Ever needed access to a computer without an Optical drive, want to install Vista from USB disk, here’s how you make a USB drive NTFS bootable and can use it to install Vista from.
INTRODUCTION
This morning when I got up I had no intention of writing a guide to making a bootable NTFS USB Drive. As things often happen on a review site you often find yourself waking up intending to get one thing done and end up going in a totally different direction. Today was one of those days. I’ve been dealing with SSD, Platter hard drives and USB Drives all week. Suddenly this morning I found myself thinking wouldn’t it be nice to be able to boot to a USB disk with the NTFS file system and run diagnostics, memory tests, and maybe install Vista or XP from a USB disk. How about being able to not only install Vista from a USB disk but once Vista is installed have all the review benchmarks and files I needed consolidated on one flash drive instead of searching for a bunch of disks scattered around my review area.
Once the idea had spawned in my caffeine deprived brain I started scooting about the internet looking for an easy to understand visual guide to creating a NTFS Boot disk that my uncaffeinated brain could comprehend. Three hours later I had bits and pieces of information none of which I was sure I could trust. None of them were done in a reasonable visual manner that you could look at the pictures and follow along and create a bootable NTFS USB disk. Many of them recommended programs that frankly just won’t work and end up with frustrated readers wasting time and giving up. So I find myself sitting on a folder of pictures detailing the process and two bootable USB disks created ready to serve my needs.
If you happen to need a bootable NTFS USB disk for a laptop that doesn’t have an optical drive, want to install Vista (or XP) from a USB drive, occasionally need a virus scanner for a non-bootable machine, or think it would be handy to have a bootable USB disk for emergency repairs this is probably the guide you want. This one works and it’s fairly easy.
DISCLAIMER
Bjorn3D has tested this method of creating a bootable USB drive extensively, we however assume no responsibility or liability if you choose to use this method and something goes wrong. Following this guide should create a bootable USB drive easily and quickly, but due to the nature of computing accidents happen, I and Bjorn3D assume no responsibility for those accidents, use this guide carefully and at your own risk.
In other words it works for us when we follow the instructions but if you pull some bone head stunt and manage to format your hard drive, you are on your own, we feel for you but no where in this guide do we say “Format your hard Drive”. Make sure you know the name of your USB drive and what drive letter is assigned to it and you should have no problem.
Two ways to format your USB Drive to NTFS
HP USB Disk Storage Format Utility
One way to format your USB drive to NTFS format (The easy way) is to download the HP USB Disk Storage Format Utility for fast and easy formatting of USB Disks. You can pick up the HP USB Disk Storage Format Utility Here
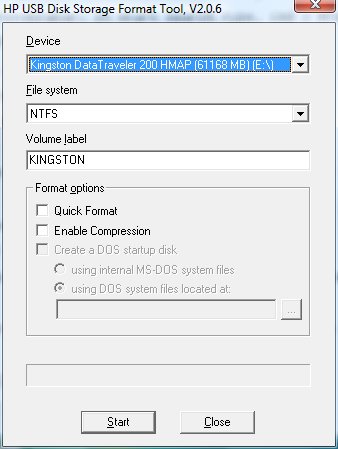
Download and install the utility and click the icon and you’ll see this screen.
If you have data on the USB disk you might want to copy it to a folder on your hard drive, you can copy it back to the USB drive if you want to later on. Please note that if you want to do a Vista install from USB your going to need an 8GB or larger USB drive.
Make sure that your USB drive is plugged in before you click the HP utilities icon and you should see the USB disks name in the top window, in this case the Kingston DataTraveler we just reviewed. You can click Quick format if you like I tried both quick and slow format and both worked. Make sure you have NTFS selected in the File System box. Then just click start and wait for the USB Drive format to complete. If you used that method and don’t want to see how to do it in Windows Explorer skip to page 2 (Two).
Formatting your USB Drive in Windows Explorer
Click your start button then all programs then accessories, then click Windows Explorer and you’ll get this screen.
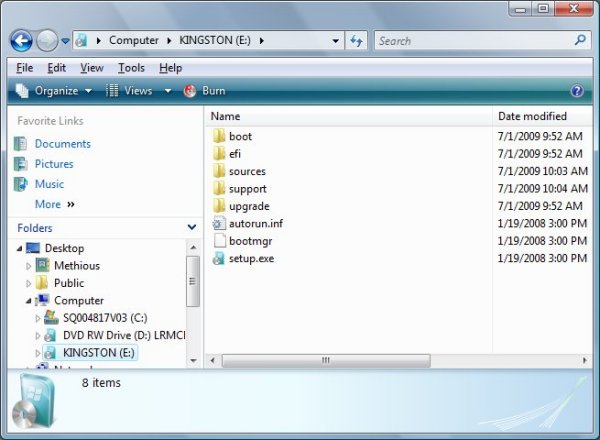
Your Screen might look a little different, this is my personal laptop Explorer screen. Notice I have the Kingston Drive named KINGSTON and it’s listed as E:
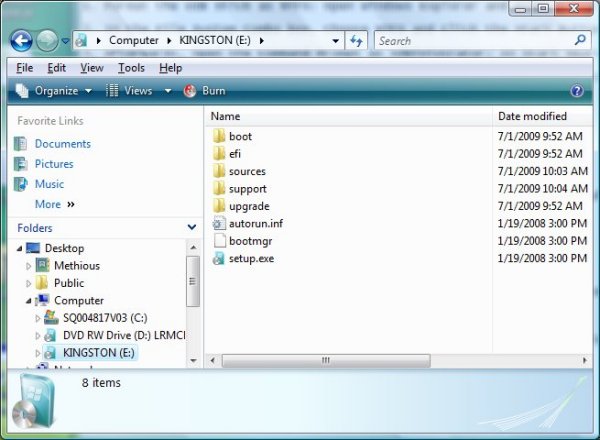
Once you have the USB Drive highlighted hover over the drive letter with your mouse pointer and right click to get the following screen.

Just click format on the pop up window and you’ll get a format dialog box.
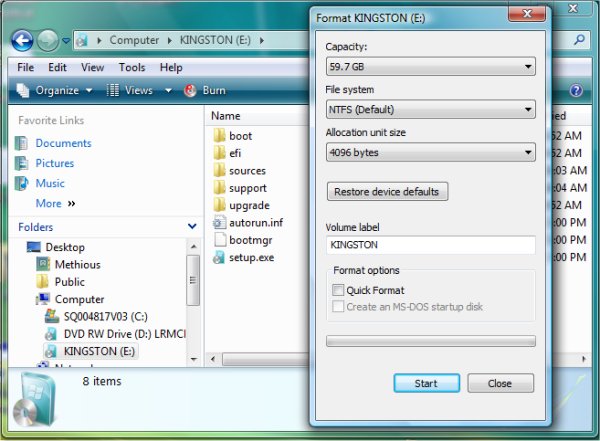
Things get a little dicey here so I want to make this perfectly clear. MAKE SURE THAT THE VOLUME NAME MATCHES WHAT YOU NAMED YOUR USB DRIVE. I don’t want to hear I accidentally formatted my hard Drive following your guide. Your hard drive should have a Windows logo next to it in Explorer and if you format that drive you didn’t follow my instructions and I and Bjorn3D assume no responsibility for that. Typically your USB Drive will be last in the list, but make sure you know the name of the USB disk, and the capacity. Make sure that the capacity and USB drive name is listed correctly and that the File system box says NTFS and click start. At the end of this process your USB Drive should be formatted to NTFS but it’s not quite ready to boot yet so move on to the next page (DISKPART.EXE).
DISKPART.EXE Making the Partition Active
Getting to the Command Prompt
Before you can boot to the USB disk we need to make the partition Active. You formatted the USB drive but in order to boot to it we need it to be active, once that’s done we can put boot files on it.
Click the start button then all programs then Accessories and you’ll get this screen.
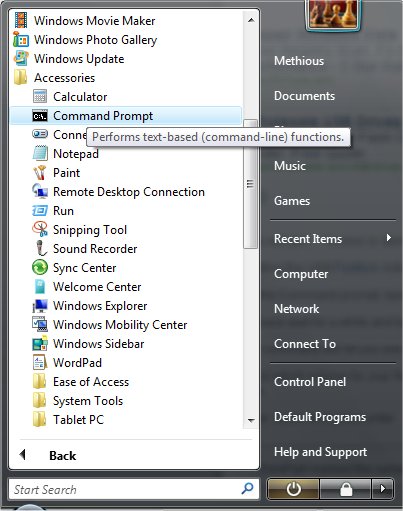
Click the Command Prompt Icon and venture into the DOS command line territory (Scary huh).
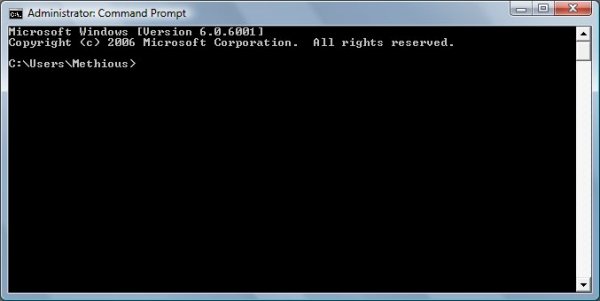
This is my Command Prompt Dialog Box, yours will have a different name unless by some quirk your machine is named “Methious” in which case I’ll have to hunt you down and beat you with a copy of the US Statutes on Copyright Infringement. Once you have the Command Prompt up we’re ready to run Diskpart.exe
Diskpart.exe
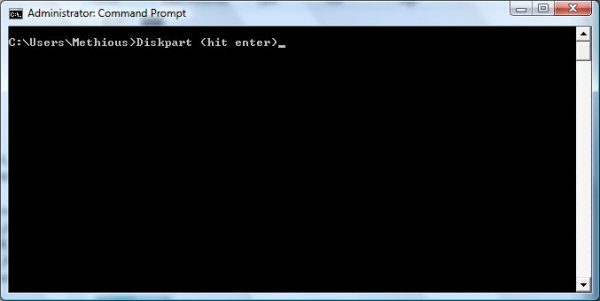
Diskpart.exe can be run from the command prompt without navigating to another folder (in DOS they’re called Directories). Just enter “Diskpart” and hit enter and you get the next screen.
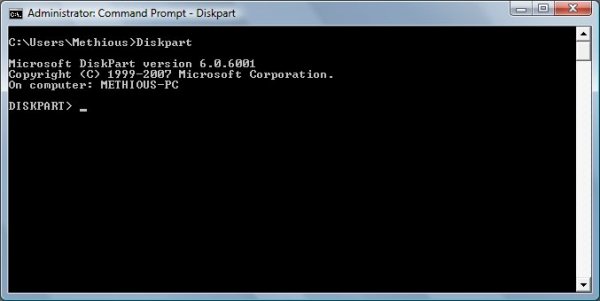
This is the screen you enter Diskpart commands in.

Just Type “List Volume” and hit enter.

This shows you the drives Diskpart sees, you should see your USB Drive listed and a volume number to the left of that. Mine is Volume 2.
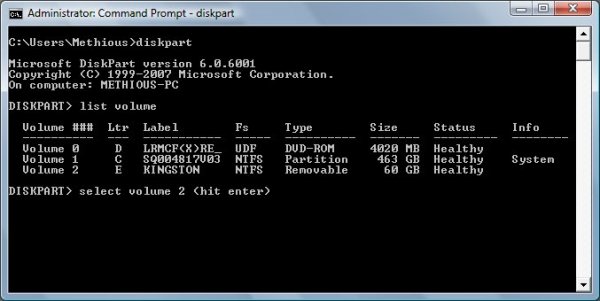
Type “Select Volume 2” (insert your volume number if it isn’t 2) and hit enter.
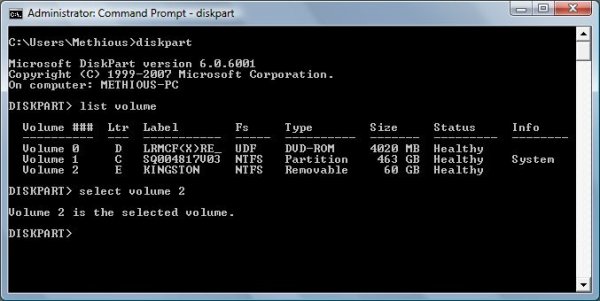
That makes your USB drive the default drive Diskpart will operate on.
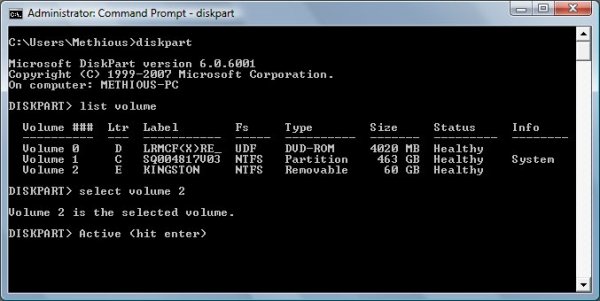
Type “Active” and hit enter and you get the confirmation screen.
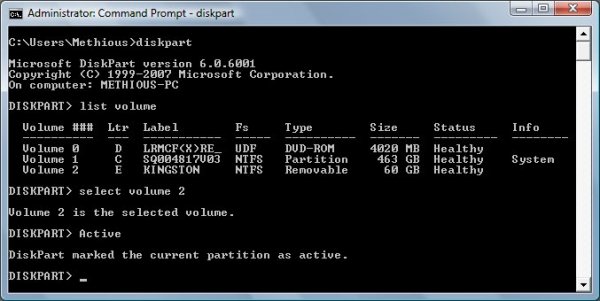
Your USB Disk should now be formatted to NTFS (Previous page) and marked as active. We’re ready to move onto Bootsect.exe so move on to the next page (Bootsect.exe Moving boot files to your USB Drive).
Bootsect.exe Moving Boot Files to the USB Drive
Now that the USB drive has been formatted NTFS and the Partition marked active we’re ready to make it bootable. To do that we need to use Bootsect.exe which is normally used to repair faulty bootsectors on NTFS disks. It’ll work for our purposes.
If your trying to create your Bootable NTFS USB drive by following along, insert the WIndows Vista Install Disk into the optical drive now.
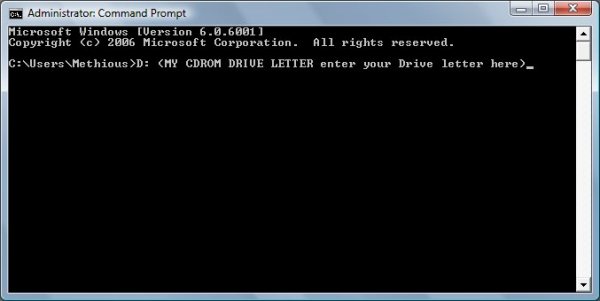
Once you have the Vista Install disk in the optical drive, type the drive letter, mine is “D” so I type “D:” then hit enter.
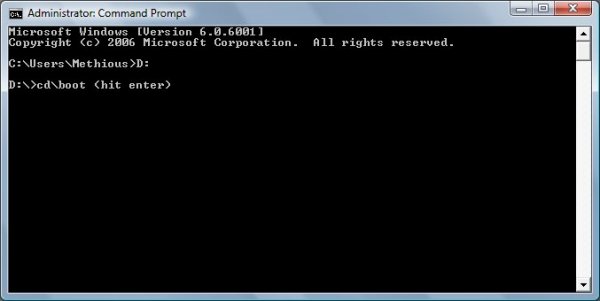
Then Type “CDBoot” and hit enter.
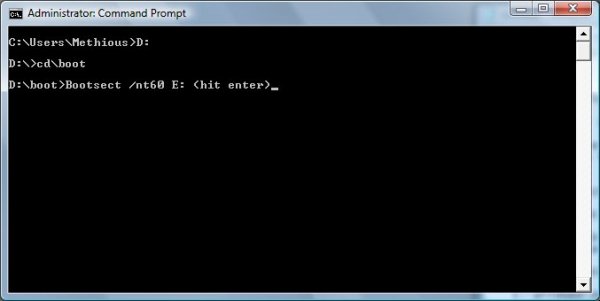
Once you get the D:boot> prompt type “Bootsect /nt60 E:” and hit enter. Please note that if your USB drive has a different letter use your letter. Also please note that after “Bootsect” there’s a space, and after “/nt60” there’s a space. Then just hit enter.
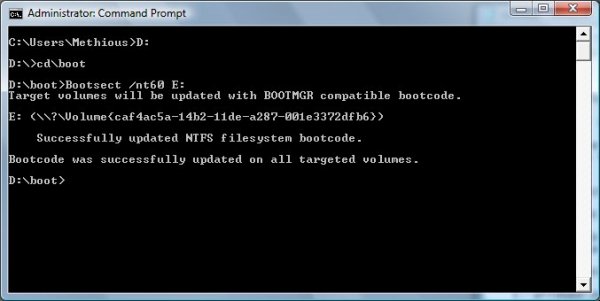
That’s all you have to do to create a Bootable NTFS Disk but what can you do with it.
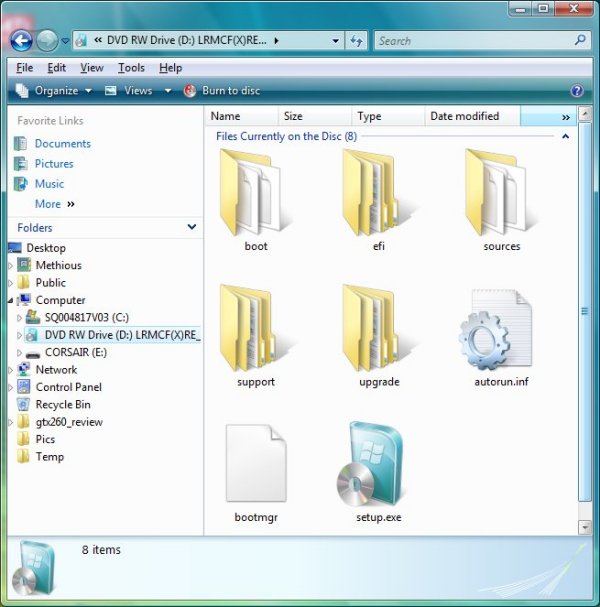
Well for one thing you can copy all the files from your Vista install disk and install Vista from USB disk which is a lot faster than from Optical drive. Then copy any files you end up installing frequently (review files) to the same disk, then when the install is done remove the USB drive and boot to the HD. Once booted to the HD you can plug the USB drive in and install anything you have copied to it.
This works for desktops, laptops with no optical drive and every other machine we’ve tried that has a boot to USB disk option in BIOS.
You can also boot to the USB disk and run repair utilities like Norton Pen, virus scanners etc. You’ll find that if you install Vista often, or do a lot of computer repair the Bootable USB disk quickly becomes indispensable.
Hope you enjoyed the guide and it helped you in your quest for a Bootable USB Drive, this was a little impromptu so if you see a correction or think we need to add something please let us know in the forum or by email and we’ll be glad to look at suggestions for improvement.


nguyen2012 your program sucks ;(
a bit late, but I just found this… there are plenty of ‘usb fomatting’ progs about, a better one is RUFUS.. BUT the main problem is they depend on getting an ISO of your boot media!! ok if you want to put a large OS installer on your USB, but….
also many of those programs need a specific format of ISO, and are not clear on where to get it!! 🙁
nguyen2012 goes on and on about his disk, but that is the mistake, it is a not a FLASH drive… :/
normal (rotating disk!) hard drives are much easier to manage…
Thanks for this now I can use Yumi to put iso images larger than 4GB on my multiboot stick.
But i get stuck when Im supposed to type “Active” (after selecting my flash drive).If i input “Active”, i get a message.The message states that “There is no partition selected.Please select a partition and select again”.
Is there any way to make the USB Flash Disk to be active?
Hi, you must use new diskpart.exe (Vista/Win7 version) to set USB Flash Disk to be active.
when I try to make the disk bootable, it says that “could not map drive partitions to the associated volume device objects: access is denied.”
Open the command prompt as an administrator (instead of left clicking on Command Prompt, right click and select ‘Run as Administrator’) and run Bootsect from there.
tttttttthhhhhhaaaaaaaannnkkkkkkk yyyyyyyyooooouuuuuuuuuuu
sssooooooooooooooooo mmmmmmmmuuuuuuuuuuccchhhhhhhhhhhhhh
Awesome thanks, lots of crap utilities and howtos out there, this one hits the spot.
You are more than welcome when we see a common problem or task we try and write a how to it makes every ones lives easier. We only wish we had more time to do How To’s.
The HP USB Formatting Utility link was broken for me. Here’s the alternative: http://download.cnet.com/HP-USB-Disk-Storage-Format-Tool/3000-2094_4-10974082.html
http://www.techspot.com/downloads/6582-hp-usb-disk-storage-format-tool.html
I know this is an old post but I’d like to thank the writer for it because the information is still valid and usable on my Windows 10 x64 computer and it’s helped me put a large usb stick to better use, thank you for your time
I liked your article. In Vietnam, no one has done ntfs-formatted USB boot at all. You can give me a guide by Vietnamese okay? My English is not good to read your post I do not understand much. Thank you so much. If you send me instructions. please email them.
I’m curious. If you do not mind can you tell me which country you are okay? thank you
Hey, there is a tool I use for making unix images, it works on window too. Its a freaking fantastic tool called Rufus – check it out. rufus.akeo.ie
unfortunately this does not work more often then not. you get the msg that bootsect was successfully updated on the usb stick, but then when you boot it says bootmgr is missing, press control alt del. so