We at Bjorn3D going to compare 4 different CPU coolers, on my Intel Core i5 750 CPU. Lets take a peek inside and see how these CPU coolers stack up to one another.
Introduction
Since the introduction of the Intel socket 1156 CPUs, we have seen some new heatsinks, and some of these heatsinks have been adapted to accommodate this new CPU socket type. We at Bjorn3D are going to compare 4 different heatsinks on my Core i5 750 CPU. Two of these heatsinks we have already seen from previous reviews, so I wont be including an installation page for these two CPU coolers. One of these CPU coolers is the massive Prolima Mega Shadow (review can be found HERE). The second CPU cooler is none other then the Cooler Master Hyper 212+ (review can be found HERE).
I will be including the installation on two new CPU coolers. One of these Is from a company that we all know about from their top-of-the-line CPU thermal paste GELID. The other is from a proven manufacturer of CPU/GPU coolers that most of us have come to depend on for great products, Arctic Cooling.
Not shown is the Hyper 212+ CPU cooler, because this image was taken after I did the Mini CPU cooler round up. Shortly after testing the Hyper 212+ CPU cooler, my niece had serious cooling issues with her computer. So the Hyper 212+ went into her computer.
Now, normally I do an everyday installation that most users will be performing when installing the CPU cooler, when the motherboard is out of the chassis. After getting a few emails, from various people, inquiring why am I so rough to CPU coolers about their mounting? My reasoning is a simple one and I hope that I can shed some light on why I grade things the way I do, when it pertains to CPU coolers. I mount a CPU cooler in an unconventional (but growing) way, when everything is still in the chassis, and performing an upgrade of the CPU cooler, rather then doing a complete fresh install (first time install). Why? Because most chassis have the ability of installing the CPU cooler without having to remove the motherboard from the chassis itself. So lets get on with the Installation and the testing and lets see how these CPU coolers stack up with one another.
- Zalman CNPS9700 NT CPU Cooler – $69.36
- ThermalTake TMG A3 CPU Cooler – $26.58
- Zalman Z-Machine GV1000 VGA Cooler – $60.69
- Vantec Tornado 92mm High Speed Case Fan – $24.42
- Reserator XT Liquid Cooling System – $499.99
- ThermalTake VJ400G1N2Z V9 Mid Tower Marvelous Gaming Case – $104.12
- Belkin Fan Unit for Wall-Mount Enclosure – $269.99
To keep things as simple as possible, I am going to group up some of the images below to shorten these next few pages.
ARCTIC COOLING ALPINE 11 PRO
Specifications
| Feature/Specification | Alpine 11 Pro |
|---|---|
| Heatsink | 105.3 L x 113.4 W x 85H mm |
| Fan | 92mm x 1 |
| Fan speed | 500 -2000 RPM (Controlled by PWM) |
| Air flow | 36.7CFM / 62.2 m3/h |
| Maximum Cooling Capacity | 95 Watts |
| Weight | 428g |
| Patent | DE 20307981, DE202005011514, US7101149, CN 200610106209 |
| Warranty | 6 year |
Packaging & Installtion
 |
 |
 |
 |

This is how Arctic Cooling is packaged and a quick overview of the Alpine 11 Pro CPU cooler. The Box that Arctic Cooling uses is nothing out of the ordinary. They use it for all their products, signature white box with plenty of information about this CPU cooler printed on it. As we can see with the overview of this little CPU cooler, it is pretty much a standard square CPU cooler. There was thermal paste pre-applied to the base of this CPU cooler, but I had to remove it in order to see how the base was. As we can see that this CPU cooler still has a semi-rough look to it. Nothing to be overly concerned with, but Arctic Cooling could have done better in my opinion. The little bag that comes with this CPU cooler has 4 push pin inserts (tan in color) with black keepers. I did not find an instruction manual.
 |
 |
 |
 |
 |
 |

A quick look at Arctic Cooling web site for instructions on how to mount this CPU cooler I got an idea on how it is supposed to be done. First we have to remove the bottom holder from the CPU cooler itself, there are two screws that hold this onto the CPU cooler these have to be removed. Next up is the placement of the holder onto our motherboard. Line up the corresponding holes to our motherboard (in this case I am putting this on my Core i5 750, then insert the four tan push pin inserts. Make sure the slots on the inserts are facing the same way i have illustrated, other wise the CPU cooler will not mount properly. if need be use a small flat blade screw drive to ensure this. I originally installed the tan push pin inserts at various angles, and when I would tighten down the CPU cooler, the cooler kept popping off the CPU.
 |
 |
 |
 |
Now locate the black push pin keepers, then with a small pair of need nose pliers (best to use these as it makes it so much easier) insert the keepers into the slots of the tan push pin inserts. I had a minor disagreement with the black push pin keeper and I accidentally snapped off the top of it (during the first time attempting to install this CPU cooler). If you happen to do this it will still work just you have to remove it differently, just come from the backside of the motherboard, and then use a small flat blade screw driver and gently push out the black push pin keeper (make sure you go in between the tan push pin inserts).

Oops, forgot to clean the CPU IHS off before installing the Alpine 11 Pro. Ok, all clean now.
 |
 |
 |
 |
Time for test fitting, as always I use a 5 dot pattern on the CPU IHS, then place the CPU cooler on the CPU then hold for 30 secs then remove. Initial results not bad, the base of the CPU cooler is nice and flat.
 |
 |

Time for the final installation, once I tightened the Alpine 11 Pro to the mounting plate, I checked to make sure that it did not warp the motherboard. as we can see I could not detect much warping at all.
This installation was a bit on the difficult side, if not done properly you will end up pulling your hair out. Thankfully I keep my hair short, otherwise I would have had less hair. After, using the Alpine 11 Pro CPU cooler, I had no real major issues during testing of this CPU cooler, it was not until I had to remove a video card to test out a friends video card until the push pins failed to hold the CPU cooler in place. I personally do not like push pins, I would rather put in nuts and bolts to ensure that the CPU cooler stays in place no matter what I do with the motherboard it will stay in place at all times. I was just glad I finished the testing prior to this popping off of the CPU cooler.
GELID Tranquillo
Specifications
| Feature/Specification | Tranquillo |
|---|---|
| Air Flow (CFM) | 58 max |
| Bearing | Hydro Dynamic Bearing |
| Cable Length (mm) | 500 |
| Current (A) | 0.18 |
| DC Voltage (V) | 12 |
| Fan Dimensions (mm) | 120 (l) x 120 (w) x 25 (h) |
| Fan Speed (RPM) | 750 – 1500 |
| Heat Sink Dimensions (mm) | 74 (l) x 125 (w) x 153 (h) |
| INCLUDED | GC-2 Thermal Compound & Installation Kit for AMD & Intel sockets |
| Life time MTTF at 40C (h) | 50 000 |
| Noise Level (dBA) | 12 – 25.5 |
| Static Pressure (mmAq) | 1.6 |
| Warranty | 5 |
| Weight (g)(years) | 645 |
Before I continue with this portion of the review, I will be doing an somewhat unorthodox mounting style with this CPU cooler. Instead of taking the motherboard completely out and installing this CPU cooler that way I will be leaving the motherboard still in the chassis, and leave all other major computer components hooked up.
Packaging and Installation
 |
 |
 |
 |
The packaging that GELID Solutions uses, is not much different from what we are used to seeing with other CPU coolers. We get a picture of the CPU cooler, with general features and specifications on the box itself. The CPU cooler was packaged inside of a blister style packaging to keep it from getting damaged during shipping. All of the mounting hardware came inside a flat white box (not shown), what you will get with the Tranquillo CPU cooler. Intel’s three types of mounting socket back plates socket 775,1156,and finally the 1366 CPU socket backplate. We also get upper mounting hardware that will work on all 775-1366 Intel socket CPUs as well as AMD CPU type of sockets. Not to forget there are two fan wire clips that will be needed to hold the fan onto the CPU cooler. The upper mounting brackets shown by themselves (one with two holes in it) is for the 1156 and the 1366 CPU socket types Intel) I will be using this upper mount, on my Core i5 750 CPU.
 |
 |
 |
 |
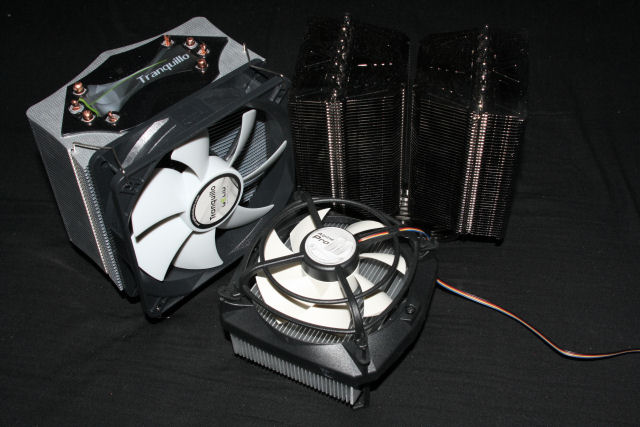
Time for a quick overview before installation. GELID Solutions did a good job on making sure that each of the aluminum fins are evenly spaced, we can also see that GELID uses a total of four 6mm heatpipes to wick heat away from the full copper base of the CPU cooler. The base of the CPU cooler does have a semi polished look to it, I can see it reflecting the lens cap of camera off from it, but I can not make out the CANON lettering from the lens cap in the reflection.
 |
 |

Before we get right into the CPU cooler installation on to the motherboard, we need to install the supporting hardware first. The upper CPU socket mounting hardware mounts directly to the CPU cooler. I do prefer this type of design as it is just plain and simple. But the bolts or hold down screws do not get hard mounted to the CPU sockets upper mounting plate. This is going to be an interesting, install. Better go ask for help just in case I will need it.

Motherboard and CPU all prepped and ready for installation. This is to ensure to you readers that this is indeed inside of a chassis.

The five dot thermal paste pattern I have been using for years.
 |
 |

Test fitting, just making sure everything is going to properly meet up and to check thermal paste dispersion. Besides of me being a tad off center the Tranquillo does disperse the thermal paste nice and evenly across the CPU IHS.
 |
 |
 |
 |
 |
 |
Now time for the fun part. I had to ask my roommate for some assistance in installing the CPU cooler onto my motherboard. I did not have enough hands to hold the CPU cooler, the retention plate, and put each one of the screws in, then grab a screwdriver to tighten each screw up, too taking pictures all at the same time. Even then with 2 pairs of hands (four hands in total) it still proved to be somewhat a challenge. I have a simple saying, if it takes more then one person to install a simple CPU cooler, (whether that chassis is up right or laying down or having the motherboard out side of the chassis) then there is definitely a problem with companies not properly designing their hardware. During the installation portion, either the CPU cooler would slide out of place or the retention plate would move out of position, adding to the frustration to a simple CPU cooler installation. I perform this test on most of the CPU coolers I test or review, so far only one company has proved to be the best at this part of unconventional installation, that company is Cooler Master, and this was only done on a few of their own CPU coolers (that I have personally used) the Gemini II, the Hyper 6+, and finally the V8, then Cooler Master opted to use a way over complicated gaggled up mounting system on the Hyper 212+.

What the back of the motherboard looked like after installation of the Tranquillo CPU cooler. From what I could tell the motherboard did not get bowed or warped with the use of the Tranquillo CPU cooler. I forgot to mention during the installation portion of this review, that one time when the retention plate popped out of position, it fell in behind the motherboard and the motherboard back plate. It did not fall very far because I was able to remove it with out disassembling the entire computer.

Final installation of the Tranquillo CPU cooler. With out fan, Oops better put that on before I fire up “Minor Me”, things may get a bit toasty in there without them.
Testing Methodology
| Minor Me | |
| CPU | Lapped Intel Core i5 750 |
| Motherboard | GIGABYTE P55-UD6 |
| Case | SIlverStone Raven RV-02 |
| Memory | GSkill RipJaw |
| Video Card’s | 2 x EVGA 275GTX |
| Hard Drives | Patriot SSD 128 Gig, Western Digital 160 Gig Backup drive. |
| CDRom Drive | Lite On Blue Ray |
| Power Supply | Seasonic 850W |
| CPU Speeds Used | Maximum acheived per CPU cooler |
| Operating System Used | Microsoft Windows Vista 64 |
| Video Card Cooler |
Stock cooled |
| CPU Cooler |
Mega Shadow, HYPER 212+, Tranquillo, Alpine 11 Pro |
To test all of the CPU coolers listed above, I ran LinX a total of three times (break in time) on default CPU speeds, and overclocked settings. I allowed the computer to idle 1 hour in between each run of LinX to ensure the CPU was at its Idle state. After the initial trial runs of LinX i performed 2 record LinX run and used Real Temp 3.40 to monitor the temperatures of CPU cooler tested. then allowed the computer to idle for 1 hour for my record idle temperatures. I will set a maximum temperature limit of 60°C on each CPU cooler tested. I will also be using Arctic Cooling MX3 thermal paste through out testing on all CPU coolers. Ambient temperature of the room tested was 21°C, I had to move “Minor Me” upstairs because the ambient temperature of the “Dungeon” was 14.5°C, I felt the “Dungeon” was a tad too cold, not to mention impracticable to properly perform the CPU cooler round up. The fans used on the Prolima Mega Shadow and the Hyper 212+ CPU coolers were Rosewill 80 CFM 120mm fans, the Alpine 11 Pro and the Tranquillo CPU coolers used there default CPU coolers, all fans were set to their absolute maximum speed possible. So your results will vary greatly from my own.
Results
Time to see how these CPU coolers performance does on a Core i5 750 CPU.
Default Speed CPU speed of 2.66 GHz
| Core i5 750 2.66GHz |
Idle | Load |
| CoolerMaster Hyper 212+ |
27°C | 39°C |
| Prolima Mega Shadow |
24°C | 38°C |
| Arctic Cooling Alpine 11 Pro |
25°C | 59°C |
| GELID Solutions Tranquillo |
24°C | 43°C |
As we can see the only CPU cooler that struggled on keeping the CPU cool while at default CPU speed of 2.66 GHz was the Arctic Cooling Alpine 11 Pro. The other three CPU coolers tested had no issues controlling the temperatures of the Core i5 750 CPU. The Tranquillo did have a slightly higher temperature then the Mega Shadow and the Hyper 212+ coolers, but this is because the fan used on the Tranquillo only uses a single 58 CFM 120mm fan while the other two CPU coolers are using a pair of 80 CFM 120mm fans. So in my opinion not to bad for a stock clocked CPU.
Overclocked CPU (CPU cooler specific)
I should mention during the overclocked portion of testing I turned off any power saving portion pertaining to the CPU to get me a better temperature reading across all CPU coolers. And to make it fair as well.
| Core i5 750 @ Maximum CPU core speed achieved |
Idle | Load |
| Cooler Master Hyper 212+ 3.6GHz |
31°C | 59°C |
| Prolima Mega Shadow 3.8GHz |
26°C | 57°C |
| Arctic Cooling Alpine 11 Pro 2.8 GHz (Turbo mode On) |
28°C | 65°C |
| GELID Solutions Tranquillo 3.6 GHz | 27°C | 62°C |
Now when I overclock the Core i5 750 CPU, is when we start see the minor differences. The Prolima Mega Shadow, of coarse came in first place having the highest overclocked CPU, fallowed by the Hyper 212+. I was not expecting much difference from these two. The Arctic Cooling Alpine 11 Pro personally failed the default CPU speed testing on having a 59°C temperature, but I had to test this CPU cooler with at least turbo mode on, the Gigabyte P55-UD6 motherboard set the BCLK to 136 and the CPU multiplier to 21. But I have to admit for such a small CPU cooler the Alpine 11 Pro does manage to handle its own, I have no idea on how a stock cooler performs on the Core i5 750 CPU, because I never received one when I got this CPU. Considering the Tranquillo is using a single 58CFM 120mm fan, It does manage to maintain a somewhat decent temperature of 62°C, I am not going to worry much about a couple of degrees myself.
Conclusions
Prolima Mega Shadow
the Prolima Mega Shadow, A lot of things come into play when doing a CPU cooler review. The price (currently still at 80 USD) of the Mega Shadow and its over use of mounting parts (19 total) still to me, makes a big difference, especially when the retention plates nuts kept coming out when I was assembling the CPU cooler inside of my chassis, things change drastically when you doing an unorthodox assembly.Since it seems that a lot of different manufacturers are fallowing suite with multiple mounting components, and considering this CPU cooler does out perform all of the CPU coolers tested here, I will change the rating.
Since the Awards have changed a bit since the last review I will give the Prolima Mega Shadow a: 8 out of Ten and the Bjorn3D.com Silver award

Cooler Master Hyper 212+
When it comes to the Hyper 212+ CPU cooler, I will not be changing its scoring, mainly the one area that really hurts this CPU is the (again) the mounting. Trying to hold onto a retention plate insert the retention plates nuts while at the same time try to screw on the motherboard/retention plate stand off screws, all at the same time (Like the Prolima Mega Shadow). Made things quite interesting. And I have not even started the CPU cooler installation yet. But the low price of on or around $30 USD does help offset the overly complicated mounting system that Cooler Master used.
Since the Awards have changed a bit since the last review I will give the Cooler Master Hyper 212+ a: 7 out of Ten and the Bjorn3D.com Bronze award

Arctic Cooling Alpine 11 Pro
This little CPU cooler is a bit different. Its low price of on or around the 13 USD mark , makes it affordable for just about any one needing a CPU cooler. But the high temperature of 59°C while using a default CPU core speed of 2.66GHz is to high for me to swallow. The mounting system that Arctic Cooling used on this CPU cooler was a tad bit overcomplicated, if not done right you could be pulling your hair out because the base of the CPU cooler would not stay in place. By using nuts and bolts in stead of the gaggled push pin design will help alleviate any issue regarding this CPU cooler from popping off the motherboard. I cannot recommend this CPU cooler for the use on the Current Quad Cores on Intel CPU’s, lets face it an extra 15 USD you could get a better CPU cooler. But I can say this, this CPU cooler is perfect for those with HTPC’s, that are using dual core CPU’s (socket 775, or the newer 1156 Core i3) and need that small form factor size, and that is “Dead Silent” . This CPU cooler would fit this perfectly.
I give the Alpine 11 Pro an 6.0 out of Ten and no award
GELID Solutions Tranquillo
I don’t even no where to start with this CPU cooler. during the mounting portion, with this CPU was an absolute impossibility when attempting to mount this CPU, while the motherboard was inside of the chassis, when trying to install this CPU cooler by myself. I did an install when the motherboard was out of the chassis, installation went very smoothly, and easy. I would prefer a better mounting design. Looking around the web, I see this CPU cooler goes for on or around 40 USD, Is a fair price considering this CPU cooler does perform very well, and is virtually silent.
So I give the GELID Solutions Tranquillo a: 7.5 out of Ten, and the Bjorn3D.com Bronze award.
- Zalman CNPS9700 NT CPU Cooler – $169.36
- ThermalTake TMG A3 CPU Cooler – $26.58
- Zalman Z-Machine GV1000 VGA Cooler – $60.69
- Vantec Tornado 92mm High Speed Case Fan – $24.42
- Reserator XT Liquid Cooling System – $539.99
- ThermalTake VJ400G1N2Z V9 Mid Tower Marvelous Gaming Case – $104.12
- Belkin Fan Unit for Wall-Mount Enclosure – $291.59


