MSIs TV@nywhere (model MS-8876) PCI TV-tuner packs a lot more than just video input and some TV-tuning software. Two features that stand out, right off the bat, are that the TV@nywhere can (1) record and convert between MPEG1, MPEG2, and MPEG4, and (2) actually serve its TV connection over the internet such that you can watch your TV channels from work or wherever.
Introduction
TV on your PC isn’t a new concept. TV-out has been around a long time. I have an old S3 Virge GX2 with TV-out in a box somewhere buried in my basement. TV-tuners have been around a few years also. Most of the old TV-tuners were simplistic things, having little more than the coaxial cable input. Times have changed though. MSI’s TV@nywhere (model MS-8876) PCI TV-tuner packs a lot more than just video input and some TV-tuning software. Two features that stand out, right off the bat, are that the TV@nywhere can (1) record and convert between MPEG1, MPEG2, and MPEG4, and (2) actually serve its TV connection over the internet such that you can watch your TV channels from work or wherever.
Features
Hardware Features
Software Features
-Client user can real-time change TV channel and any software setting on the Server side
-TimeShifting
-Scheduled, real-time and programmable recording
-Supports conversion to all formats: MPEG1, MPEG2 and MPEG4 (coming soon, please download patch)
-Instant channel preview
System Requirements
The TV@nywhere’s system requirements are minimal. As little as a P2/Celeron and Win98 will run this hardware. Any video card supporting at least 640×480 resolution will also work.
Packaging
The packaging includes almost everything you need to get the TV@nywhere up and running.
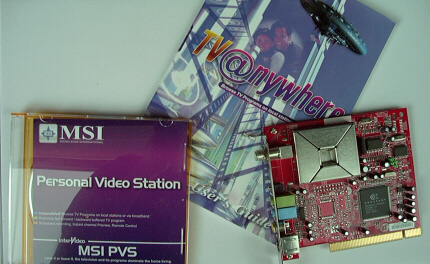
Besides the PCI TV@nywhere card, you get a handy paperback installation and user’s guide and a driver/software CD.
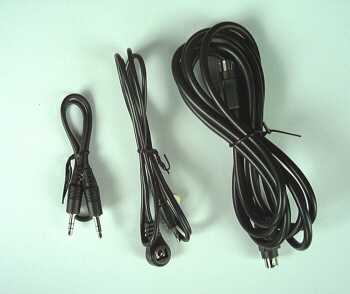
Cables include a 6-foot S-Video cable, a 6 miniDIN umbilical cord for attaching the audio output from the TV@nywhere to the input on your sound card, and the IR remote control receiver cord. This last cord could be about 2 feet longer than it is, unfortunately.
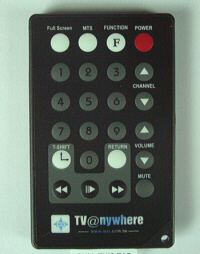
The remote control is of the credit card style remotes. But it contains all of the needed controls for surfing through the software TV controller. It came with a paper tab, shielding the battery from making contact with the remote controls innards. This is a small but thankful thing, ensuring battery life.
Next, let’s look at the installation of this TV card and software set-up….
Installation
On the previous page, you’ll notice that I said that the TV@nywere includes almost everything you need to get it setup. I said almost because you’ll likely need to buy some additional cabling to get your TV cable line strung to your computer. I needed a cable splitter/booster box and 25 feet of RG6 coaxial cable to get coaxial to the TV@nywhere. Alternatively, you can use the separate S-video or RCA and miniDIN audio input jacks to get your line feed. However, I don’t really see the benefits in using this latter setup for connection to your cable TV service. Using S-Video means you’re connecting the TV@nywhere to your cable box/tuner, and the signal that it will receive will be limited to what that tuner has selected (i.e., you won’t be able to change channels on your PC using the TV@nywhere). Conversely, The S-Video/RCA and miniDIN audio input combination is ideally suited to connecting to a DVD player or VCR.
MSI does provide a paperback manual that covers installation and use. Unfortunately, it is fairly generic, covering both VGA-TV cards and the TV@nywhere installation. You need to dig through the front half of the book to find the recommended cabling and installation for the TV@nywhere. But it’s there and well described. I simply shut my computer down and inserted the TV@nywhere into an empty PCI slot.
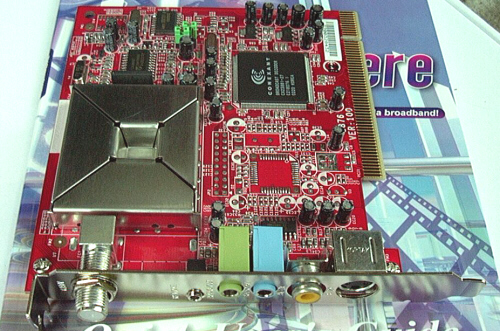
To hook the TV@nywhere up to my digital cable service, I plugged the RG-6 coaxial cable into the coaxial input on the card. I strung the remote control cable down behind my desk to its port on the back of the card (the small, offset port at far left in the above picture). I ran the audio patch cord from the audio output to the input on my Hercules sound card. Powering on the computer after all of the cables were installed yielded the standard Found new hardware bubbles in Windows XP. Inserting the driver CD and letting it auto-run permitted me to install the drivers and MSIs TV software. Windows XP promptly found everything it needed to get the TV@nywhere up and running.
The software setup and use is also well described in the manual. The later half of the book provides detailed guidance in using the MSI PVS software (Personal Video Station, actually its Intervideos WinDVR Version 2.0).
Testing
I tested MSIs TV@nywhere on my Intel rig:
Before I talk about using the software, we must talk about the software setup. When you first run MSIs PVS software app, youll get a pop-up screen asking for some settings for your TV service and other hardware (below).

This setup screen is actually one of seven screens in the Properties selection of the MSI PVS software. As you can see in the above picture, it defaults to the Conexant chipset, which MSI uses to run the TV operations. The source defaults to TV. You can also choose between NTSC and PAL codes. The Audio device choice defaults to your sound card as well as Line In. The only thing you really need to check here is your Source.
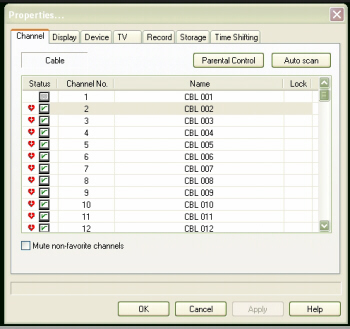
After accepting the Device tab settings, you should then review the other tabs before using the TV@nywhere. In fact, you have to. The first tab (Channels, shown above) of the properties box is where the TV@nywhere identifies what channels are available to you. There is a button at top right for autoscanning the TV input for available channels. With digital cable, this took some time for the TV@nywhere to go through every channel and identify which ones had a signal. But it worked well enough. After the channels are found, you can actually edit the titles for the channels to reflect the actual channel name since the software cant identify this on its own.
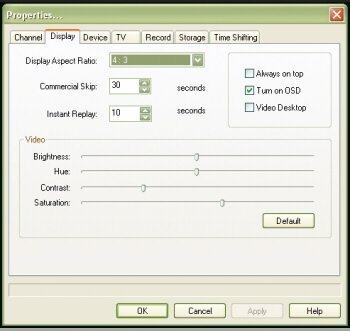
The second tab is the Display settings tab. This tab permits you to change the display aspect ratio from standard 4:3 to 16:9, etc. There are also miscellaneous settings here for brightness and picture quality settings as well as some control settings for timings of commercial skipping and the software instant replay feature.
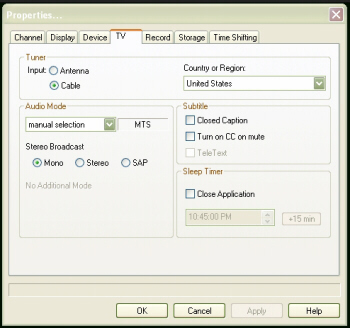
The TV tab has a few important settings that need to be edited. These include the input type (cable or Antenna). If youre running cable TV and leave it at Antenna, it wont find most of your channels correctly in the autoscan. Here you can also select stereo versus the default mono audio. The country/region can also be selected, but it didnt seem to impact my experience. Other interesting features here include closed captioning support and a sleep timer.
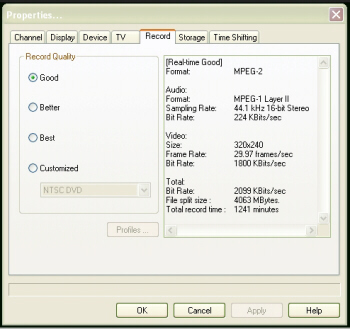
The Record tab is a simple interface for establishing what level of quality you wish to record the TV signal in. You can even setup custom profiles if the default schemes arent good enough for you. As examples, the Good setting is the standard TV signal level while the Best bumps it to 640×480.
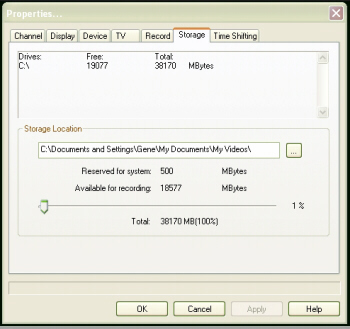
The Storage tab simply lets you specify where you want to store your video captures. In Windows XP, it defaulted to the My Videos directory, under the active profile. A custom place can certainly be chosen instead. Under this tab, there is also a slider for limiting how much hard drive space can be used for video capturing a nice touch.
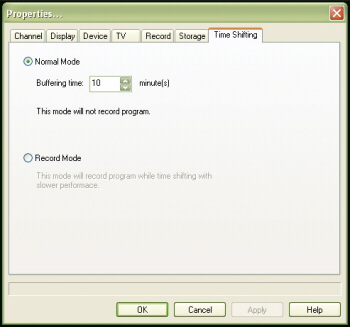
The last tab is entitled Time Shifting. The setting on this tab governs the buffering for how the software records.
Next, I’ll look at performance and my conclusions…
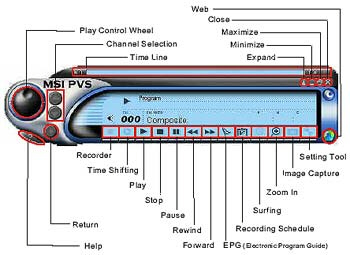
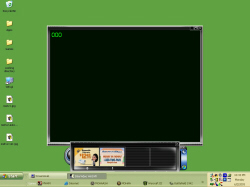
Using the PSI PVS software is very simple and straightforward. The control center (below) looks similar to the DVD palyer software that we commonly use. As you can see on the graphic, the controls are laid out nicely for ease of use.
After having gone through all of the setup items which I discussed on the previous page, I surfed some channels. I found the PVS software to work smoothly, without any hiccups. Investigating some of the features, I first played with simple channel surfing. The up and down channel buttons worked quickly, without any pausing like what is seen with satellite TV.
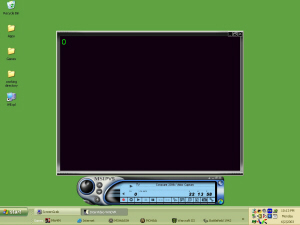
The stock 4:3 layout of the control center fit nicely on my 1024×768 desktop. The video is presented here at 640×480. Note that my screencap application couldnt capture the live, DirectX, video stream.
Next, I quickly played with the screen capture feature in the PVS software. Clicking the small screencap button near the bottom right instantly caps the active TV screen. It then pops up a little slideshow bar that shows a thumbnail of your picture(s). You can then click on the thumbnail to get a pop-up window with the full size image.
Recording with the PVS software is straightforward as well. Hit the familiar button by the red dot, and it will enter you into record mode. You then activate and deactivate recording like a camcorder. A few short videos later and I had a decent reproduction of a few 30 second clips form a few channels in MPEG-2 format.
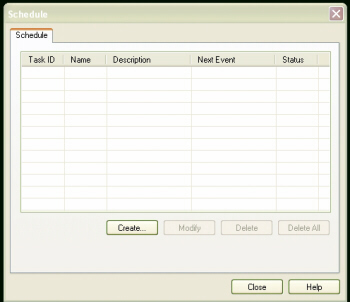
As far as recording, you can set-up the PVS software to record scheduled programs via the schedule button (schedule window pictured above). Multiple scheduled items are permissible, but not concurrently.
Heretofore, I havent spoken about the TV@nywheres most surprising feature .serving TV over the internet. Unfortunately, I could not get extra coaxial cabling run to my computer to test this feature (not yet), since I need the coaxial cable to run both the TV signal and my cable modem (I have been swapping my single cable back and forth from the TV@nywhere to the cable modem). A trip to Radio Shack will cure this problem. But, anyway, this TV card permits you to setup an internet server for the TV signal.
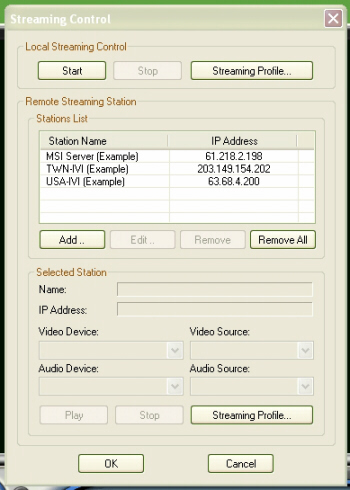
Under the Streaming Control settings, you an establish an internet gateway for serving the TV service. I plan to investigate this further once I have requisite cables.
Conclusions
After playing with the TV@anywhere for a few weeks, Im satisfied with the performance and ease of use of the PVS software. The only real negative comments that I have include CPU utilization and NVIDIAs nView display features. The TV@anywhere software consistently used 40-42% of my CPU. This isnt too bad but its considerably higher than the 8% that Scott is seeing on his TV card. At 42%, I did notice some slow down in opening new applications and other Windows duties. As far as NVIDIAs nView display features, dont try and turn on multiple monitors while the PVS software is running. When trying to enable my second VGA monitor, the PVS software would freeze. To make matters worse, I couldnt end the WinDVR process in Task Manager to get it to stop or to even shut the computer down. A hard reboot was required to solve the problem. So, get your displays situated before or after using the TV software.
Regardless of these issues unrelated to the true performance of the card, MSI’s TV@nywhere should be considered by those interested in watching and recording television programming on their PC. The TV@nywhere’s competition includes NVIDIA’s Personal Cinema line of video cards and also ATI’s All-in-Wonder line-up. The benefit of the TV@nywhere vs. the Personal Cinema and the All-in-Wonders is its cost and life span. The Personal Cinema is quite often bundled with lower end NVIDIA 3D graphics cards (GeForce MXs), while the All-in-Wonders can be had with ATI’s high end graphics engines but end up costing an arm and a leg. The TV@anywhere fits the nitch where it works independently of your primary display adapter, permitting you to upgrade your 3D video performance as you see fit, while maintaining the TV ability. Beyond the above obvious benefits of MSI’s PCI TV solution and besides my few complaints, the TV@nywhere performed very well, or as advertised.
I’m awarding MSI’s TV@nywhere an 8 out of 10 and the Bjorn3d Seal of Approval!