Known for exceptional memory performance, Corsair looks to enhance the performance of your CPU through water cooling. Do they stand a chance or are they all wet?
INTRODUCTION
Ever notice how some things were just meant to go together. Peanut butter & jelly, milk & cookies, bees & honey, and water and electronics. What!?! Yes that’s right my disbelieving readers, I said water and electronics and no I haven’t gone off the deep end. Anyone over the age of eighteen should remember the days when CPU’s were cooled down with nothing more then a chunk of metal (discrete video card had not caught on yet). When evolution took it’s course engineers placed fans atop these blocks of cooling apparatus and all was good in the world. As time went on new ways were invented to ‘beat the heat’ and we saw the heat-pipe make its way into our computers. It was about this time that a few people who were likened to mad scientist’s thought about using water to cool down their PC’s. It had long been known water had much better heat transfer properties than air. That is, water can transfer more heat per volume than air. But no one dared to place the arch nemesis of electronics in such close proximity as to actually impact heat levels. As more and more ‘experts’ started using water as a means to keep their PC’s chilly Corsair quickly recognized the need for a simplified way to bring these advantages to the masses of people without engineering degree’s. This was the birth of the Corsair Nautilus 500.
Corsair Nautilus 500
Corsair
![]()
In case you have been living under a rock for the last decade I will catch you up to speed. Corsair has become a premier manufacturer of memory and power supplies. The performance of their memory kits is legendary and their power supplies are fast becoming world renowned. So why the watercooling kit? Well, take a look at this excerpt from their website:
Corsair has been a leader in the design and manufacture of high-speed modules since 1994. Our focus has always been on supporting the special demands of mission-critical servers and high-end workstations, as well as the performance demands of extreme gamers. While maintaining this core focus, in recent years, we’ve also brought our expertise, technology leadership and legendary quality and reliability to memory and other technology products for the more mainstream consumer.
There in the second sentence is the reason for the Nautilus 500. “…as well as the performance demands of extreme gamers.” Good enough for me. Let’s get to it.
PACKAGING
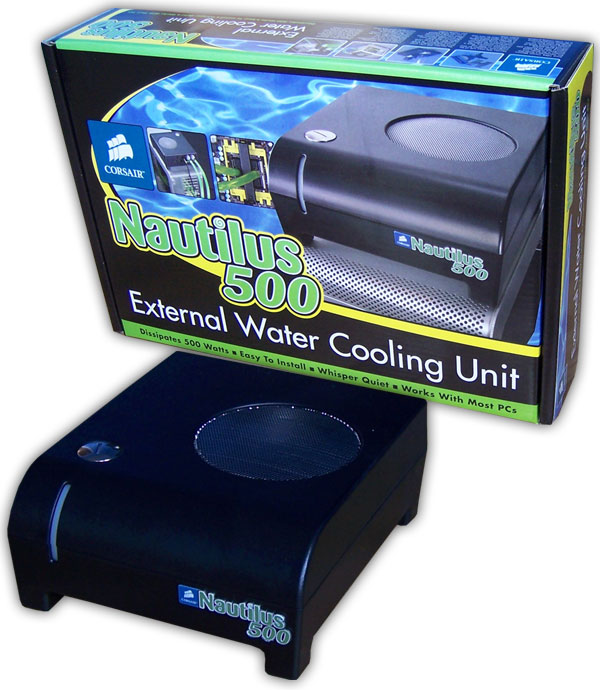
Looking at the packaging of the Nautilus 500 shows the box to be undamaged which is a good sign of things to come as we delve deeper into its contents.
The front of the box is colorful and eye catching with an abundance of information regarding the features of the unit.
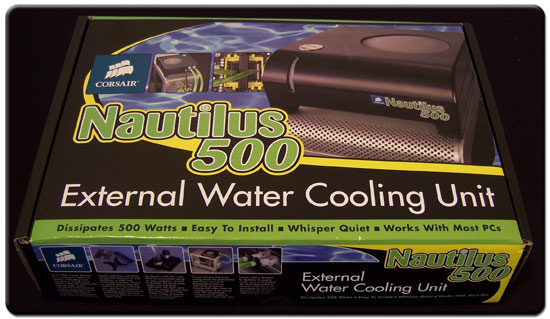
Corsair Nautilus 500 – Front
Turning to the side of the box Corsair tells us about the different components of the Nautilus 500 and what they provide.
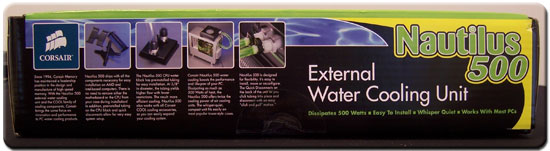
Corsair Nautilus 500 – Side
Flipping the box over we see even more information and propaganda regarding this kit. Corsair makes a bold move by including results from their testing with this kit on Intel and AMD platforms. We will soon find out if this is a meaningful inclusion of information or a hollow attempt at marketing.
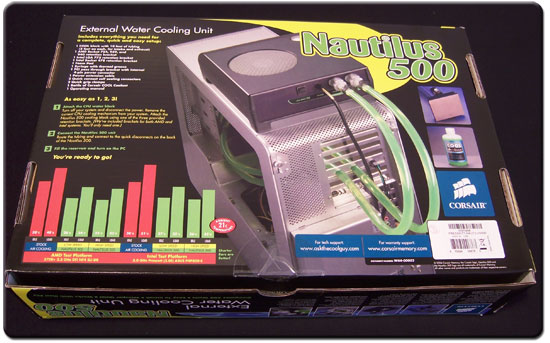
Corsair Nautilus 500 – Rear
CONTENTS
Our first sight after opening up the box is two manuals. One is the installation instruction which are very clear and thorough with full color photos. The other is PR material pertaining mostly to the units features and performance.
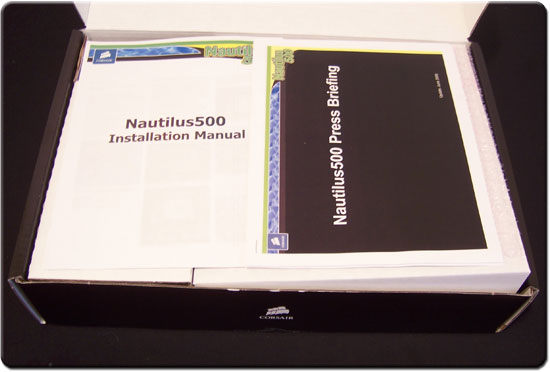
Corsair Nautilus 500 – First look
Going a bit deeper we see that Corsair has included all the accessories you will need to install your new kit (minus the water of course). There are clamps and plates for every major socket available today from 939 up to AM2 and from 478 up through 775. Very thoughtful.
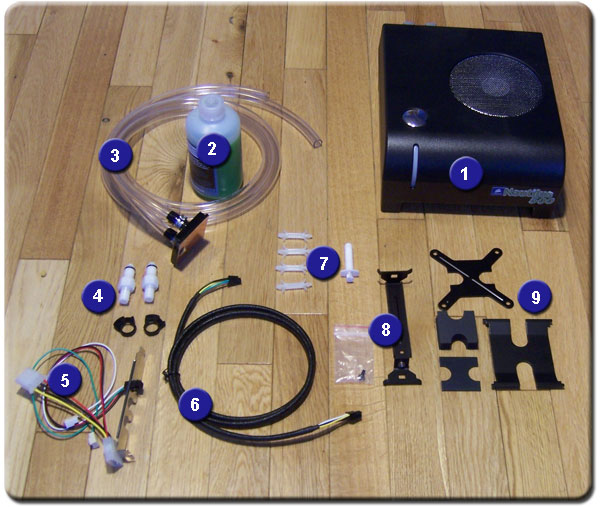
Corsair Nautilus Accessories
- Corsair Nautilus 500
- Water additive
- Tubing & water block
- Tube nozzles & clamps
- PCI pass through bracket
- Power cable
- Motherboard standoffs & thermal paste
- AMD bracket
- CPU hold down plates
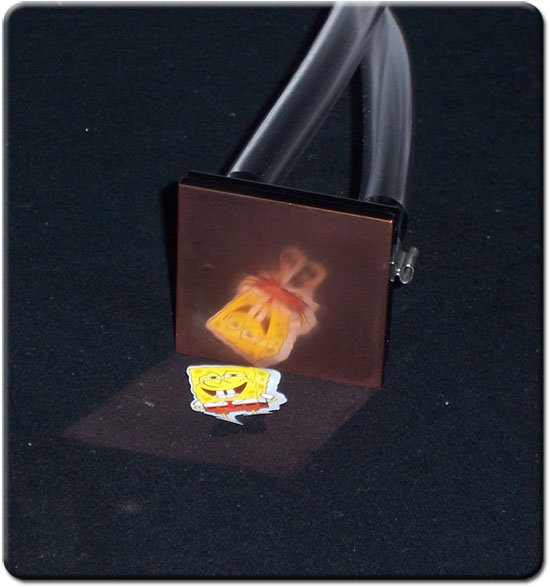
Lastly I wanted to show you the CPU block. It has been machined smooth and polished to a shine. There are very few marks that can be seen and overall the finish of the block is excellent. This will help with heat transfer.
EXTERNAL
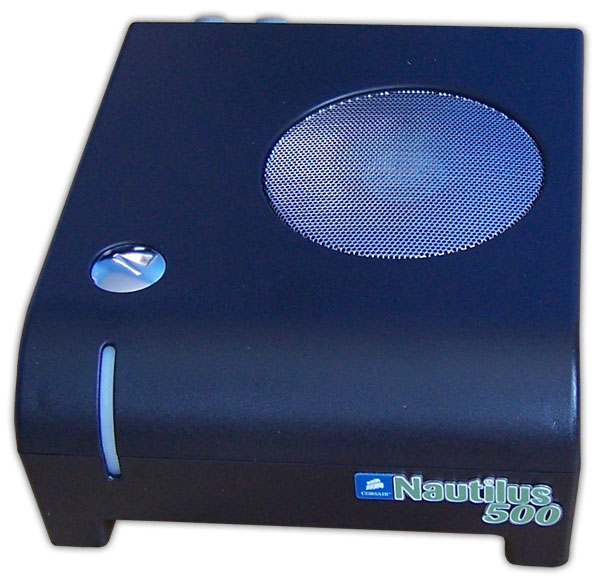
Looking at this unit itself you can see how everything on it is designed for functionality. Very little thought was given to the aesthetics of the unit and in my opinion this is a good thing. A good performing unit beats a pretty piece of garbage any day of the week.
Looking at the top of the unit we can see the reservoir cap for filling the unit as well as the level of fluid in the system. Also a rather restrictive looking fan grill where the air is exhausted out of the unit. These holes are very small and while they safeguard against curious fingers I would prefer to see a honeycomb design implemented for better air flow. I smell a mod coming.
Looking underneath the unit we see an open path to the radiator where air is pulled inwards to cool the passing water. We also see the four foam padded feet for increased dampening of any vibrations. Underneath these feet are the screws that hold this unit together. More on that in the next section.
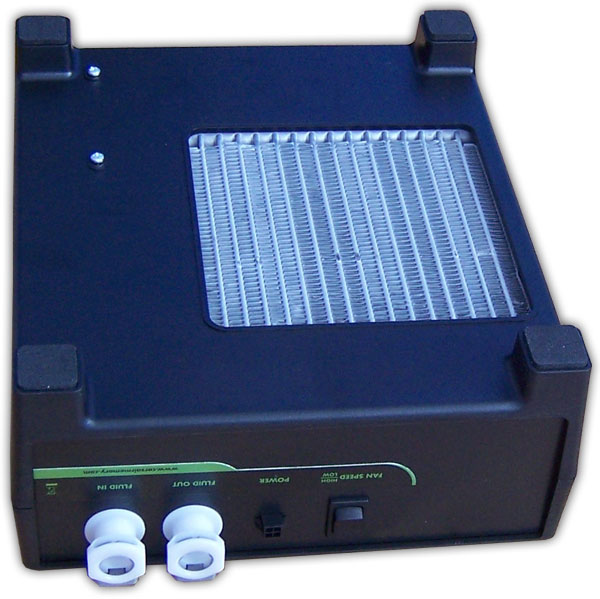
Turning to the rear we see the good stuff. There is a switch for adjusting fan speed (High/Low) as well as the inlet and outlet connectors for the tubing and finally the power connection. The connectors for the tubes are quick disconnects which is essential should you ever find the need to rapidly unplug the water tubes from the system without spilling water everywhere. Perhaps in case of invasion from extra-terrestrials?
INTERNALS
Opening up the unit was a pretty straight forward affair. Flipping the unit upside down allowed me to peel back the foam rubber pads on each foot designed for noise reduction. Once removed all that was left was to unscrew each screw and carefully separate the two halves of the unit.
And this is where all the magic happens. Its design is so simple its genius. Space is at a premium here and the engineers at Corsair were able to do a first rate job at cramming in all the hardware necessary for dissipating 500 watts of heat.
.jpg)
- Reservoir Cap – Remove to fill the unit with distilled water and the special additive.
- Reservoir – Used to store the water.
- Inlet Tube – Water enters the system here straight into the reservoir.
- Water Pump – Responsible for pushing water through the system.
- Outlet Tube – Water exits here from the radiator to the waterblock.
- Radiator – Used to cool down the water by blowing air across the thin fins.
- Control Board – Provides power to the pump and fan.
- 120mm Fan – Provides fresh, cool air to keep the temperature down.
.jpg)
Here I illustrate the flow of water through the system. Starting at the inlet, warm water goes into the reservoir where it then gets pulled into the pump and shot out into the radiator where it cools off through the use of the fan and finally is passed through the outlet tube and into the waterblock cooling off your CPU. Brilliantly simple.
INSTALLATION
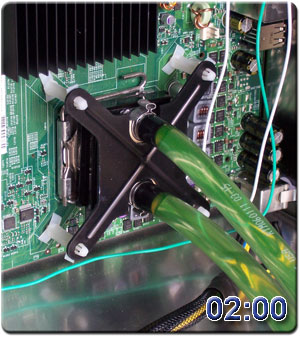
Installing the water block is a very easy task and one that thankfully does not require the removal of the motherboard. I will be installing the unit onto a LGA775 socket but the included instructions detail installation on a wide variety of platforms including socket 478/754/939/940/AM2. About the only thing this won’t fit are those Athlon XP’s and the Slot1 Pentium’s from yore.
Corsair makes a bold claim that installing this kit takes less than ten minutes. I say we put that to the test shall we. Having never used a water cooling kit I would be representative of the typical user Corsair is targeting with this kit so this should be a good comparison.
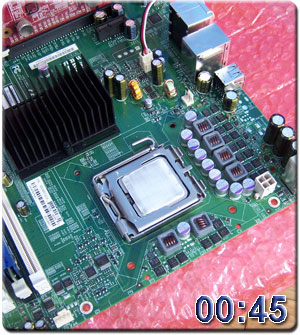
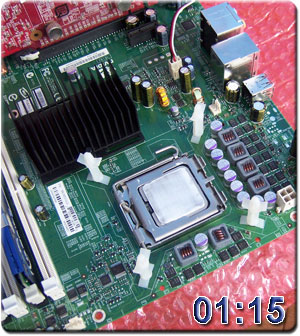
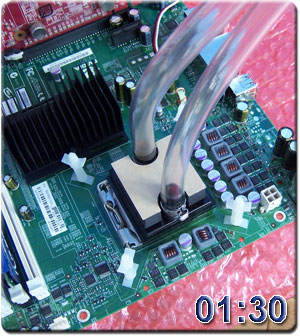
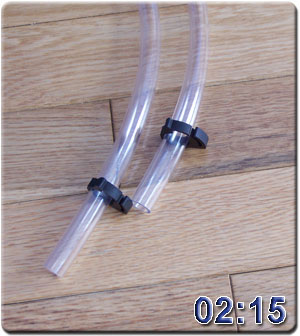
Now I may have cheated by having the motherboard outside the case but searching the rule book made no mention of this so the judges will allow it. With the CPU block in place I would quickly move to setup the tubes other end to connect to the Nautilus.


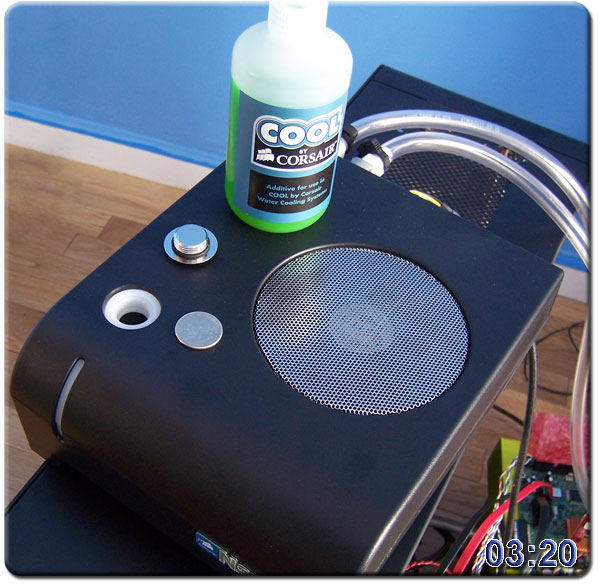
With the tubes connected the last step was to fill the reservoir with the distilled water and Corsair’s additive aptly named ‘COOL’. After pouring in the additive I topped off the reservoir with water and started the unit up by itself. As the water level dropped from it passing through the tubes I would top it off with more water until its level stabilized and then it was just a matter of bleeding the air bubbles from the system.
Once filling the unit with water and bleeding it of air was finished it was a bit over ten minutes. A very painless process indeed all the while checking and rechecking as I went. I would have never thought it could be this easy.
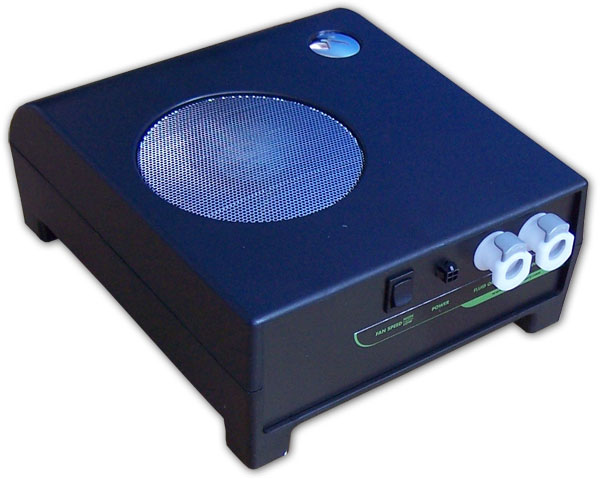
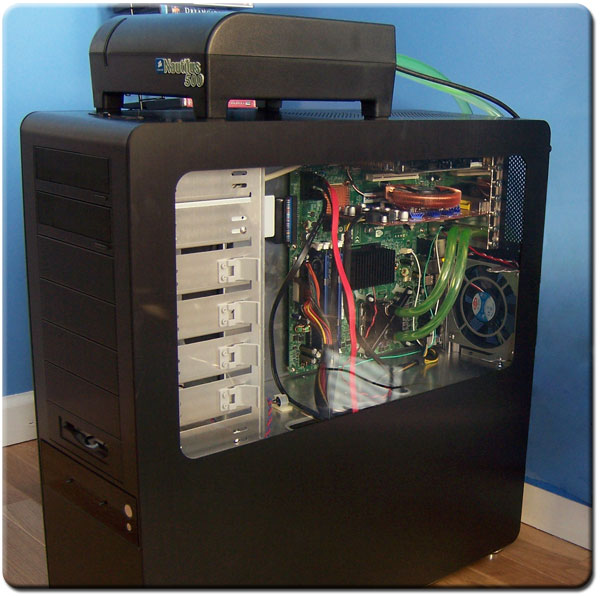
Here is a shot of the unit in its finished state sitting atop my PC. Besides matching rather nicely to the case the unit makes the inside of the case look cleaner without a oversized heatsink and fan. It is important to note that once the unit had been installed and filled, leak testing occured. As good as the build quality is on this unit you should always take the steps, as I did, to run the unit for an hour or more to ensure tight connections all around.
To run the unit without turning on the PC simply remove the 24-pin ATX connector from the motherboard and with a paper clip connect the green lead to any black lead (ground). This turns on your PSU and in turn will power the Nautilus 500 for testing.
Looking good is only half the battle. Now it’s time to see if it can live up to the hype.
TEST SETUP
| Test Platform | |
| Processor | Intel Core 2 Duo E6420 |
| Motherboard | XFX 650i Ultra |
| Memory | 2 GB (2 x 1 GB) of G.Skill DDR2-800 |
| Drive(s) | 1 – Seagate 7200.9 Barracuda SATA 1 – Samsung HD501LJ SATA |
| Graphics | MSI 7900 GT |
| Sound | Creative Soundblaster Audigy2 ZS |
| Cooling | Cooler 1 – Stock Intel cooler Cooler 2 – Thermaltake Big Typhoon Cooler 3 – Corsair Nautilus 500 |
| Power Supply | OCZ GameXStream 850 watts |
| Display | Westinghouse 37″ LVM-37W3 |
| Case | Tagan A+ Black Pearl (For installation) Open air (For Testing) |
| OS | Windows XP Pro SP2 |
Test Methods
Comparative testing will occur outside a computer case in an open-air environment. The reason for this is to remove any air flow limitations a case may introduce. We will compare the Nautilus 500 against the stock Intel cooler and the very formidable Thermaltake Big Typhoon paired with a SilenX 120x38mm fan pushing 72CFM. As noted in the previous section I will attempt to uncover any limitations in the setup of the Nautilus by testing it with the top grill installed and then again with it removed.
Testing will be done under closely monitored conditions and ambient temperature will be constantly checked for accuracy. Ambient temperature remained a toasty 26C and was measured with a Radio Shack digital outdoor thermometer and cross-referenced with an IR Thermometer for accuracy.
Idle – After booting into windows the computer is left untouched for a period of twenty minutes. After this time a reading is measured
Load – Two instances of prime95 will be run (one per core) for a period of no less than 30 minutes. If any errors are found then the speed is determined to be unstable and no temperature will be recorded. If no errors are found then the temperature is recorded.
RESULTS
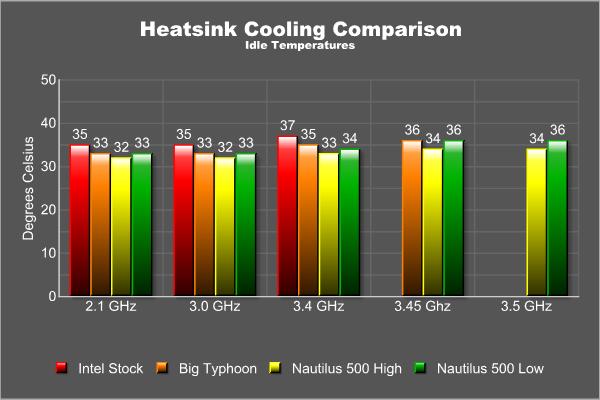
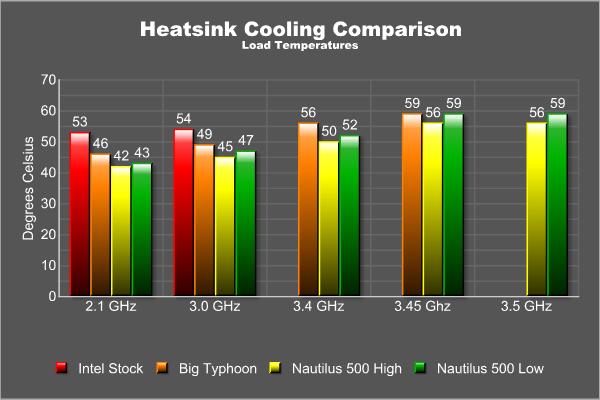
A picture really is worth a thousand words isn’t it. Well, here’s a few more for good measure. The Big Typhoon has been a strong performer for a long time now and it was only made better by mating it with the SilenX fan. The numbers posted were strong but the Nautilus had no problem man-handling it to my surprise. I really thought the Typhoon would give it a run for its money but in the end it was no contest.
During testing I attempted to test if I could increase the efficiency of the unit by trying different configurations that were easy to do and didn’t cost any money. I placed the unit on top of my case with a fan blowing upwards from underneath it directly onto the radiator. The increased airflow had no increase in cooling and actually resulted in higher temps. The turbulence created was most likely the culprit here. Then I tried to remove the fan grill on top of the unit as it looked way to restrictive for good air flow. Well to my surprise the temps did not budge one degree. It seems Corsair really knew what they were doing when the designed this unit. I wonder what would happen if we strung two of these units together in series??? I’ll save that for another day (Hint Hint).
Noise
Noise testing is somewhat relative in that what sounds loud to me may be perfectly acceptable to you. As such I will share with you my relative experiences with this unit. I have my computer set up in a quiet room of the house where the only noise would be from the outside world coming through the window. My impressions were good as this unit does not sound any louder then a couple of fans running in a PC. I had four fans running before so this unit was a bit quieter then before but those only using one or two fans may notice the noise levels more. With the computer running and doing nothing but running Folding@Home it was easier to notice the noise which is a low hum coming from the pump. Switching the unit from low to high resulted in such a slight increase in fan noise I had to hold my ear to the unit to notice the change.
While not the quietest water cooling kit in existence it is certainly not the loudest. For the level of performance it offers along with the reduced amount of fans required the little noise coming from the Nautilus 500 is easily ignored.
CONCLUSION
I have to say I am really impressed with this product. I have been toying with the idea of trying water cooling for some time now and even went as far as to learn how different pumps work with different radiators, etc. Corsair takes out all the guess work and gives you a rock solid item that offers very good performance. I was also shocked how easily it beat out the Big Typhoon. I knew it would do well but it really flexed its muscles when the heat got turned up. The sound from the unit was also easy on the ears. If you run multiple fans at full speed then this unit will give you a much quieter experience. Though if you typically run 1 or 2 low flow fans you may notice a small increase in sound, mostly from the pump. It is rare that I find a product as well thought out as this. There is always something, not matter how small, that I can find to improve the product in some manner. In this case nothing I did helped the Nautilus cool any better and that was a pleasant surprise. I would strongly suggest anyone thinking about getting into water cooling to give this unit a hard look. It is a great way to try out water cooling without the fear of destroying your system.
FINAL WORDS
To give you a clear picture of how I rated this product I chose four distinct areas of interest and scored them out of a possible 10.
Installation: 9.0 – Installing the unit was easy and straight forward even for a novice like me. I am concerned about the PCI bracket pinching the tubes especially if your case has sharp edges.
Performance: 8.5 – This unit does what it sets out to do. It cools your CPU better then a good heatsink and fan combo. There are better performing components out there but none this easy to handle. Noise levels were apparent though not overly intrusive which lowered the score a bit here.
Price: 9.0 – I was able to find this kit for $150 online easily and at that price I find it to be a great bargain.
Value: 10 – For the level of performance this kit offers at the price it retails for this is a good purchase.
Pros:
+ Fast and easy setup
+ Excellent cooling
+ Expandable to GPU (Not included)
+ Quiet
Cons:
– PCI bracket pinches tubes slightly
Final score: 9 out of 10 and the Bjorn3D Seal of Approval.


