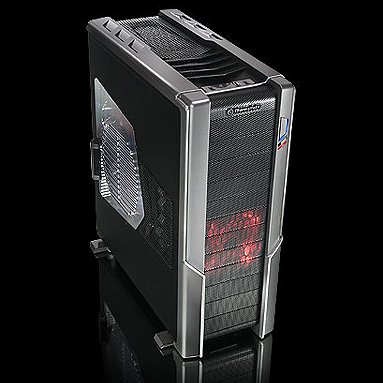
The Thermaltake Spedo Chassis is an exercise in functional elegance. It features Thermal Zones, an Adjustable fan mount, and removable HD bays. It comes in 3 flavors.
INTRODUCTION
Once in a while a product comes along and you look at it and wonder where it’s been all your life. The features you always wondered why they didn’t incorporate before are all there in one spot. It doesn’t happen very often that products are so feature laden that you’re taken aback.
Even less often do you see a limited release review product that fits that description. Today, we are privileged to bring you one of three Thermaltake Spedo Chassis released for review in the United States. Needless to say, we are excited to give it a test drive.
In checking out the Thermaltake Spedo, we were shocked at all the features Thermaltake incorporated in its design. It offers something for everyone needing a spacious chassis to grow their system into.
About Thermaltake
We live in a world where most things seem to move at the speed of light. At Thermaltake, we feel the same way and that is exactly how Thermaltake conducts itself to deliver innovative, reliable and customer-centric solutions to the worldwide market.
Since the beginning of Thermaltake in 1999, it has been at the forefront of creating new and exciting products at a time where most computer users were provided little to no choices for components that may seem irrelevant, but in reality crucial to the performance of a PC.
Thermaltake Server Series solutions, with years of thermal experience and industry leadership, sets its goal on reforming total thermal management in server segment by formulating the perfect mixture of versatility, efficiency and thermal management with each respective server product category: Rackmount Chassis, Server Fixed & Redundant Power Supply and Server CPU Cooling Management Solutions.
With its comprehensive line of products available, it enables Thermaltake’s core customers to enjoy a one-stop-shop experience, reduce product design-in evaluation period and most important of all, flawless integration process. Each of Thermaltake’s strengths enables its customer to focus on their core business while taking advantage of the skills and efficiency of a single thermal management solution partner.
Values & Principles
– While still a relatively young company, established in 1999, Thermaltake is built on unwavering will and dedication to address issues and innovate at the same time for computer enthusiasts and corporate users worldwide .
– With strong support of Research & Development team standing behind the brand, Thermaltake is committed to never-follow but always-lead.
– In past decades, the industrial and technological advancements in different fields have shaped the world we live in today and have also made a big impact on the environment. Thermaltake takes great measures to ensure the product that we produce relieve these impacts by being first to act on 80 PLUS® specification for computer power supply that greatly reduces the amount of electricity that a computer consumes.
– Always striving to be the best, we continuously benchmark our performance against the very best internally and externally.
– Customers are our greatest asset and Thermaltake does not take that for granted. That is why Thermaltake is the industry leading in customer service and customer support with around-the-clock automated product return service.
SPECIFICATION & FEATURES
Specifications
The Thermaltake Spedo comes in 3 flavors, which would inevitably lead to a highly convoluted hard to read table, so we decided to go it a little different with the Spedo.
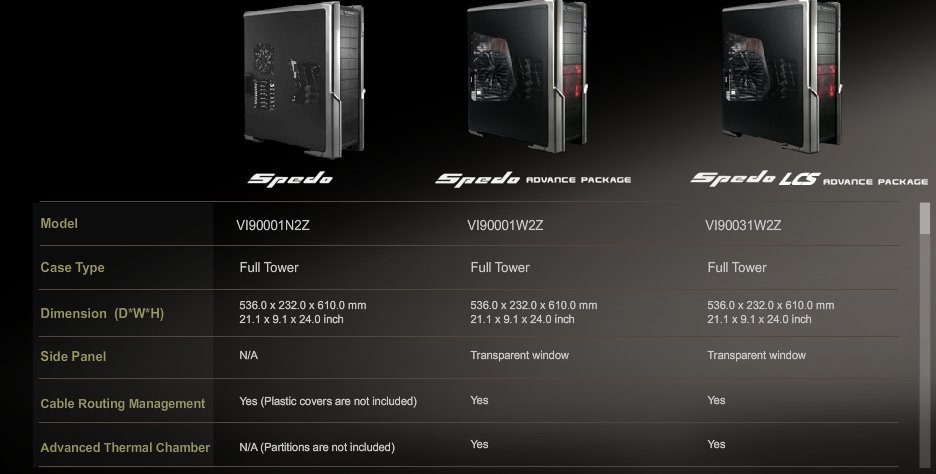
The Spedo model is non-windowed, the Spedo Advance Package is what we have for review and it has a side window, and the Spedo LCS Advance Package is windowed and it includes a water cooling system.
Features
Again, with the features of the Spedo it’s not enough to just list them in a table. It often happens with items of great beauty and functionality that words fall short of properly describing it (this is one of those cases, pun intended). If we throw up a table or a list you’ll skim over it and miss a lot of the beauty and functionality of the chassis. If you’d prefer to see the list instead let us know in the forum thread.

Out of the box with no modifications the Thermaltake Spedo is dual Radiator ready; no modifications, no drilling, just bolt it in and run. For those wanting to go with water cooling that’s a really nice feature.
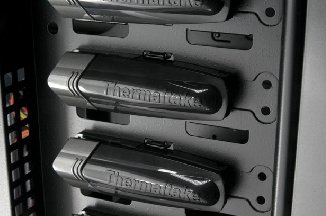
You can install 5 1/4 inch drives easily by gently lifting on the drive release handle and sliding it in the bay. This particular design is superior to most we’ve seen and holds the drive quite securely. Then it just looks really wicked; most are some kind of knob you turn and lack flair and style. Thermaltake managed to merge functionality with flair and style in this tool free design.

The removable Hard Drive bay system in the Spedo is really elegant. Lift the handle and the whole drive tray comes out for easy access, one drive tray at a time.
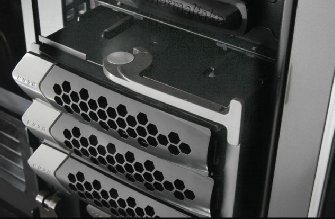
Lift the big handle you see on top and the whole bay comes out for easy access. Relocating the bay is a little more involved.
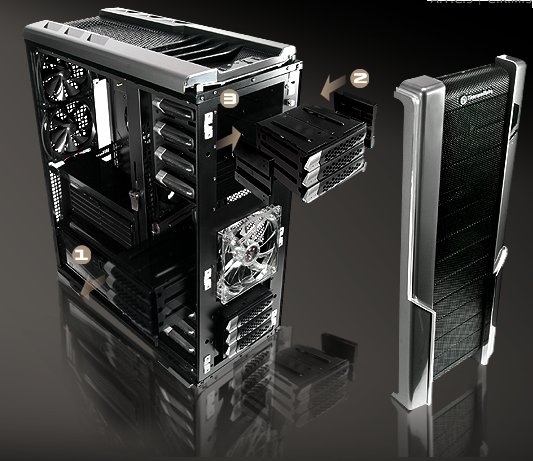
To relocate the HD Bay you have to remove the front of the chassis, then slide the bay out and move it to the desired location.
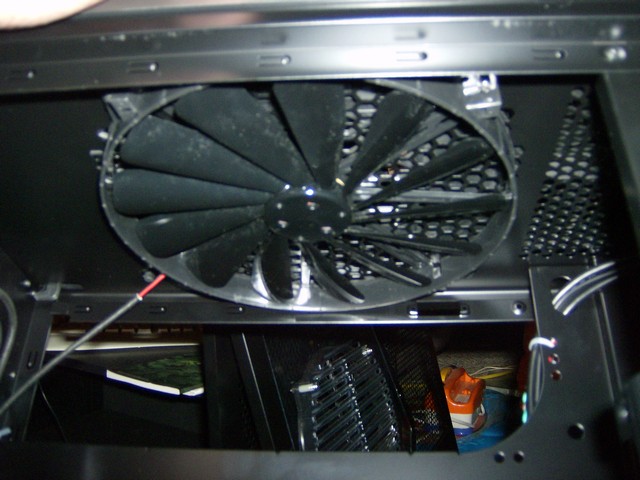
The side fan is 230mm and provides excellent cooling across the motherboard and those ever hotter GPU’s the major manufacturers are cranking out. That’s not the most unusual part of the door and fan design though.
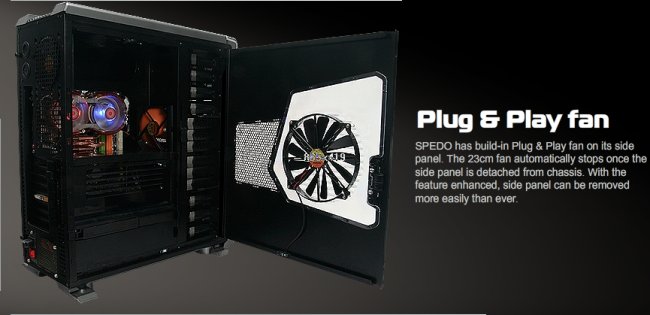
You know how you always have that fan cord to hide coming off of the side panel? On the Thermaltake Spedo you don’t have that hassle anymore. On the front corner of the chassis you have contact points for the fan’s electrical connector. You can leave the system running and open the door and there is no trailing cord and the fan shuts down automatically. That’s not evolutionary, that’s revolutionary! Kudos, Thermaltake!
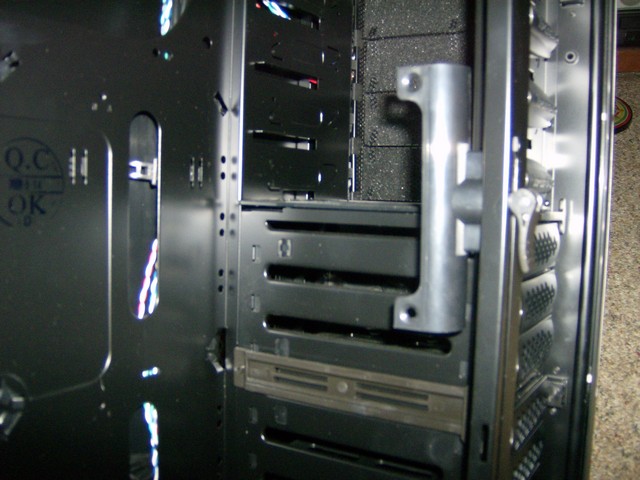
The Spedo has tool free expansion ports and on some chassis we’ve seen that this makes for problems with larger GPU’s. We didn’t have any problem installing a dual slot ATI 4870 video card in the Spedo and the expansion port clips held it firmly in place. It’s removable for those that prefer old school methods.
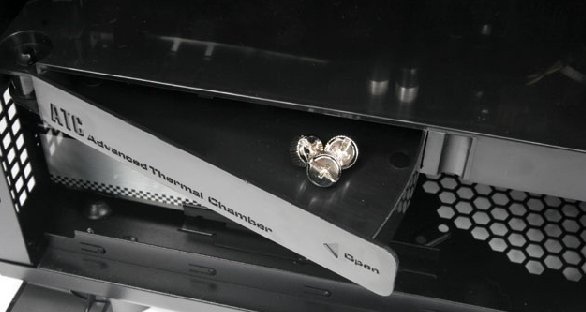
One of the features in the Spedo we’ll be looking at later is thermal chambers. One of the thermal chamber components has a parts drawer for those pesky left over screws and assorted parts we always seem to have left over. If you’re storing anything else in there away from prying eyes we’d rather not know.
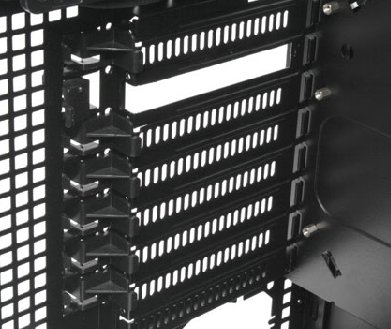
Part of the elegant design of the Spedo is Cable Routing Management 3. Thermaltake implemented more cable management features into the Spedo than we’ve ever seen on any one chassis.
The hard drive cables can be routed behind the motherboard to the side mounted Hard Drive Bays and the cabling is almost entirely out of sight. They also included a feature you don’t see often on the motherboard tray side, room for a 120mm fan to fit in between the chassis side and the motherboard tray to keep the motherboard temps down. Part of the CRM3 (Cable Routing Management 3) are the plastic covers you see pictured. Run the wiring through the motherboard tray and behind the plastic trays and the door will close easily and keep those unsightly wires neatly tucked away.
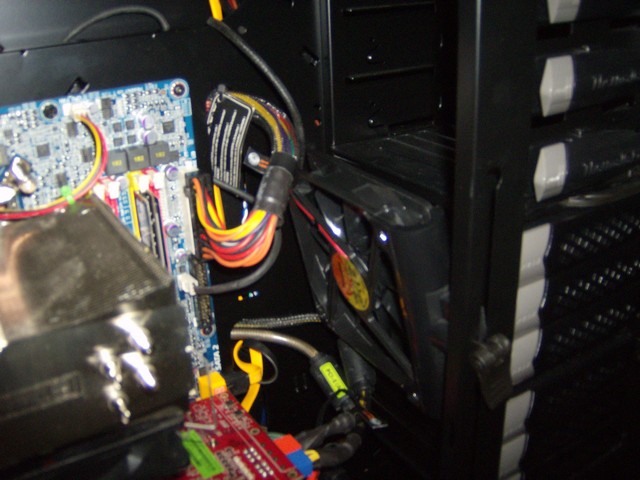
Inside the Spedo you can see the 120mm rear tray mounted fan but there’s a host of things going on in here. The bottom mounted PSU in a chassis often poses wiring problems. On the Spedo they left the bottom edge of the motherboard tray open so wires can be routed under the tray and through the slots you see on the tray itself, leaving your wiring out of sight and a professional clean looking layout inside the chassis.
From the side angle of the chassis you get a glimpse of the two included 120mm fans which operate whisper quiet. That’s also the space provided for a dual radiator if you go that route.
On the interior top on the Spedo you’ll find a 200mm fan. Between the side mounted 230mm and the top 200mm we’re looking at 430mm of cooling power. Add to that the two rear mounted 120mm fans and we’re looking at 670mm of fans pushing air. Then, there’s the fan they threw into the bundle box (we’ll look at it later) and the drive cage fan so we’re seeing 910mm of combined fan space.
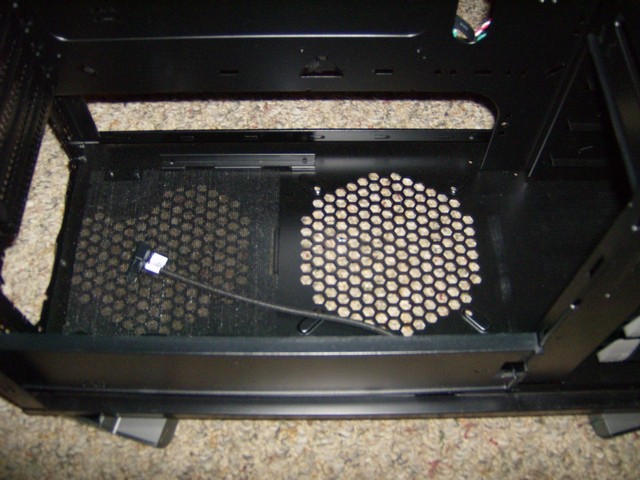
Wait a minute there, do our eyes deceive us? There is room for one more 120mm fan on the bottom (the one closest to the PSU is for the PSU fan). So we’re seeing 1030mm for fan acreage. Wait another minute, what’s that inside the chassis?
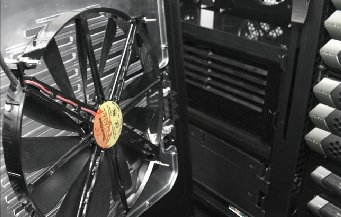
Behind the drive bays there’s one last fan slot. It’s an adjustable fan bracket that slides up and down to anywhere you want to position it, and the fan can be tilted to direct the air at any component you desire. That’s a feature we’ve been waiting to see for far too long. The last fan brings us to a massive total of 1150mm of fan space. That would make the Spedo “King of the Hill” for air flow and cable routing management enthusiasts.
Lets move on to the Packaging, Pictures, and Bundle section before we spend the rest of the day marveling at the Spedo’s plethora of mouth watering features.
PACKAGING, PICTURES & BUNDLE
Packaging
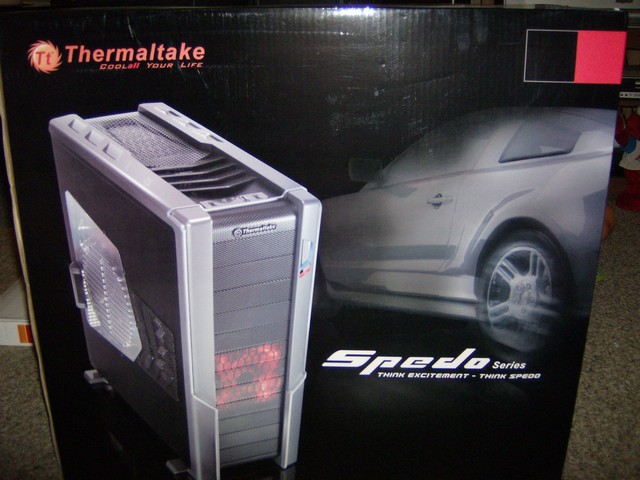
The Spedo comes in a huge attractive black box with double wall cardboard construction.
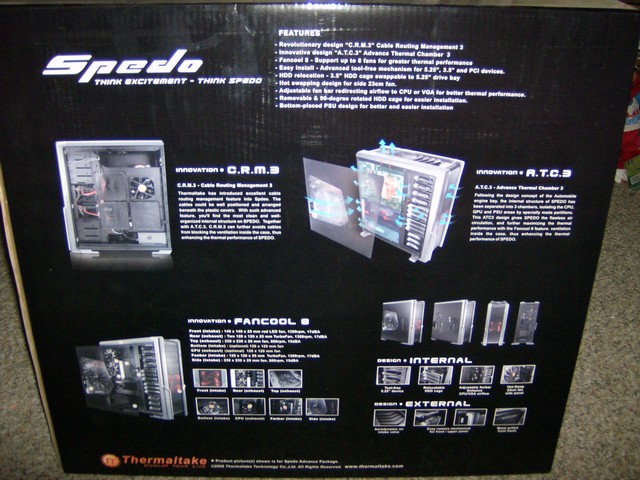
The box has plenty of features and specifications to help inform the consumer about the purchase of the Spedo.
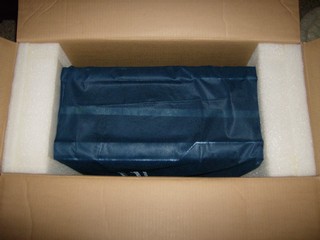
Inside the case the Spedo is protected by thick layers of resilient foam and encased in a protective cloth bag.
Pictures
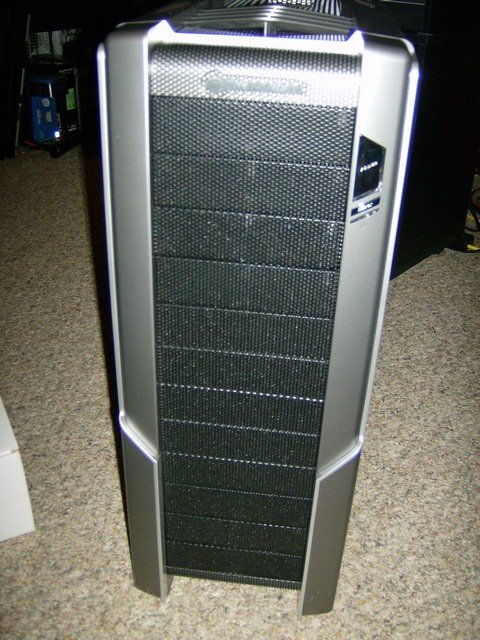
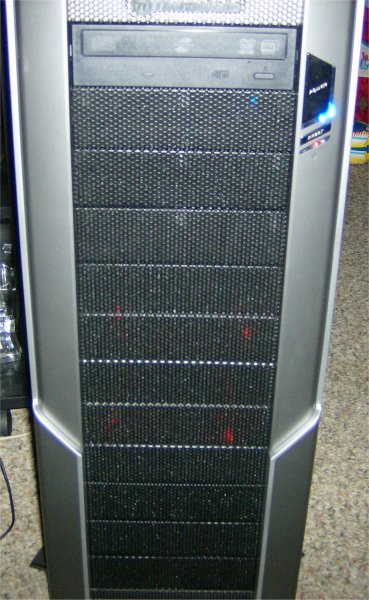
From the front, the Spedo shows it’s true full tower colors, strutting the 12 5/14″ drive bay slots and looking quite attractive. You can see the power and reset buttons on the right edge and the hard drive access light right below that.
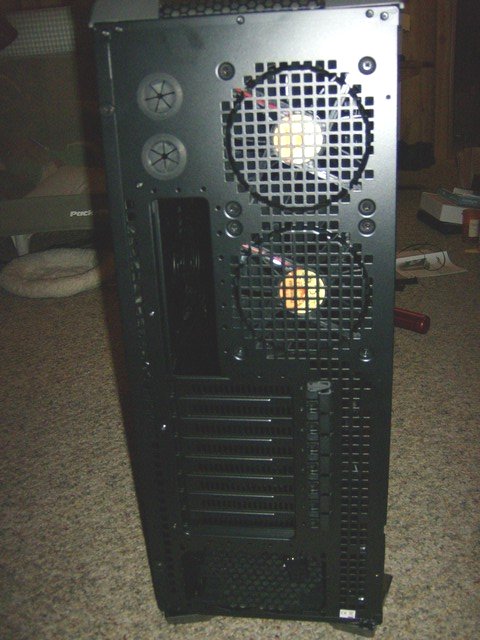
The back of the Spedo gives us a look at the dual 120mm exhaust fans and the ports that the external watercooling hoses use.
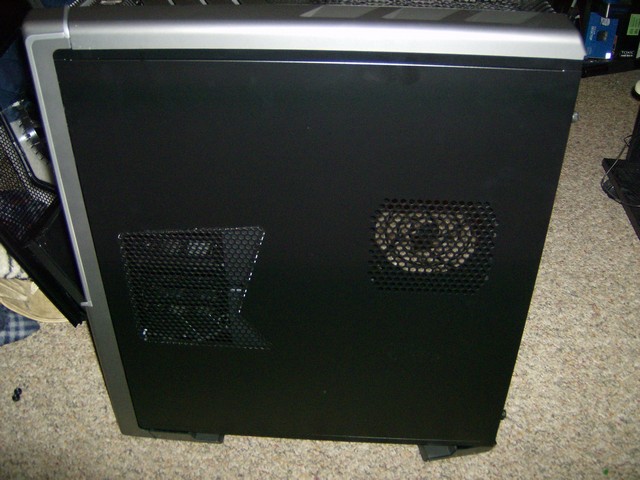
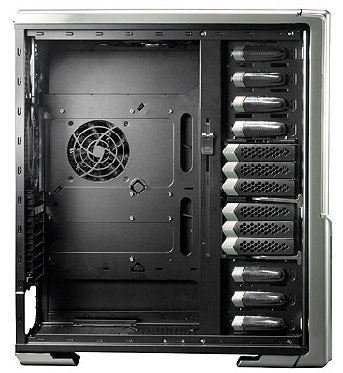
On the motherboard side you can see the mesh for the rear mounted 120mm fan and the mesh in the front for additional airflow. With 8 fans spinning in there you’ll need plenty of mesh to allow the air to move freely.
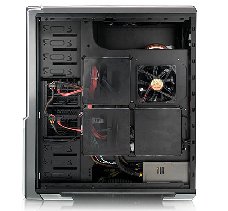
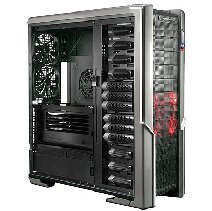
Finally, there’s the fan side which brings us to our only complaint about the Spedo thus far. The window could have been a little larger, or they could have used another window at the front.
The Bundle
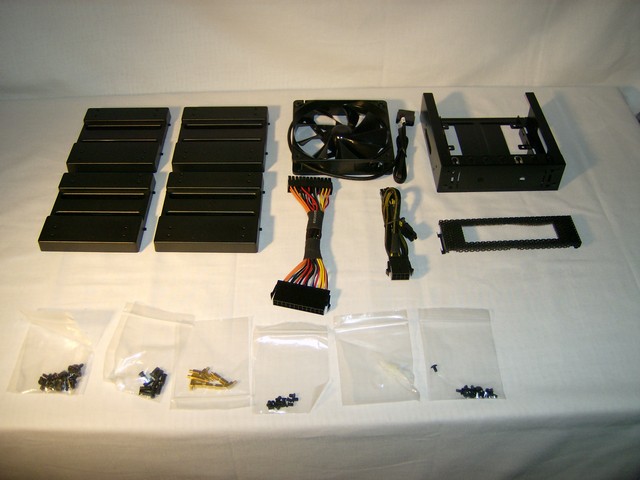
Starting at the top left of the bundle picture, you’ll find four odd plastic panels used if you choose to relocate the hard drive bays on the Spedo. They tossed in a 120mm fan into the bundle to sweeten the pot a little. Then, they thoughtfully included a 24-pin motherboard extender cable and a 4 or 8-pin CPU cable extender. If you have a bottom mounted power supply in the chassis and the leads are a little short on your power supply, you’ll be glad Thermaltake tossed those in the bundle. Our power leads were long enough on the Tagan BZ1100 1100 watt PSU that we used for the review and we’re still glad to see those extra cables. You’ll also find a 5 1/4″ drive bay to 3 1/2″ drive bay converter suitable for a 7th HD or a floppy if you’re so inclined. We didn’t need the converter, but again we’re still glad to see it because they are getting hard to find these days. You also get some black screws in several bags, which is nice because the interior of the Spedo is black and they prevent having a bunch of silver screws standing out like a sore thumb. There was a manual somewhere close to the box but we’re pretty sure the dog ate it, “Bad Dog! Bad Dog!” (We don’t need no stinkin manual!) No, in all reality, there is a manual but pictures of manuals are just boring so we thought we’d spare you that. (Bad Dog!)
TESTING & CONCLUSION
There’s only one way we know of to test a chassis, you get a 12 pack of beer and, oh no, wait a minute, that’s how you annoy the neighbors, with music. You build a system into the chassis, which is what we did. We migrated our 4870/4850 Crossfire rig into the Spedo. It’s a good test for the chassis, with plenty of wiring to do and multiple PCI-E connectors flying everywhere and dual slot GPU’s eating up space. Here’s the list of components we stuffed into the well designed Chassis.
- Gigabyte EP45-Extreme Motherboard
- E8400 CPU
- Thermalright Ultra 120 CPU Cooler
- Sapphire 4870
- Sapphire 4850 Toxic
- Tagan BZ1100 1100 Watt PSU
- 400 Gig Western Digital Hard Drive
- Sony DVD/RW
Every thing fit nicely and we have plenty of room to grow the system.
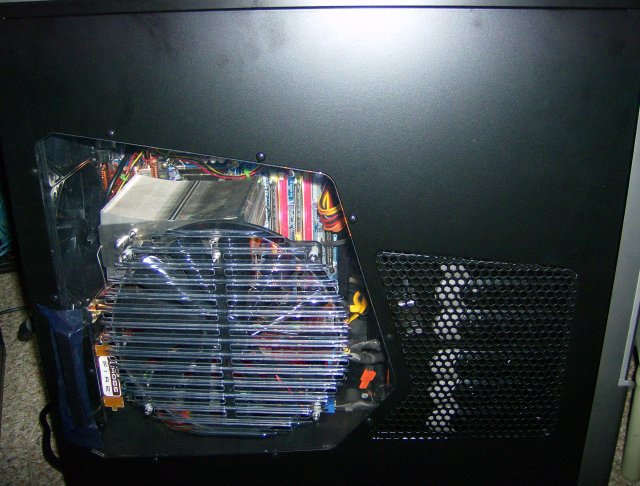
Being somewhat cable impaired, we were quite impressed with the cable management features of the Spedo. Only the ends of some cables show coming from under the motherboard tray. Now, we do have to admit that the backside of the tray, when exposed, looks a little like the power lines from a third world country, but they are out of sight, leaving us with a fairly clean look. If we had more time or inclination we could neaten it up more, but with time and products beckoning, we gave it a decent effort and moved on.
You do get a good look at the fan you can slide up and down and tilt to point at any area that you want extra cooling for. In our case, we pointed it at the Sapphire 4870 to help cool the GPU because they are known to run a tad hot.
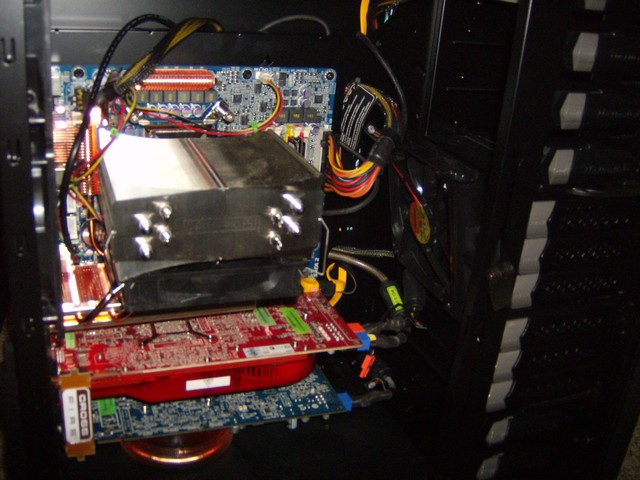
Backing away from the chassis a little you get a good look at our 4870/4850 Crossfire setup and the layout of the interior of the chassis with 2 dual slot GPU’s and the massive Theralright Ultra 120 we used.
Then, through the magic of the internet, there we are, up and running after our transplant.
Finally, the build with the side on, up and running. Thermaltake didn’t stick a lot of tacky lighted fans in there to shine out like a lighthouse, but they did include a nice red fan on the front.
Conclusion
We found the Thermaltake Spedo to be one of the most intelligently designed chassis we’ve ever had the pleasure of laying our hands on. The FanCool8 design incorporating 8 fans in total, from the massive 230mm side fan to the 200mm top fan and the airflow in the case is unparalleled. Cable management was a snap, even for the cable impaired, and the tool free drive bays and hard drive bays held the drives very securely.
The windowed side of the chassis with the 230mm fan has a power contact point that powers the side fan and automatically shuts the fan down when you open the chassis with the machine running. We really like not having to chase down a fan cord to remove the side panel. All of the fan cords are black coated to minimize the visual impact inside the chassis and were plenty long enough to route behind the motherboard tray. Thermaltake was thoughtful enough to pack them behind the tray so cabling them was almost an afterthought.
Every feature we tested on the Spedo from the ACM3 (Active Cable Management 3) to FanCool8 worked as advertised and was not only functional, but incorporated style and flair into the design. There are enough features to keep you exploring this chassis for a long time to come. The only feature we could think of that was missing was a beverage cooler, but that’s asking a little too much.
After building the Spedo and living with it for a few days we can already tell you our Crossfire rig has finally found a home that we can not only live with, but love. We’ll continue to use the Spedo to house the Crossfire rig and we are now looking forward to migrating our SLI rig into a Thermaltake Armor ECS Chassis. All the airflow Thermaltake is making available in their chassis is just too hard to resist by protecting our multi GPU rigs.
Pros:
+ Great Styling
+ Fantastic Airflow
+ Adjustable Interior fan
+ Sexy
+ Nice Cable Management Features
+ Includes 6 Fans
+ Solid Construction
+ Thermal Management Chambers Isolate And Cool Hot Spots
+ Quiet Operation
+ Enough Interior Room For Large Components and Crossfire or SLI
+ Migrating From A NZXT Tempest To The Spedo, The internal chassis temperature dropped 4°C (So much for the old airflow king)
Cons:
– No Beverage Cooler
– A Little Expensive For Some ($280 MSRP)
The Thermaltake Spedo is an exercise in functional elegance. It’s a pleasure to look at and it keeps your expensive components well protected and it cools them like no other chassis.
With it’s stylish design, cable management, and sharp sexy look we have to give the Spedo a:
Final Score of 9 out of 10 and the Golden Bear Award.


I had this case for two yaers now, i cant really believe how good it is, super,super happy about this buy :D, massive massive airflow and future proof case !