The Thermaltake Bigwater 780e is a triple drive bay single radiator water cooling kit that is ESA capable. If you new to water cooling, a kit is the way to go.
INTRODUCTION
Cooling your expensive CPU is an important task and the level of cooling you choose can either make or break your system performance. If you’re overclocking, it can mean the difference between a minor OC and one that can give you major bragging rights. Air cooling has come a long way, but water cooling has come even farther. With CPU’s running faster you get higher heat, and air is okay for some people, happy with a decent overclcok, but if you’re going for the gusto, you might need a little more.
In the never ending search for entry level kits that satisfy the cooling needs of the CPU and are easy to set up for the beginner, we obtained a Thermaltake Bigwater 780e ESA water cooling kit. We’re going to run it on an Intel Q6600 Quad and see how high we can clock it, or at least until we break a decent sweat worrying about climbing temps.

About Thermaltake
We live in a world where most things seem to move at the speed of light. At Thermaltake, we feel the same way and that is exactly how Thermaltake conducts itself to deliver innovative, reliable and customer-centric solutions to the worldwide market.
Since the beginning of Thermaltake in 1999, it has been at the forefront of creating new and exciting products at a time where most computer users were provided little to no choices for components that may seem irrelevant, but in reality crucial to the performance of a PC.
Thermaltake Server Series solutions, with years of thermal experience and industry leadership, sets its goal on reforming total thermal management in server segment by formulating the perfect mixture of versatility, efficiency and thermal management with each respective server product category: Rackmount Chassis, Server Fixed & Redundant Power Supply and Server CPU Cooling Management Solutions.
With its comprehensive line of products available, it enables Thermaltake’s core customers to enjoy a one-stop-shop experience, reduce product design-in evaluation period and most important of all, flawless integration process. Each of Thermaltake’s strengths enables its customer to focus on their core business while taking advantage of the skills and efficiency of a single thermal management solution partner.
Values & Principles
– While still a relatively young company, established in 1999, Thermaltake is built on unwavering will and dedication to address issues and innovate at the same time for computer enthusiasts and corporate users worldwide .
– With strong support of Research & Development team standing behind the brand, Thermaltake is committed to never-follow but always-lead.
– In past decades, the industrial and technological advancements in different fields have shaped the world we live in today and have also made a big impact on the environment. Thermaltake takes great measures to ensure the product that we produce relieve these impacts by being first to act on 80 PLUS® specification for computer power supply that greatly reduces the amount of electricity that a computer consumes.
– Always striving to be the best, we continuously benchmark our performance against the very best internally and externally.
– Customers are our greatest asset and Thermaltake does not take that for granted. That is why Thermaltake is the industry leading in customer service and customer support with around-the-clock automated product return service.
FEATURES
- Supports NVIDIA ESA Technology
- 5.25 Drive Bay design: liquid cooling system in-a-box to save the space in the chassis and simplifies installation
- Mesh design front bezel enhances ventilation
- Easy to install and refill
- 12cm Motorsports Radiator
- DTT – Dimple Tube Technology swirls the coolant within the radiator to increase thermal transfer
- An all-aluminum radiator featuring expanded outer fins and tube style for maximum performance
- Pure Copper Waterblock
- Advanced Brazing technology improves reliability and leakage free
- All-in-one mounting design supports all latest CPU from Intel & AMD. (Includes: Intel Socket LGA775 and AMD K8/AM2.)
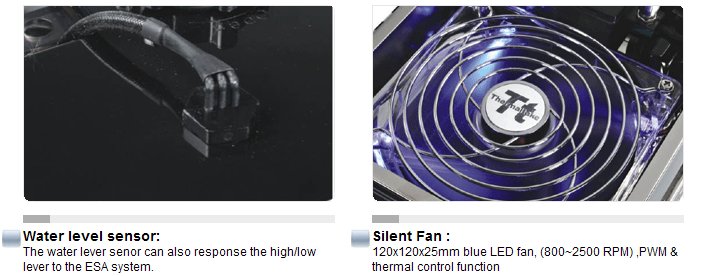
- Ultra-low noise fan
- Silent fan with blue LED (800 ~ 2500rpm)
- The 4-pin of the fan connector has PWM & thermal control function
- High-performance PWM Liquid Pump
- Silent and powerful P500(500L/hr) pump provide superb reliability
- The ceramic bearings significantly extend the life-expectancy of the pump
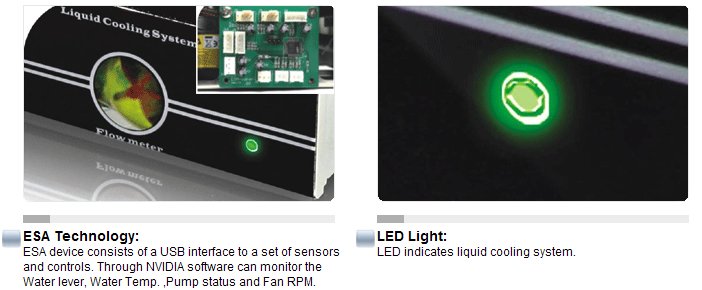
- Thermal control capability through ESA software
- Flow meter
- Accurate monitoring and fast response- Transparent cover clearly shows the movement of the coolant
- Quick connector
- Quickconn connector : Valves shuts off water flow immediately when dismantling to prevents water leakage
- Durable 3/8” Tube: Special material to prevent wear & tare from being clogged up or over bending
- Compliant with Nvidia nForce 780a SLI / nForce 790i SLI / nForce 780i SLI / nForce 680i SLI / nForce 680i LT SLI based motherboard for ESA Function
Pictorial Features


SPECIFICATIONS
| Bigwater 780e ESA Specifications | |
| 3U Bay Drives | |
| Dimension | (L) 249.5mm x (W)149mm x (H) 128mm |
| Weight | 1.74(kg) |
| Application | |
| CPU | AMD AM2, AMD K8, Intel LGA775, Intel P4 |
| Water Block | |
| Material | All copper |
| Dimension | (L) 58mm x (W) 58mm x (H) 35mm |
| Weight | 311(g) |
| Quick Install Connector | For 9.5mm ID (3/8”) tubing |
| Pump | |
| Dimensions | (L) 75mm x (W) 70mm x (H) 75mm |
| Bearing | Ceramic bearing |
| Maximum Capacity | 500 L/ hr |
| Rated Voltage | DC 12V |
| Input current | 600 mA |
| Connector | 4 pin |
| Noise | 16 dBA |
| Life time | 80000 hr (MTBF) |
| Radiator | |
| Dimensions | (L) 153mm x (W) 120mm x (H) 28mm |
| Material | Aluminum |
| Tube Design | Aluminum, Dimple |
| Fin Design | Aluminum, Louvered |
| Quick install connector | For 9.5mm ID (3/8”) tubing |
| Fan | |
| Fan Dimension | (L) 120mm x (W)120mm x (H) 25mm |
| Fan Speed | 1600~2400 RPM |
| Rated Voltage | 12V |
| Noise | 10 ~20 dB |
| Life Expectancy | 30,000 hr |
| Connector | 4pin |
| Liquid tank | |
| Dimensions | (L) 130.2mm x (W) 107.2mm x (H) 51.5mm |
| Capacity | 530 c.c |
| Quick install connector | For 9.5mm ID(3/8”) tube |
| Tube | |
| Dimensions | 9.5mm ID(3/8”) tube |
| Material | Green UV |
| Coolant | |
| Capacity | 530 c.c |
| Major Material Ingredient | Ethylene Glycol |
We might as well deal with this here. When you mix Copper and Aluminum in a cooling loop and introduce an electrolytic solution into the loop (Water, Antifreeze, Ethylene Glycol) you get what’s known as Galvanic corrosion. One metal tries to send electrons to the other because of the electon inbalance between the two metals. This causes Galvanic corrosion but we’ve been assured by Themaltake that if you follow the cleaning and refilling schedule in the manual it’s not an issue.
PICTURES & IMPRESSIONS
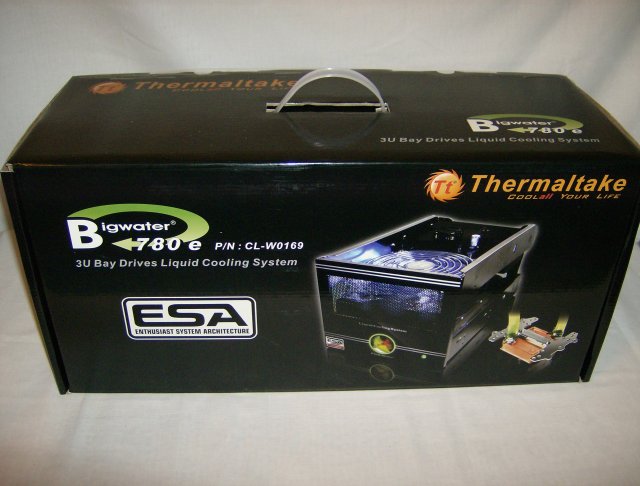
Like most of the Thermaltake water cooling kits we’ve seen recently, it comes securely packed in a large black box listed with plenty of features and specifications to help inform the consumer about its purchase.
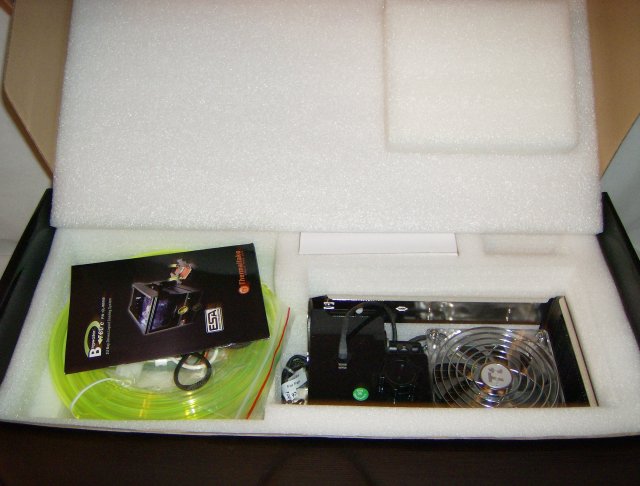
Inside the box, thoroughly packed, you’ll find the Thermaltake Bigwater 780e literally surrounded by thick resilient foam. Despite obvious mishandling of the outer cardboard box, the kit that came in it survived unscathed.
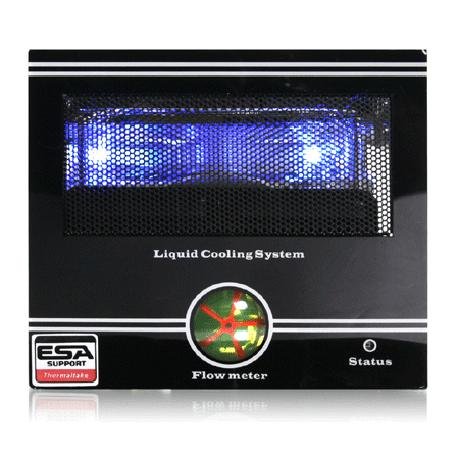
This is a three bay model and it does take up a little more room in the chassis, but that extra room is put to good use for that extra room is used for the airflow around the radiator. If you’ve have the extra basy for it, it’s well worth the extra space. This shot does afford you a good look at the flow indicator on the front, which also serves to let you know when you need to add coolant.
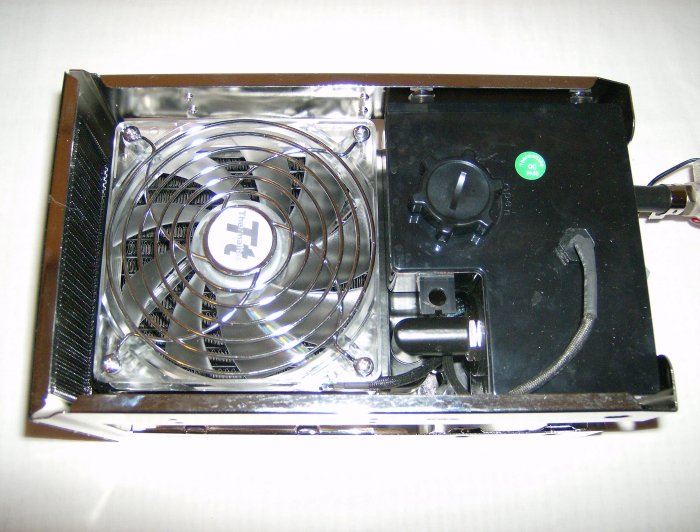
Looking at the top of the Thermaltake Bigwater 780e you can see the ultra quiet fan and the extra room the three bay design affords for airflow. You can also see the much larger reservoir that this model sports over previous Bigwater models. With more airflow and a larger reservoir you will get better cooling with this model than the 760is model. The 760is reservoir will hold 130cc and the 780e will hold a whopping 530cc of coolant. With that larger capacity it takes more heat to raise the overall temperature, and there’s more liquid to spread the heat load across. We would like to see a dual radiator variant, but we suspect in a drive bay based cooler, that would be a chore.
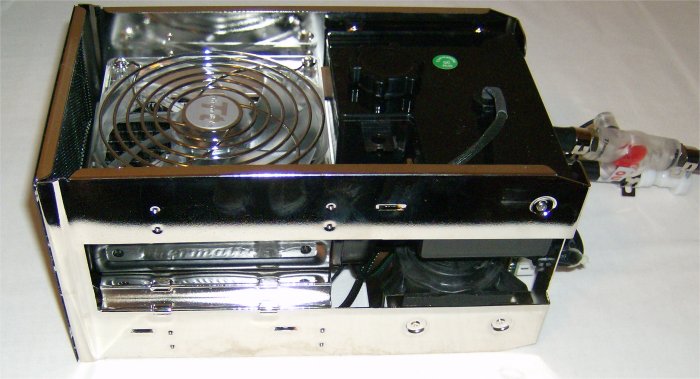
This angle gives you a little better perspective of the extra room you get with the three drive bay model and you get a peek at what we’d consider the extra flow meter.
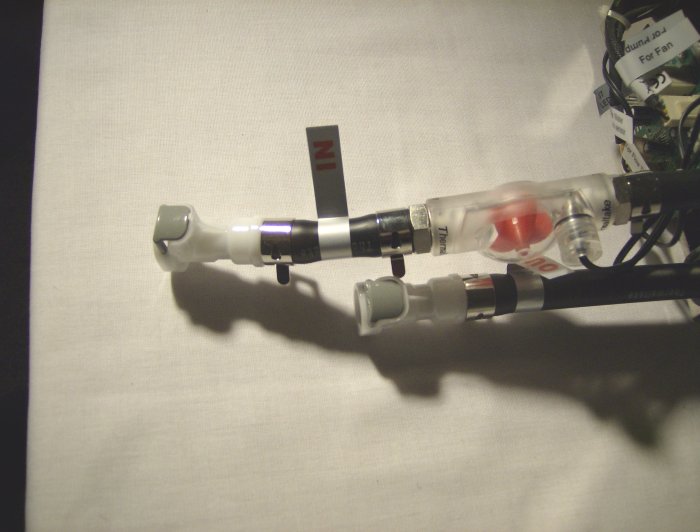
There’s a close up of the second flow indicator. At this juncture we feel compelled to tell you that since it’s extra, we removed it. With that extra length on the hose, reaching the CPU would have kinked the hose, constricting coolant flow. Since there’s one on front, it’s redundant anyway.
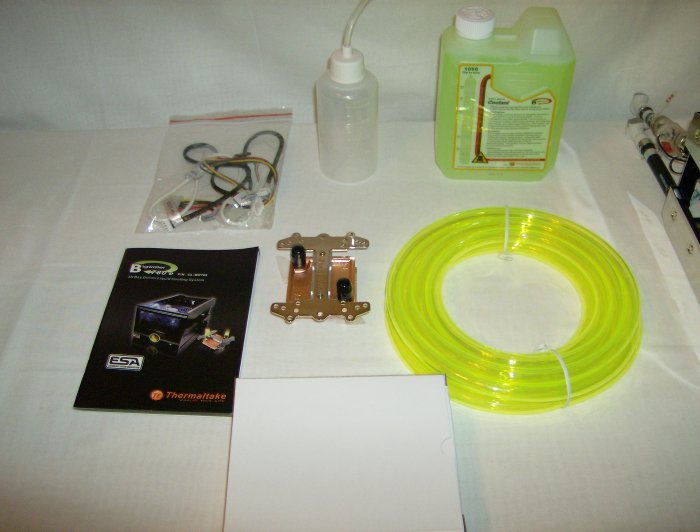
And that leads us to the thing that scares most people about water cooling (other than leaks), the volume of hardware required. Trust us, we had it up and running in under an hour, so it’s not that hard. As for leaks, across several kits from Thermaltake, we’ve never had a leak. Read the manual. Thermaltake recommends that you leak test outside the chassis. We didn’t do that but with experience comes confidence (and foolhardiness).
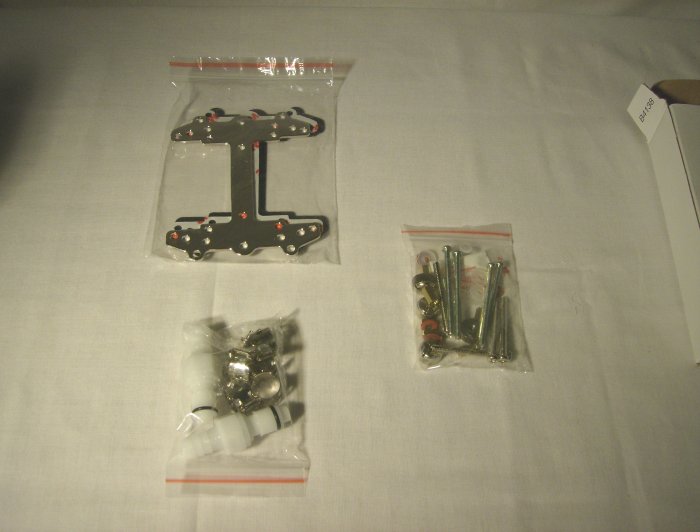
Then there’s the last little bit of hardware you’ll need for your water cooling adventure, the motherboard backplate and the hold down and various clamps, as well as the quick connects, which make setup and draining a snap.
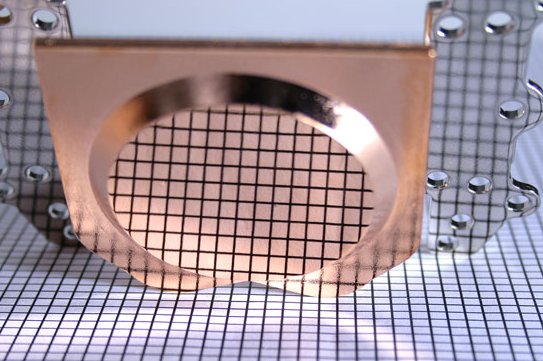
There’s a look at the bottom of the block, Thermaltake did a good job in milling it because, if there’s any warp, we can’t see it. Stare at it long enough and white dots will appear in the line intersections. They are an optical illusion, we assure you.
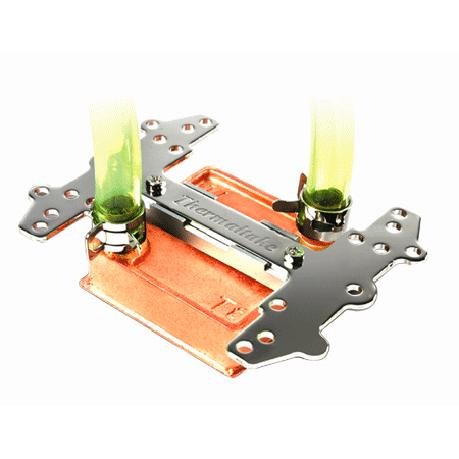
Then there’s the solid copper braised block that Thermaltake includes with the kit. The one thing that I would warn you about is the solid brass construction of the braised nozzles. Under normal use they won’t break or crack, but if mishandled, used for a hammer, or twisted on unduly, they can crack, causing a leak, so use some common sense here.
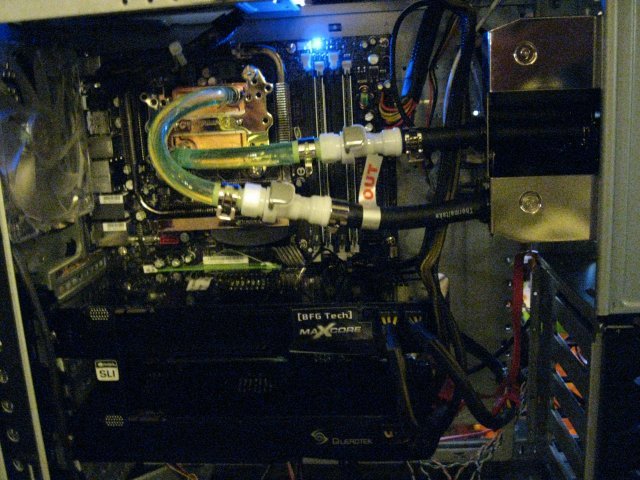
There’s the money shot of the Thermaltake Bigwater 780e installed and running. It looks good on the 790i platform we chose for testing, doesn’t it?
ESA
Enthusiast System Architecture (ESA) is a blending of hardware and software that allows you to monitor and control aspects of ESA supported hardware in an easily customizable 3D interface. Giving you system information and control of individual components like you’ve never had. Currently, it’s specific to Nvidia based chipsets and in order to use it fully, you’ll need an ESA capable chassis and ESA capable components.
Fortunately, our friends over at Thermaltake kicked in a Thermaltake Armor ESA Chassis and this Toughpower 850 Watt ESA power supply for us to take a look at in conjunction with the EVGA 790i Nvidia based chipset motherboard.
For now, we are going to deal with the ESA related software and what it can do for you. Once you’ve downloaded the ESA software from Nvidia and installed it, you’ll find new entries in the Nvidia Control Panel.
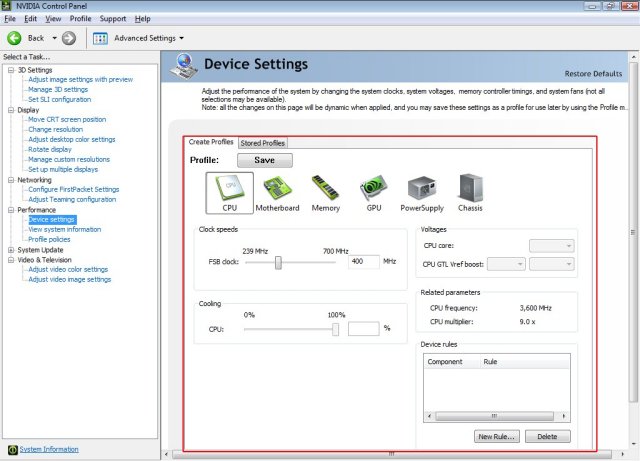
Highlighted there on the left you’ll see the new entry, “System Settings”. It’s a little hard to read, but that’s where it’s at. If we went much larger on the image it would run off the screen. This screen is the CPU screen of the ESA capable software. From here you can change the FSB within the software and, if we weren’t using a water cooling kit, we could also adjust the fan speed.
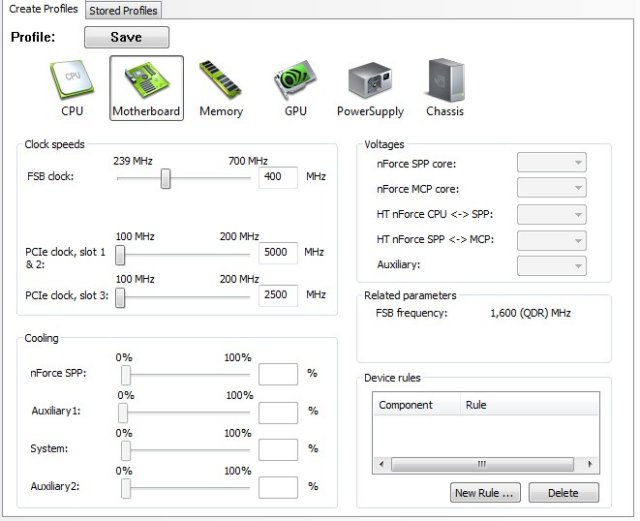
From the Motherboard screen you can adjust the FSB speed, PCI-E clocks, and the fans attached to the motherboard. In this chassis our fans aren’t connected to the motherboard so they are greyed out. The Voltages section was also greyed out but we weren’t much concerned with that. You’ll see why later. At its current infant stage, we’re looking at the ESA software more for informational purposes than actual adjustments inside the OS. We tried the FSB adjustment and most of the other settings inside the panel and they all worked without error, but still we prefer handling things in BIOS.
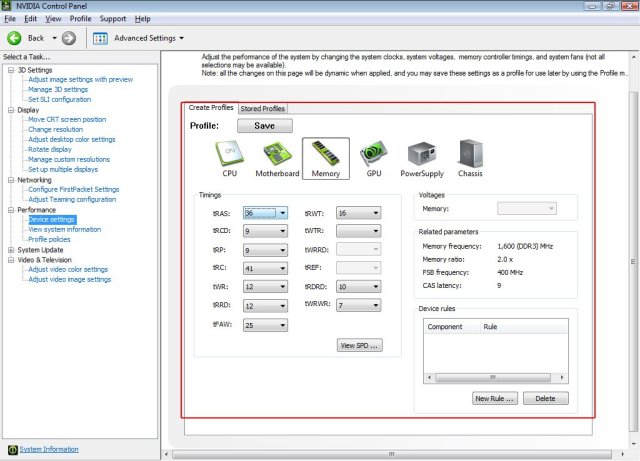
On the Memory screen you can change the memory settings and test them inside the OS without rebooting and going into BIOS. It also shows you the current settings for the memory over on the right.

On the GPU screen you can adjust the speed of Nvidia GPU’s. We are running in SLI mode and you let the drivers handle the speed of the GPU’s in SLI (we tried adjusting the speed of one GPU, it didn’t work). If you’re running a single card it’ll adjust the speed for you. We took one card out and adjusted one of the GTX-260’s we were running in the 790i from 576 to 655 with no ill effects.
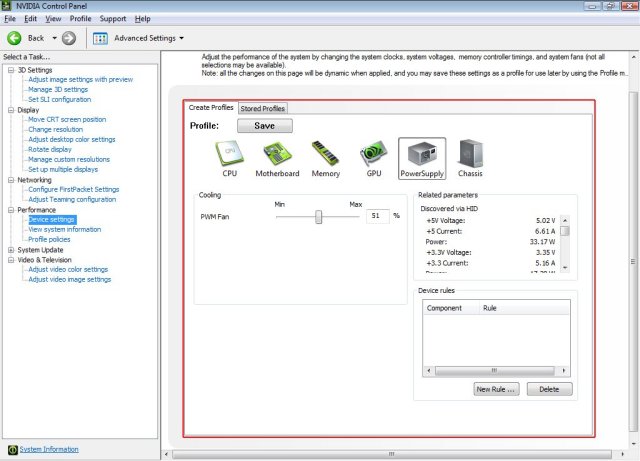
On the PSU screen the only adjustment is fan speed and that’s for ESA capable PSU’s like the Toughpower 850 ESA we’re using. It also shows you the voltages it’s reading from all the various rails. A little later on you’ll see that the voltages we read with a multimeter and a PSU tester were a little different, but in most cases within .10 Volts. One tenth of a volt is pretty good for software reporting.
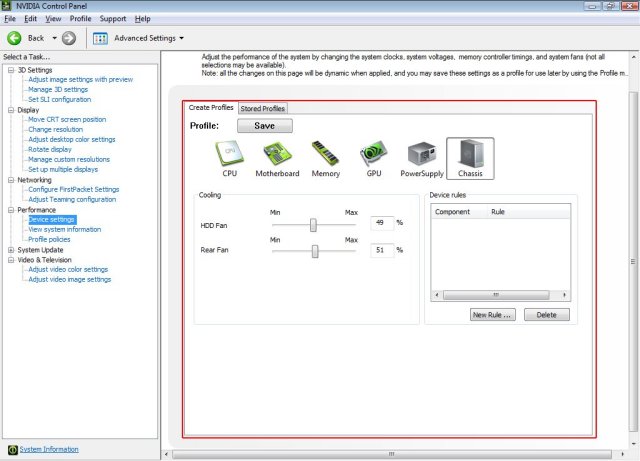
On the Chassis page you can adjust the fan speed of the front and rear fans. If you look back at the Motherboard screen section you can see that any fans that are on motherboard headers can be controlled from the Motherboard screen. You have complete control of the system fans without having to wire in a fan controller. In the ESA chassis we’re using, the fans wire through the ESA panel in the chassis itself, so it’s a little different.
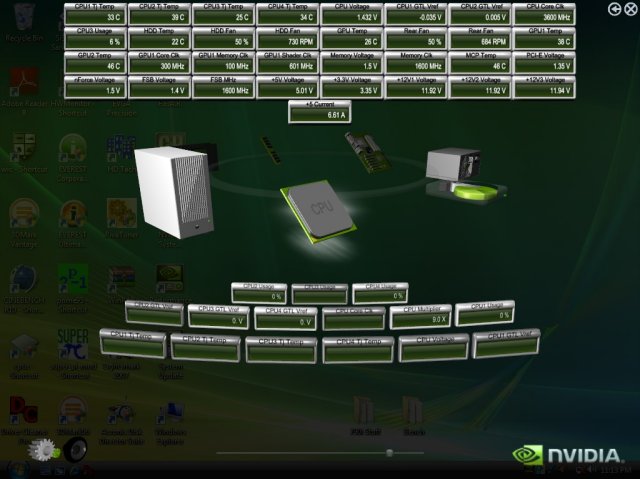
From the Nvidia Monitoring software you can select the monitors you want to see, and if you want them to be displayed on top at all times or not (you probably don’t want them on top at all times, it’s kind of annoying). We selected a bunch of sensors to display and got a shot of what it looks like from the desktop.

When you’ve gotten all your sensors selected they will display on your desktop, giving you access to more information in one spot than you’ve ever had access to from a single piece of hardware.
On a side note, that’s what a freshly loaded machine’s desktop looks like when it’s ready for testing. In total, there’s about 76-100 GB loaded, depending on if Demo or full games are loaded for testing.
In all, we found the ESA software and Monitoring component to be easy to use and had no problems with the system settings we changed with it, but believe that it could use a little maturity before it’s completely reliable. The monitoring portion was our favorite because instead of using four or five pieces of software to accomplish monitoring we can get it all in one place. Since we were testing the ESA software, we used both 3rd party software and hardware to check it and eliminate any chance of bias on the part of the software itself. With extended testing we’ve come to the conclusion that it reports accurately in most cases but we can’t account for the discrepancy between hardware reported voltages and software reported voltages, other than to say that software reported voltages are notoriously incorrect.
TESTING & METHODOLOGY
To test the Thermaltake Bigwater 780e we strapped it to our 790i platform, with an Intel Q6600 on it, and waited a week for the thermal compound to cure. During that week we monitored temperatures and used the 790i for normal every day tasks such as gaming, surfing, and writing reviews. Then we tested it with Prime95, driving all four cores as hard as they can go and after 30 minutes of Prime95 we record the temperature, turned the machine off for 30 minutes and reran the 30 minute test. We did this a total of three times and report the average of the test here. For the Idle test we left the machine at an idle for 30 minutes, record the temperatures, repeated that three times and report the average here. Ambient room temperature was held at a constant 72° F ± 2° F during testing.
Test Rig
| Test Rig “Quadzilla” |
|
| Case Type | Thermaltake Armor ESA |
| CPU | Intel Q6600 @ 3.6 Voltage 1.4875 vcore |
| Motherboard | EVGA 790i |
| Ram | OCZ DDR3 2000 MHz |
| CPU Cooler | Thermaltake Bigwater 780e Custom Triple Radiator Water Loop Thermaltake Bigwater 760i Stock Intel Cooler |
| Hard Drives | WD 250 Gig Sata 2 Two Maxtor 160 Gig Sata2 |
| Optical | Sony DVD R/W |
| GPU | Leadtek GTX-260 BFG GTX-260 OCX MaxCore In SLI |
| Case Fans | Two 120mm Thermaltake Front/Rear Push/Pull 250mm Side fan 90mm Rear Exhaust 90mm Top Exhaus |
| Docking Stations | Tagan IB290 W/Deskstar 2 1/2 Inch 80 Gig Sata 2 Tagan IB390 W/Maxtor 160 Gig Sata 2 Thermaltake BlackX USB W/Seagate 80 Gig Sata 2 |
| Testing PSU | Thermaltake Toughpower 850 ESA Modular |
| Legacy | Floppy Drive |
| Mouse | Razer Lachesis |
| Keyboard | Razer Lycosa |
| Gaming Headset | Razer Piranha |
| Speakers | Logitec Dolby 5.1 |
| Any Attempt Copy This System Configuration May Lead to Bankrupcy | |
TEST RESULTS
Now keep in mind that the Custom water loop is an enthusiast Triple Radiator water loop. It consists of an MCP350 500L/hr pump which pushes the same amount of water that the Thermaltake Bigwater kits do, but it’s got a Swiftech Apogee GTX waterblock and a Swiftech triple radiator with three high CFM Yate Loon fans extracting heat. That’s going to account for the temperature differences and should be a hint to any astute readers. To increase the efficiency of the Bigwater, adding a dual radiator down the line should produce similar results. (adding a dual radiator with the in place single radiator would make the same amount of radiator surface area, 360mm)
Q6600 @ 2.4 Stock

You can already see the quality of the Intel stock cooler just running at stock. After a short while, it’s already at 58°C just at stock clock speed. We checked the thermal material, which was the stock stuff that Intel uses, and it was spreading normally but could probably have used some spread/cure time. The 760is did okay in this test but not as well as the Bigwater 780e, which has a larger reservoir to spread the heat across more coolant, and more room for the fan to circulate air. The custom water loop did the best but cost much more to setup and is harder to implement unless you have experience at it.
Q6600 @ 3.2GHz 1.4 Vcore
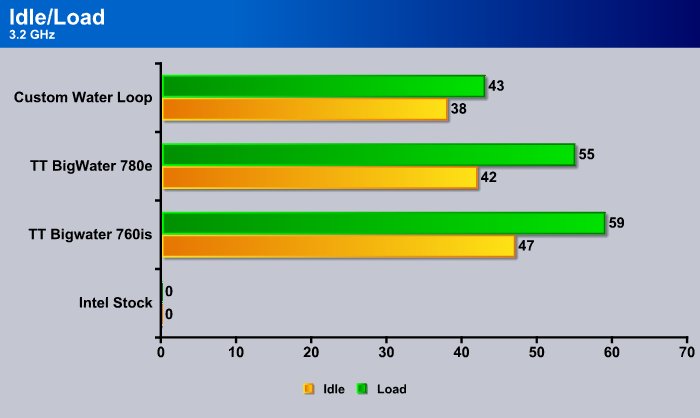
The lack of cooling capacity cause us to shut the Intel Stock Cooler test down so at this level. It had already fallen out because it was throttling the CPU. The Bigwater 760is held at 59°C load after a half an hour, but it’s close to its capacity at this level. The Bigwater 780e did hold it down to 55°C and has a little overclocking headroom left. The custom loop, of course, did best of all.
Q6600 @ 3.6 1.4875 Vcore
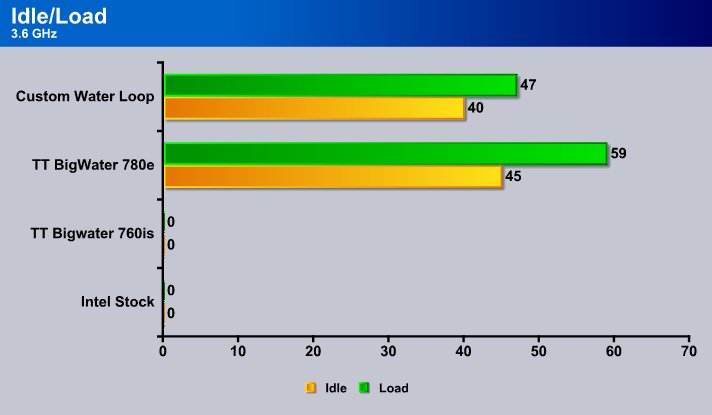
Generally, at 3.6GHz, the Q6600 is getting pretty toasty, and with this particular CPU being a little power hungry, we don’t really like to run it on air cooling at this level. The Bigwater 760is and the Intel Stock cooler have fallen by the wayside by this time. The 760is lasted about 10 minutes, then temps hit 60°C and we shut the test down. Once the CPU has started throttling, the cooler has failed in its job and firmware safeguards have taken over, so it’s the end of the line for the 760is. The newer Thermaltake Bigwater 780e held the temps down to about 58°C after 30 minutes, so we let the test run another 30 minutes for a total of an hour and it held it down to 59°C at full load Prime95 for an hour. That would indicate to us that unless you’re running 27/4 full load CPU, you’d be fine with the Thermaltake Bigwater 780e. Our Q6600 really doesn’t like to go higher than 3.6GHz and we were really close to max voltage, so we quit the testing, with the custom water loop in the lead, and the Thermaltake Bigwater 780e holding the line at 59°C. Going any higher would most likely be not be recommend with the 780e and Q6600 because, at this point, we’re almost at thermal limits anyway.
CONCLUSION
While the Thermaltake Bigwater 780e didn’t provide the same cooling that the custom water loop did, we didn’t expect it to. It held the Q6600 down to 59c @ 3.6Ghz and 1.4875 Vcore for an hour Prime95 which is 30 minutes more than we usually test for, with that kind of cooling capacity you can rest assured that it will hold it down to much more reasonable levels under normal use.
Setup was easy and completed in under an hour, the manual made setup a snap and we only encountered one minor problem. The Flow Meter on the Bigwater 780e made the hose a tad to long and would have caused crimping in the hose. Removing it was easy and everything fit quite nicely after that. Since there’s a flow meter on the front of the unit we don’t see this as much of an issue. The extra flow meter in the loop would just represent extra constriction and was redundant.
We liked the ease of setup, and the lack of noise from a CPU fan. It cools well enough for most people to have pretty decent OCing headroom unless they’re a hardcore Overclocker. If your new to water cooling but don’t want to get stuck with inadequate cooling from other kits we could easily recommend the Thermaltake Bigwater 780e.
We are trying out a new addition to our scoring system to provide additional feedback beyond a flat score. Please note that the final score isn’t an aggregate average of the new rating system.
- Performance 8.5
- Value 8
- Quality 9
- Warranty 9
- Features 10
- Innovation 10
Pros:
+ Complete Kit
+ Enthusiast System Architecture Ready
+ Quiet
+ Kept The Q6600 Down To 59c At 3.6GHz
+ Easy Setup
+ Improved Cooling Over Other Thermaltake Kits
+ Flow Indicator
Cons:
– Flow Meter Made The Hose To Long
– Need Additional Radiator For Better Cooling
The Thermaltake Bigwater 780e kept the Q6600 @ 3.6GHz down to 59c full load for an hour, any Water Cooling Kit that can do that deserves a:
Final Score: 8.5 out of 10 and the Bjorn3D Seal Of Approval.


