Test Rig & Overclocking
Here at Bjorn3d we try to streamline the testing process to ensure fair and unbiased test results by removing variables such as excess drives, clean install of Windows 10 Pro, turning off of extra software such as the virus and malware scanner and clearing the cache and prefetch data. This is all done to ensure that we can rule out any interference in the test results and allow you to get a better perception of the actual impact that the hardware makes. The only extra stuff installed are the utilities and drivers that are included with the board and before any testing we installed the latest BIOS version. In addition to this we have the benchmarking software that is used for all the motherboard reviews here on Bjorn3d.
For testing we run each test 3 times and average the results to come up with the scores that are reported here. Should we encounter a score that is an outlier, we will then run the test again. Thus we have no anomalous benchmarks that do not represent the true performance of the board are excluded.
| TEST RIG “MAXIMUS” | |
| Case Type | Fractal Define R5 |
| CPU | Intel Core I7 6700K 4.0 – 4.2 Ghz |
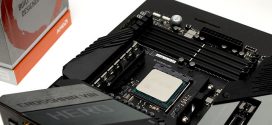
| Motherboard | ASUS ROG Z170 MAXIMUS VIII GENE |
| Ram | Patriot Viper 4 Series DDR4 16GB (2 x 8GB) 2800MHz Kit |
| CPU Cooler | Enermax Liqtech 240 |
| Hard Drive | SanDisk Extreme Pro 240GB |
| GPU | EVGA GTX970 FTW 4GB |
| Case fans | 2 Fractal case fans |
| PSU | Fractal Edison M 750W |
| Mouse | Logitech G700 |
| Keyboard | Logitech G910 |
We installed the latest BIOS revision 0907; here at Bjorn3d we always recommend updating to the most recent BIOS during your install. Even though this is a new board and this chipset has just been released there have already been 6 revisions, so it is always important to update yours in order to unlock the maximum potential for stability and new hardware like CPU’s and Memory is a good example.
It is also important to note that in addition to this board there are also components like the CPU, Memory, CPU Cooler or liquid cooler that also factor into the overclock speeds you might achieve. The chip we used is the Intel Core I7-6700K that is rated stock at 4.0Ghz and 4.2Ghz turbo speed. By default the cache runs at 4.1Ghz and it is highly recommended that you set the cache to what you end up overclocking to since this can impact your RAM performance. Most boards use the VCORE voltage to run the cache so you shouldn’t need to adjust the voltages. However because the cache shares voltage with the CPU this might result in a lower overclock with them sharing the same voltage, although you can adjust them separately if you know what you are doing. For most users we advise them to leave this setting in place. To get a good baseline we have run RealBench to show what the I7-6700K can do on default stock settings. This is still a decent increase compared to last generations I7-4790k although this could be largely due to the change to DDR4 Memory.
Before going into the BIOS to overclock, we always like out the manufactures auto overclocker and in this instance its ASUS’s AI suite III and their 5-way optimization menu. The 5-way optimization managed to take the new Intel Core I7-6700K up to 5.2 Ghz before we got the infamous blue screen of death. Upon restart the AI Suite III continued to work its magic until it reached a stable overclock of a impressive 4600MHz at 1.355V, In our opinion this is actually quite respectable and for most entry level users this will be more than adequate.
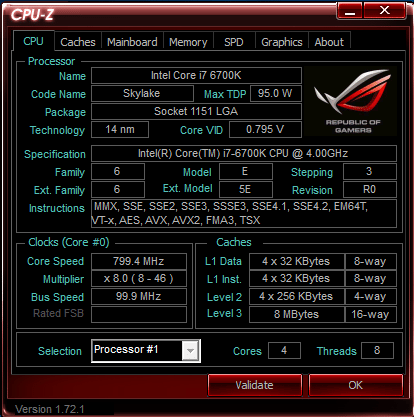
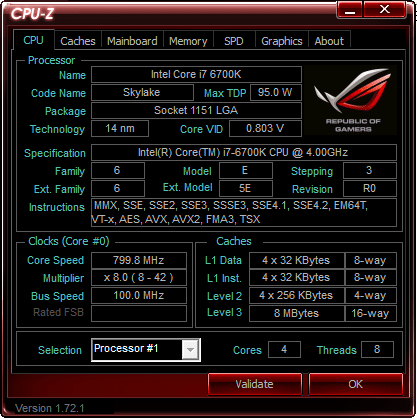
As shown here we find the settings that the AI Suite III used to obtain the overclock of 4600Mhz; it is important to note that these results were achieved with a basic liquid cooler so your results may vary slightly depending on your system.
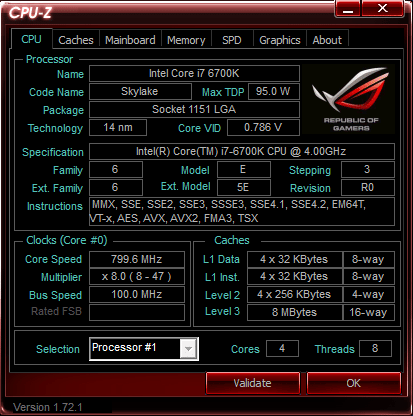
Using the included CPU-Z that Asus bundled with their software we can see that the top multiplier has been set to 47. We also have found that in order to achieve a fast ramp up, you will want to disable the C-State low power settings on the new Intel Skylake CPU’s, but leave the Turbo and SpeedStep settings enabled. This will give you the best of both worlds by giving the user fast ramp up to respectable OC numbers and maintaining the longevity of your CPU. This also gives you a nice OC when you need it but also allows the speed to drop when it is not needed, conserving power and reducing the amount of heat your system produces so you don’t end up with a space heater all the time.
We then manually OC within the UEFI Bios and achieve 4700Mhz at 1.4V with the memory set to 3000Mhz and the results were stable at this speed. Throughout testing we monitored the voltage with Intel’s Extreme Tuning Utility. We would not advise that you push your CPU past 1.4V since it could damage your CPU. For our testing we used the Enermax Liqtech 240 cooler; your results are likely to change depending on your cooler and components. We were at a Core 1.4v, VCCIO at 1.1v and System agent set to 1.1v and it gave us rock solid stability. If you decide to go on the crazy end of the memory spectrum and buy a 3400Mhz memory kit, you might find yourself needing even more voltage on the VCCIO and System Agent. In addition you might need to unjust your Uncore(Cashe) multiplier. As mentioned before you might have to match the CPU multiplier with your memory one to achieve the full potential out of it.
We don’t recommend running your CPU above 1.4V unless you have extremely good water cooling and even if you do, 1.42V is about the limit. Beyond this you are sacrificing the longevity of your CPU and you risk affecting other aspects of your system for short term gains. In addition to this any additional voltage increases the amount of heat generated by your CPU hence needing a extremely good liquid cooler and effectively turning your system into a space heater and increasing your electric bills for minimal performance gains. For everyday uses we would advise you to keep your overclock below 4500MHz and voltages less that 1.4V; this will ensure long system life and anything more is pretty much pure bragging rights.