Overall, Sunbeam’s Samurai case is a well designed low-budget project. If you are looking for cheap yet fancy case, you should give Samurai a try. Although a power supply is not included in this unit, you are free to choose any ATX power house you like.
Introduction![]()
A while ago, we were given a chance to review a unique case from Sunbeam – the Transformer. Today I will take a look at Samurai case from Sunbeam. This it not an ordinary case you’d buy at your local computer store. The company makes all sorts of PC components, starting from accessories and ending up on high-end power supplies. If you’re looking for cheap neon lights, cables, fan grills or any sort of modding equipment Sunbeam makes it all possible.
Features and Specifications
- Colors available: Silver, black, red
- Tool-free drive bay kits
- 5 x 5,25″ drive bays
- 5 x 3,5″ drive bays
- Tool-free PCI kits
- Multiple Ultra Bright LEDs in Power Switch
- Front USB & Audio ports: USB 2.0 x 2, Audio Jack x 2
- Acrylic side indow with 1 LED fan + stylish fan grill
- Front panel doors
- Ventilation
- Rear: 120mm LED Fan x 1 (not included)
- Side : 80mm LED Fan x 1 (included)
- Front : 80mm LED Fan x 1 (included)
- Weight N.W. 7.8 kg, G.W. 9.5 kg
- Dimension H 430mm x W 200mm x D 451mm
Although this is a standard ATX tower feature set, the chassis has plenty of space inside. Comparing it to Chieftec’s full tower case, it’s quite spacious.
Package and Internal Design![]()
Let’s take a look at the case itself. The chassis is made of steel which makes it quite heavy indeed.
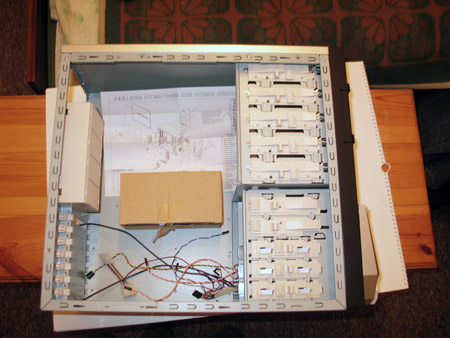
The finish on the edges is nice. I haven’t found many areas where it might cause a cut or any sort of injury. The case does not have a removable motherboard tray which may be a minus to some of you. I know how convenient it is with the tray, but many manufacturers don’t include it, same with drive racks.

Sunbeam includes a fan bracket if you feel your fans gather too much dust or you simply want your cables out of harms way. In my opinion it takes too much space, better use a fan grill or similar covering. The PCI slots are tool free which means you don’t need screws to fasten your add-in cards, just snap the bracket and it will hold.
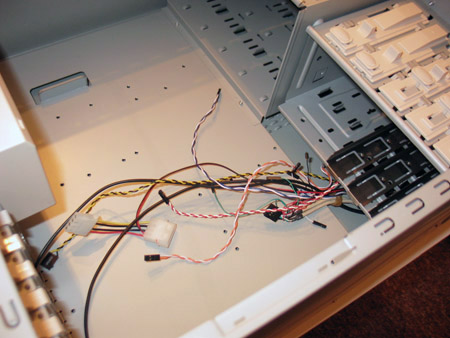
Plenty of cables that go out of the front panel, including a 4-pin molex connector used for powering the front power LED. Additionally there are USB cables as well as front panel-to-motherboard cables. No audio-to-motherboard connectors so take that in mind.
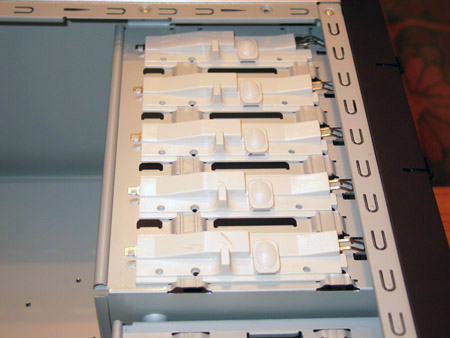
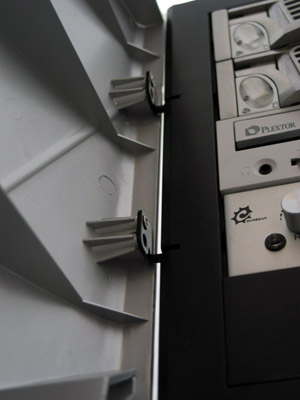
Looking back at the tool free kits, they aren’t anything special, i.e. el-cheap-o plastic that doesn’t always fit in, but it does its job which is the most important aspect here. Note that the tool free kit for the drive bays need to be assembled. I have had some issues with correctly aligning the holes. It took me few minutes to get this thing working, but it’s definitely worth it if you constantly swap devices.
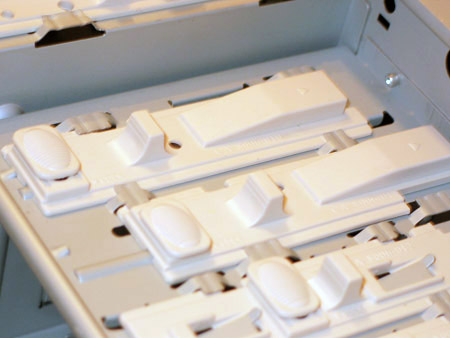
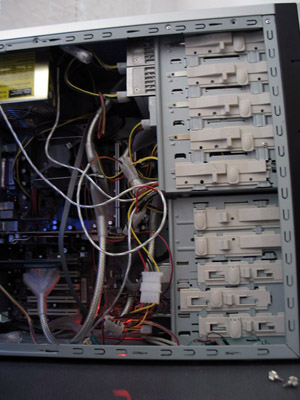
Once you assemble the kits, just put your HD or DVD, align the holes and snap the plastic plate outside of the case. To secure your device just press the round latch down (just like in the picture above). It’s very odd because I have had some problems fastening the Sunbeam Chameleon panel using this tool free kit. The panel’s aluminum casing wouldn’t align with the kit’s holes which was very annoying, but I got it inside at last.
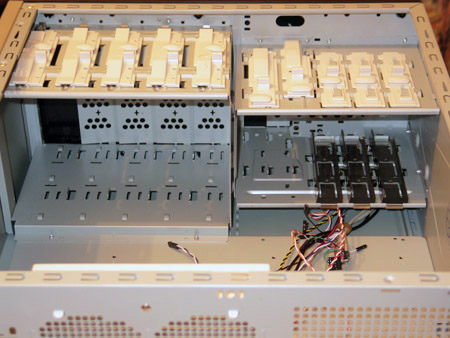
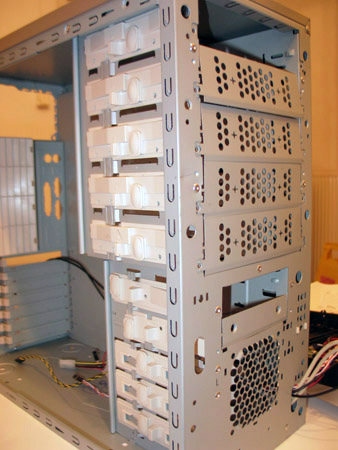
All together, we have five 5,25″ drive bays and five 3,5″ drive bays (three of them are used for your HD’s). The sad part is you won’t find removable bay housing in this case. It would be neat though since it’s easier to assamble your computer.
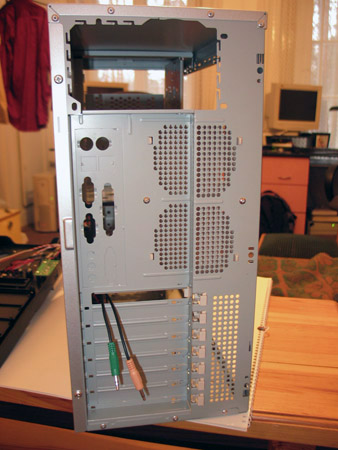
The front and the back of the case: nothing special, standard ventilation areas. One thing that bothered me and was mentioned above is lack of audio-to-motherboard cables. All you get is an extension that goes from front panel to your audio I/O ports – a technique I thought most manufacturers left behind. It’s simply annoying and most motherboard vendors now include onboard audio connectors.
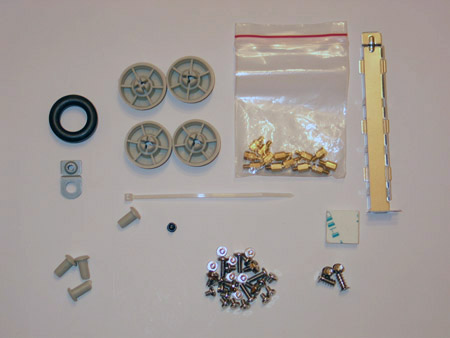
This is standard bundle included with the case. You will find all the above items in a brown box along with a blueprint of the Samurai case – might be useful if you want to see what type of different screws they gave you.
External Design![]()
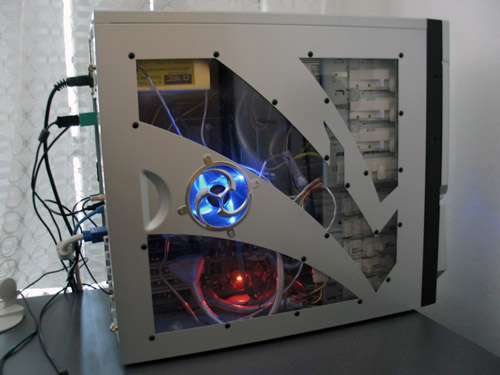
Now that I have covered the internal structure and design, let’s check out the externals. The case is painted in nice silver color (there are others available: red and black), the front panel is coated in balck which overall is a nice color scheme.
Sunbeam decided to go with thumbscrews instead of regular ones, a big plus since not everyone walks with a screwdriver in hand – it’s just more convenient and handy

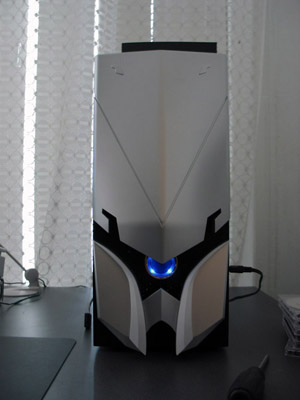
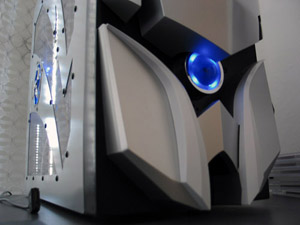
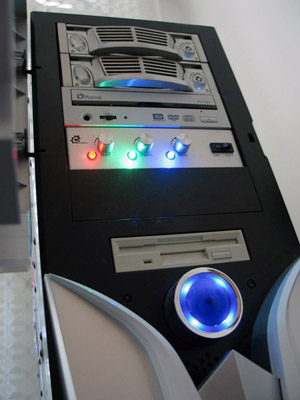
The front of the case resembles a Samurai mask indeed, a fancy addition to spice up the boring front panel. However I’m not very fond of having thick plastic doors and things sticking out of my front panel, but some will appreciate it I guess. The big LED is cool though.
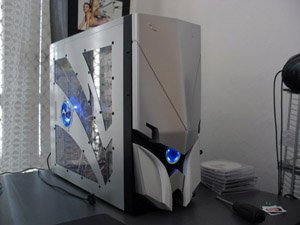

The acrylic window is neatly designed although it exposes the drive bays inside too much in my opinion. As you can see, the case has a very aggressive feel to it, Sunbeam definitely achieved that effect.
I don’t think I mentioned this, but the case came with broken front bezel doors. It’s easily breakable since it sticks out by few inches. As far as I know, Sunbeam decided to ship the front panels seperately because they have had many complaints from their customers. When I got the replacement doors I found out that having to align the doors with the panel can be painful. The deal is that the hindges are very loose and the doors are not exactly “straight”. The ones I got were hard to align but after fifteen minutes or so they were closing correctly.
Another aspect is that if you have HD racks or flashy panels controlling your lights like I do, this case may not be for you – unless you don’t care for the looks and want the doors closed. To tell you the truth the case looks ok without the front doors. Also the reset button is pushed in too much and simply small. If you have fat fingers you’ll need something small to push in the button, even I had problems with resetting the machine and my fingers aren’t thick at all.
Let’s look at the installation procedure and some conclusions shall we?
Installation and Conclusion
As I mentioned before the case is very spacious inside so having to install your motherboard shouldn’t give you headaches. Sunbeam did not make the motherboard tray removable. It’s a low budget case so it’s understandable, however it still would be nice to see one. For that reason I always install my CPU outside of the case. Why?
- More space
- Less probability you will damage your CPU or a motherboard component
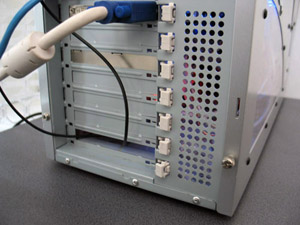
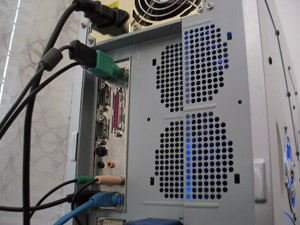
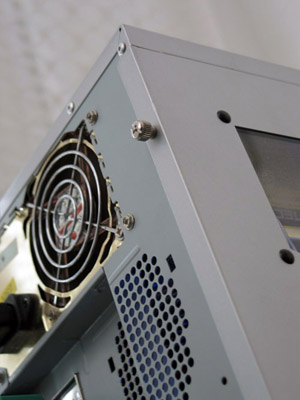
Above you can see audio cables going from the front panel to the I/O ports in the back of the case. If you have 80mm fans, you can easily mount them in the rear of the case or just put them inside the fan bracket which is included. One more complaint when doing 5,25″ device installation is the tool free kit. First of all, you might find that it’s hard to assamble this thing. Just give it a few tries and you should be golden. Make sure you align the holes on the kit with the holes on your device, otherwise it will not hold in place.
Overall Sunbeam’s Samurai case is a well designed low-budget project. If you are looking for cheap yet fancy case you should give Samurai a try. Although power supply is not included in this unit you are free to choose any ATX power house you like; you are not stranded with some no-name PS. Sunbeam also sells power supplies so you should definitely check this out. The included window fan is a nice addition to this whole package. It has four LEDs which give a nice blue-ish glow to the fan. On the bad side, the acrylic window shows off too much of the inside; bay housing to be exact. The window could have been cut a little shorter, but I guess they wanted to keep the design as is. Thumb screws and tool free kits are most welcomed here, too bad no removable mobo tray. Another minus is the inside is made out of steel, aluminum would be more appreciated considering this case is quite heavy. For around $50 bucks this case is a good bargain.
Pros:
+ Spacious
+ Tool free kits
+ Side window
+ 80 mm LED fan
+ Five 5,25″ drive bays
Cons:
– Steel chassis
– Heavy
– No front panel audio-to-motherboard cables
– No removable motherboard tray
With overall good design and performance, Sunbeam Samurai gets the rating of 7,5 (Good).


