The Galaxy case from Sansun is a case that tries to both look stylish while distinguish itself from other cheaper cases.
INTRODUCTION
There is a story going around that claims that Henry Ford once said that ”you can buy the T-Ford in any color as long as you choose black”. I don’t know if it is true or just another urban myth (and I am too lazy to research it) but the same could have been said about the computer business 10-15 years ago. You could buy a computer case in any color you want as long as it was beige. The early IBM PC’s were beige. The early MAC’s were beige. The C64 and Amiga were beige. Simply put, most cases you could buy were beige or some variation of beige.
Thank god things have change dramatically since then. These days you can get cases in all sorts of colors and designs. Some are very stylish and modest looking (like the Antec P180 or the Coolermaster CM Stacker) while others are a bit more extravagant (like the NZXT Lexa or the Sansun Bat).
The Sansun Galaxy which I am reviewing today falls in the middle. It tries to be stylish and modest while still having some design features that stand out.
FEATURES AND SPECIFICATIONS
The Sansun Galaxy case is an ATX/BTX case. The main features are:
- Meshed frontal design to scatter thermal inside the casing
- Dual frontal fan for high heat dispatching for inside case bay
- Temperature display on front panel
- ATX and BTX form factor
- Incredible Air duct design can be installed
- 9 x 5.25 bays
- Screwless structure
- Optional Meshed circle side panel
Let’s take a look at the specifications
|
Model No:
|
SN-C002
|
|
Case Type:
|
Midi Tower
|
|
Case Dimension(mm):
|
200(W)x520(D)x430(H)
|
|
Chassis Dimension(mm):
|
200(W)x480(D)x430(H)
|
|
Drive Bays:
|
5.25″ x 9(Exposed) 3.5″ x 4(Hidden)
|
|
Sheet Metal Material:
|
0.6~0.7mm SECC
|
|
Power Supply:
|
PS2
|
|
M/B From Factor:
|
ATX,Micro ATX
|
|
Cooling Fans:
|
Front/90 or 120mm;Rear/120mm
|
|
Case Color:
|
Black
|
|
Net Weight:
|
6.3Kg
|
|
Optional:
|
Cooling Fan Duct System
|
|
Front (I/O):
|
USB2.0x2 , Microphonex1 ,Earphone ,IEEE1394
|
THE CASE
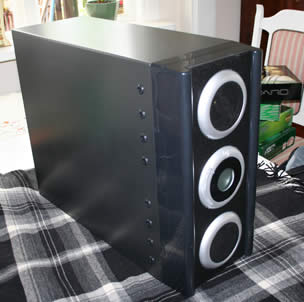
The case I got didn’t come with the optional Cooling Fan Duct system. Even though the case is not made or aluminan it is quite light. There’s a fair bit of plastic in the front that helps keep the weight down without making the case look to cheap.
The Front
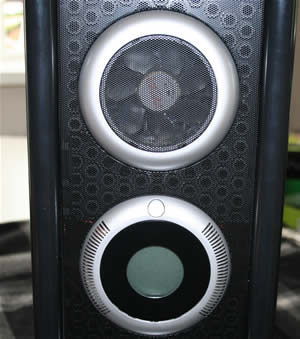
The thing you notice right from the start is the front of the case. Three large circles are placed on the front. Two hide 80 mm fans while the third middle circle has a LCD display that shows various information about the computer.
The whole front is made of plastic and swings open to the right. No drive-bay is accessible while the front is closed which means you have to open it up all the time when putting in a CD or taking out a CD. I personally prefer cases where you have access to at least one 5.25” drive bay even while the front is closed.
The reset-button sits to the left of the floppy-bay.
Another curious decision from Sansun’s part is that you won’t find a reset-button on the outside of the case. Instead you have to open the front to find the reset button hidden away. Last but not least there are no power-led or HD-led.
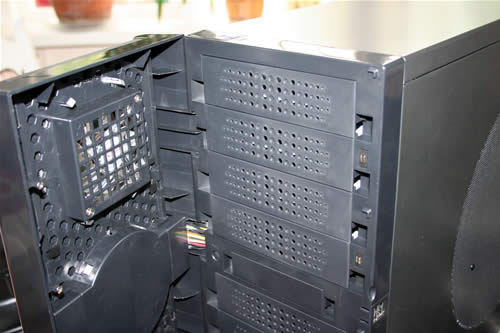
Behind the front you’ll find 9 (!) 5.25 drive bays and a floppy bay. They all are behind perforated plastic covers, probably to help the airflow. Strangely enough though the upper 4 or 5 metal covers that sit behind the plastic covers are not perforated meaning you loose some of the air-flow anyway. I recommend removing them and just keeping the plastic covers.
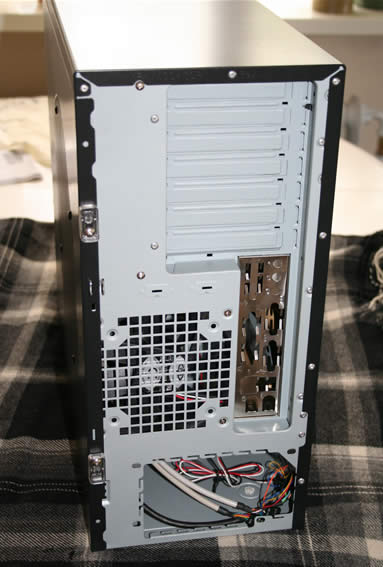
The back
In the back you’ll notice that this is primarily a BTX-case since the PSU now sits in the bottom. I must admit I don’t know how much this affects an ATX-motherboard though. Other than that the case has a normal backside.
The side panels
I am used to open cases on the left side when you look from the front but this case opens from the other side. The motherboard now is placed on the left side which once again is completely backwards to what I am used to. This is of course due to being both a BTX and ATX case.
You can only remove one of the side panels, the right one. The left side panel is bolted shut and cannot be removed. The right side panel is secured with a weird plastic contraption and I personally would have preferred nice thumbscrews instead. At least it is possible to open the side-panel without having to unscrew the small screws. You just flick the plastic switch instead.
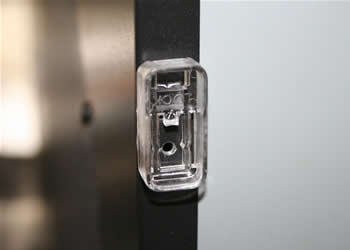
By flicking 2 of these up you can remove the right panel
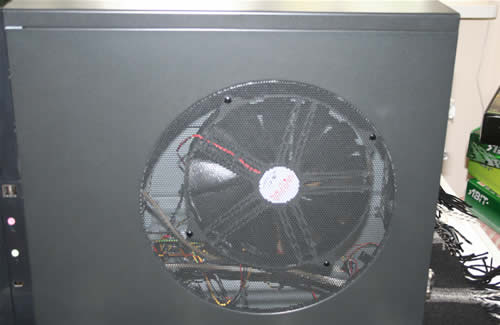
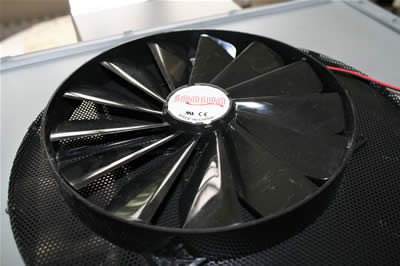
One of this cases more interesting features is placed on the right side panel: a 25 cm fan. Yes, you read it right, it’s a huge fan. It is mounted for exhaust and as far as I can see there is no easy way to exchange it if needed. It attached tightly to the side.
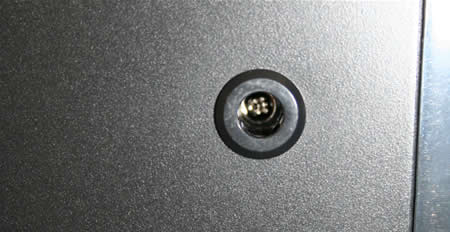
On the left side panel of the case you’ll notice a series of small holes. These are actually holes where you put in screws to secure items you put in the 5.25” bays. It’s a novel approach which at first I didn’t like but which warmed on me since it actually is quite nice not to have to remove both sides just to unscrew a CD-drive.

Each of these holes is used to fasten a 5.25″ drive in the
bays from the left side with a screw.
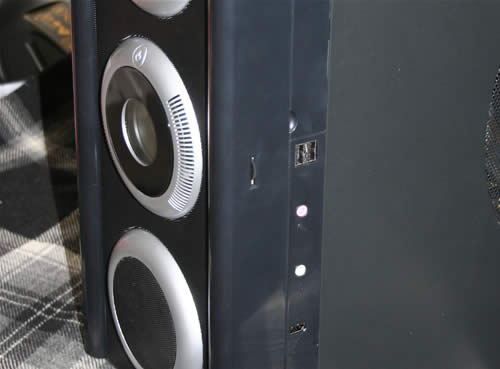
Last but not least you’ll find audio in/out, USB and firewire on the right side. There’s also a scroll wheel which is used to switch settings on the LCD-panel.
The inside
Let us move inside the case. The case has lots of space inside. This is something I value a lot since I hate to try to squeeze in motherboards. In this case you can easily put in/remove a motherboard without having to remove 5.25” drives or the PSU.
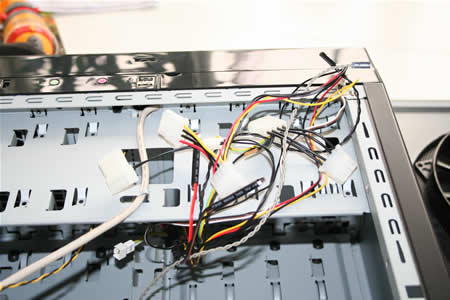
From the front of the case comes a bunch of cables. Since Sansun in their infinite wisdom choose not to include a manual with the case you’ll left guessing what each cable does. You’ll find:
- Three connectors for 3-pin fans (CPU, VGA and ‘system’)
- Three thermal sensors (again CPU, VGA and ‘system’)
- 4-pin Molex connector for power to the front LCD
- 4-pin Molex connector for power to the front fans (3 pin with an adapter for the Molex connector)
- 4-pin Molex connector for power to the blue leds in the front (3 pin with an adapter for the Molex connector)
- One USB 2.0, one Firewire and one audio (both AC97 and HD-audio) cable for the front-connectors.
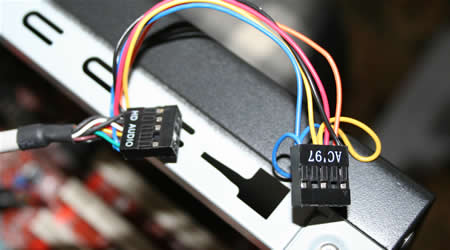
You can either hook the front audio-connectors
to a motherboard with AC97-audio or with HD-audio
A few things directly stand out when looking at the cables.
- They are short! I would love to hook the front fans up to the motherboard but the 3-pin connector doesn’t even reach out from the 5.25” slots and you need to use the Molex adapter.
- The CPU-fan connector doesn’t include a splitter so you can hook it up to the motherboard also. While most motherboards these days allow you to ignore it if the CPU fan isn’t spinning some do not.
- All the cables stick out through a hole in the front and continue into the front. Since you are opening and closing the front quite often I’m a bit worried you might put a lot of wear and tear on the cables.
As I mentioned earlier drives that are put in the 5.25” drive bays are secured not only from the open right side but also from the left side panel through the holes.
Harddrives can be placed in the 3.5” drive cage that is placed on the bottom of the case. The cage can accommodate up to 4 drives. Because of the placement of the drives there is virtually no airflow going over them. You secure the drives from the bottom of the case. This means you have to turn the whole case on the side just to access the drives. The drives are pointed towards the bottom and while there are a few small holes in the bottom there is barely room for any air to flow in under the case.
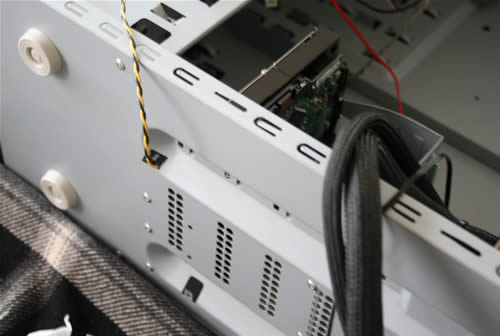
The cage sits on the bottom and is secured through screw-holes in the bottom.
The pattern of holes I guess is to get some air to the drives.
So far I cannot agree with Sansun that the case has a “ Screwless structure”. Whether it is a 5.25” drive or a 3.5” hard drive, you have to screw them on with normal screws. The only truly screwless part is the way expansion cards are held down. On the other hand it works very well. I’ve tried various types of toolless/screwless designs but Sansun’s are one of the better.
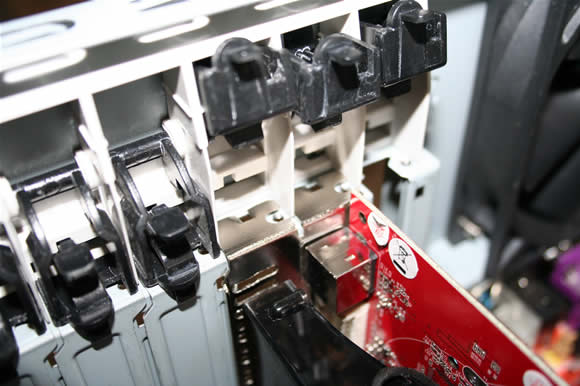
It even works very well with Dual-slot video cards, something I have had problems with on other cases.
HOOKING EVERYTHING UP
As I mentioned earlier the case itself is very roomy. Thus I expected no real issues when installing all the bits and pieces in the case. While the inside is made of sheet metal there were not real problems with sharp edges that could slice my hands open.
After a minor hick-up where the machine refused to start (and I was cursing the case) everything started up just fine (it turned out to be the PSU). Then it was time to close the right side door and I realized that I was screwed.
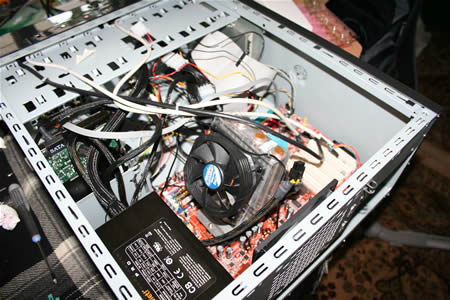
Take a look at the image above. The CPU cooler I am using is the Asetek Vapochill (reviewed here). The cooler is a bit taller than the regular AMD-cooler but not extraordinary tall (not like the Tuniq Tower cooler I reviewed here) . Still, when I put the right side door back with it’s 25 cm fan I realized that it didn’t fit. The fan connected with the CPU-cooler. So, if you plan on using a CPU-cooler which is taller than the default AMD-coolers, be aware it might not fit with the door.
The LCD on the front displays the temperature and fan speed of the CPU, VGA and System (if you have hooked them up that is) and also allows you to control the fan speed. The speed is set with the scroll wheel to the right side of the case and can be set from 1 (lowest speed) to 5 (highest speed).
The front of the case glows in a nice blue color during usage and looks quite good. The sound-level of the fans is ok. I’ve heard a lot worse and with the exception of the 25cm fan you should be able to switch for even queter fans if needed.
CONCLUSION
This is a pretty good case with some minor faults.
Let’s first look at the good things:
Looks good
Sansun has managed to make a case that doesn’t look cheap (like their horrible Bat-case does) and yet has some features that makes it stand out from “no-name” cases
Ok features
The case comes with lots of fans (including the 25 cm fan) as well as a nice LCD that help you keep an eye on temperatures in the case. The fans also are of the more quiet sort.
Much room in the case
The case is well organized inside and has lots of room for the motherboard and tons of bays for 5.25” drives.
The not so good things with the case are:
Has a problem with tall CPU-coolers
Be aware that the right side door weith its 25cm fan might not fit back if you got a to tall cooler.
No documentation
Come on Sansun. Is it really that hard not to include some info on the case and the LCD?
Few included screws and other items
Compared to a lot of other both cheaper and more expensive cases the included assortment of screws feels tiny.
Lack of airflow over the hard drives
The placement of the hard drives means that not only do you have to tip the whole case over just to remove a hard drive but you also get very little airflow over them.
No access to 5.25” when front is closed
Just one opening would have been enough. I hate having to open the front every time I have to take out or put in a CD.
Short cables
The cables from the front are a bit on the short side.
If you can live with the minor flaws (and I think I could) then the case is a solid case that won’t dissapoint.


