Ready to take the plunge into water cooling but not sure how to do it? Thermaltake would like to offer their all-in-one kit dubbed the Bigwater 760i as a solution. Making it easy for all of us to switch to water is one thing but offering a competitive kit at a competitive price is another. Can Thermaltake pull it off?
INTRODUCTION
Most computer enthusiasts know that water is inherently better than air when it comes to cooling our nuclear powered rigs. This is primarily due to water’s capability to hold and transport more heat than air within the same volume of space. It is this property that has long allured users to take the plunge and stick water inside their machine regardless of the dangers. It is these same dangers that have kept water cooling on the fringe of mainstream acceptance. No one wants to deal with the reality of coming home to a dead machine only to realize the cause of the untimely demise was a leak in their water cooling loop. And so company after company has sought to solve this problem and devise a system so easy, a system so fool proof that it could rival the ease of air cooling while maintaining the benefits of water cooling. Not an easy feat to be sure. Enter Thermaltake, a company dedicated to cooling since 1999. With their vast amount of experience and R&D resources they stand ready to bring water cooling to the mainstream.
Presenting the Thermaltake Bigwater 760i, an internal, all-in-one water cooling solution for the masses. It has an adjustable LED fan, easy to read reservoir, quick disconnect fittings and a whole lot more. But does it have what it takes to supplant air cooling as the choice of cooling for millions of users? I intend to find out.
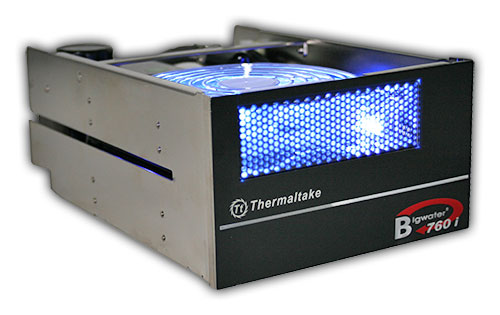
Thermaltake Bigwater 760i
Thermaltake: The company
![]()
Established in 1999, Thermaltake is a company many enthusiasts have come to know for providing a wide range of products including cases, fans, heat sinks, water cooling kits, fan controllers, and accessories. The list goes on and on. Making it in this business is hard enough let alone sticking around for over eight years and building a name for yourself. Here is a snippet from the Thermaltake web site:
Thermaltake Technology Co., Ltd.
started its core business based on our extensive knowledge of PC thermal management during the era where the area of performance CPU cooling was only exclusive for “overclockers” or PC enthusiasts. With the company’s initial launch of Orb coolers, it created waves of shocks and appraisals throughout the gaming and overclocking communities. Thermaltake quickly became the name gamers turn to when they need high-end and reliable thermal solutions.With company’s core business of CPU cooling still growing at a vast rate, Thermaltake made another grand entry to the PC chassis industry. To date, Thermaltake has always been considered as the pioneering company that revolutionized the PC chassis industry with Xaser series enclosures. The typical and traditional beige and plastic front panel design was outdone by Xaser series chassis’s atypical gaming red and aluminum front panel. It was also the first enclosure available to public with Hardcano unit which provided users full control over computer’s thermal management system.
In the year 2002, Thermaltake announced Purepower line of power supply units for the ever-growing power-hungry PCs. Purepower series PSU quickly gained recognition with its extensive warranty and high-reliability guaranty.
Today, Thermaltake has grown into a world-class company with state-of-the-art testing and R&D facility based in Taiwan along with 60+ engineers and ID team covering each application segment such as Liquid Cooling, Air Cooling, PC Enclosure and Power Supply for main-stream users, high-end solutions, system integrators and industrial applications; thus achieve Thermaltake’s company motto, ” COOLall YOUR LIFE ” !
SPECIFICATIONS
Here is a breakdown of the Bigwater 760i. There are a few points are worth mentioning which can be found further down the page.
For those of you who skipped ahead to my comments I will save you the time of reading through all the specs. The water block is made entirely of copper and the radiator is made of aluminum. This creates the opportunity for galvanic corrosion to occur. What is galvanic corrosion and why should you care?
Source: Wikipedia. (Our emphasis)
Galvanic corrosion is an electrochemical process in which one metal corrodes preferentially when it is in contact with a different type of metal and both metals are in an electrolyte.
When two or more different sorts of metal come into contact in the presence of an electrolyte a galvanic couple is set up as different metals have different electrode potentials. The electrolyte provides a means for ion migration whereby metallic ions can move from the anode to the cathode. This leads to the anodic metal corroding more quickly than it otherwise would; the corrosion of the cathodic metal is retarded even to the point of stopping. The presence of electrolyte and a conducting path between the metals may cause corrosion where otherwise neither metal alone would have corroded.
Since we have two dissimilar metals here in the presence of an electrolyte we encounter a situation where galvanic corrosion can occur. Additives to the cooling solution help to slow the process but over time the metals will break down. This is not an ideal situation but it is also one that will not occur over a day, week, or month. It will take a while to occur.
The other point worth mentioning is that the pump is rated for 80,000 hours of operation and the fan is rated for 40,000 hours. Keeping your system well maintained will result in you needing to change out the fan at least once prior to the pump failing. Not a huge deal when you do the math and come up with four and half years of constant duty for the fan.
PACKAGING
Packaging on the Bigwater 760i is top notch. Complete with the molded styrofoam padding, the 760i can stand up to even the most determined delivery person.
Click a picture to see a larger view
 |
 |
 |
| Box Front | Box Rear | Box Open |
CONTENTS & BASE
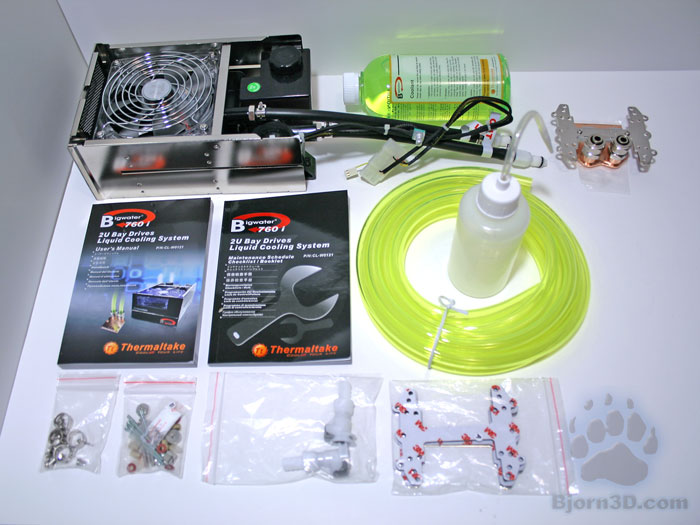
Here we see one of the reasons I believe water cooling kits have been slow to gain acceptance. The sheer amount of hardware included is enough to confound anyone. Thankfully Thermaltake has realized this and included two very detailed manuals to walk you through the entire process of setting up your new kit.

Click to enlarge
Looking at the base we see how flat Thermaltake was able to make it. The polish of the base is a nice feature but shiny does not make a base flat and it is this flatness that we are looking for. This will give better contact with the CPU and thus serve to lower temperatures.
INSTALLATION
Installing the Bigwater 760i into your system is an involved process and one that I feel may be a large reason why more people stay away from water cooling. When a high end air cooler take anywhere from five to fifteen minutes to install, it is easy to see how the install process shown here can be viewed as laborious.
The install process begins with the mounting of the back plate and stand offs. My motherboard is already outside of the case so this step took less time than usual. Should you already have your motherboard inside a case you will need to remove it to complete this step.
Once you have installed the back plate, stand offs and thermal paste the next step is to mount the block. Here you place the block over the stand offs of slip it into place followed by tightening the thumbscrews in an alternating fashion to ensure equal pressure across the water block.
Once the water block is in place we can move to installing the tubing. You will first need to unscrew the compressions fitting from the water block and slip it on the tubing. You may then place the tubing onto the valve and tighten the compression fitting. You will want to use a tool here to tighten the fitting sufficiently so as to prevent any leaks. Tightening by hand will not cut it here. Don’t forget to install the tube for the other valve.
Click a picture to see a larger view
 |
 |
 |
| Back plate & stand offs | Water block installed | Tubing ready to go |
We are now ready to install the main unit of the 760i. As per Thermaltake’s included instructions, I will install the 760i in the third or fourth slot from the top since I have a full ATX tower. Primarily you want to have your reservoir at the highest point in the loop since this will help to collect the air bubbles for purging.
I first remove the front panel shields from my case in preparation for the 760i.
I begin by sliding the 760i in slowly making sure nothing gets snagged or caught on the way in.
Once I place the unit all the way in all that is left is to tighten the sixteen screws (eight per side). I am unsure why Thermaltake only includes twelve screws in the package. Also shown in this picture is the knob to control the speed of the fan.
Click a picture to see a larger view
 |
 |
 |
| Front panels removed | 760i sliding into place | Screws tightened and ready to go |
Still with me? Good because we are in the home stretch.
Now that we have our main unit installed in our system and our tubing attached to our water block we can cut the tubing to the necessary length of our needs. Once we have done that we will need to place one of the included clamps over the end of the tube and slide on our quick connect fitting. You want to use needle nose pliers here to really tighten the clamps. I tried using only my fingers and found out quickly how much easier on my hands it was to just follow the directions and find some pliers.
Once both tubes are cut and installed with quick connect fittings we can connect them to the main unit.
Once that is finished all we need to do is plug in the four pin plug to our power supply to power the unit and plug in the yellow wire to the motherboard to monitor the speed of our unit.
Click a picture to see a larger view
 |
 |
 |
| Quick connect fitting & clamp | Tubing attached to main unit | Powered up and ready to go |
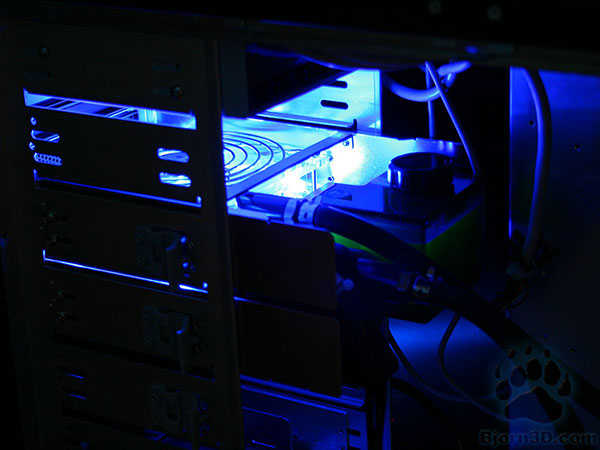
Thermaltake Bigwater 760i in action
TEST SETUP
All tests were conducted on the following platforms. A format of the hard drives followed by a fresh install of the OS was done. The latest drivers were then installed and all non-essential applications were halted.
| Test Platform | |
| Processor | Intel Core 2 Duo E6420 |
| Motherboard | XFX 650i Ultra |
| Memory | 2 GB (2 x 1 GB) G.Skill DDR2-800 – 650i |
| Drive(s) | 1 – Seagate 80GB Barracuda SATA 1 – Samsung HD501LJ SATA |
| Graphics | ASUS 8800GT TOP |
| Sound | Soundblaster Audigy 2 ZS |
| Cooling | Cooler 1 – Thermaltake Bigwater 760i Cooler 2 – Corsair Nautilus 500 Cooler 3 – Noctua NH-U12P Cooler 4 – Intel Stock Cooler |
| Power Supply | OCZ GameXStream 850 watts |
| Display | Westinghouse 37″ LVM-37W3 |
| Case | Tagan A+ Black Pearl |
| OS | Windows XP Pro SP2 |
Testing will occur after a burn in period of twenty-four hours. This will allow enough time for all air bubbles to be purged from the system allowing for maximum performance. Ambient temperature is maintained at 25C during the entire duration of testing.
We will test the cooling capacity of the 760i at the CPU’s default setting of 2.1 GHz with 1.35 volts and at the CPU’s overclocked settings of 3.4 GHz with 1.4875 volts. This will allow us to show how well the kit can keep up as the heat levels rise.
Additionally, I will be testing the sound levels from the 760i. Using a Reliability Direct AR824 placed three feet away from the case I will measure the sound levels at the units lowest fan setting as well as its highest fan setting.
TEMPERATURE RESULTS
SOUND RESULTS
With everything turned off, the sound levels in the office measured 38.0 dB(A). This is a very quiet room. The measurements for the Noctua heat sink were under this threshold and as such is listed as 38.0 dB(A).
CONCLUSION
The Bigwater from 760i is one of those kits that has a lot of potential but doesn’t realize that potential at the end of the day. For starters, why would I want to keep opening up my case to adjust the fan speed? I also don’t agree with the placement of the quick disconnect fittings or the lengthy installation process. The performance is mediocre and the price is expensive for the amount of cooling you receive. But I am not going to be irresponsible and harp on every problem without presenting a solution.
I think Thermaltake would do well to move the speed control knob to the front of the unit where there is ample room. This would make is easy to access and adjust fan speed without having to dig inside the case. It would also make for a more elegant solution. The quick disconnect fittings should be placed directly on the unit as far away from the motherboard and CPU as possible. For anyone who has ever used these fittings you know that when you disconnect them a little bit of fluid will leak out. Why make the situation any more risky than it needs to be?
Regarding the installation process, it is just to long. The Nautilus 500 demonstrates that entry level water cooling does not have to take a long time to set up. In fact I think Thermaltake should consider a pre-plumed kit. This would take much of the work/hassle out of setting up the Bigwater and make it even easier for newcomers to try water cooling.
This brings me to the final point; value. As an entry level kit you are going to be dealing with a lot of competition from the high end air-coolers and if you can’t justify the extra cost with better performance you are going to lose every time in this game. A quick search reveals this kit costing $150.00 USD before tax and shipping at the time of writing. At this price you have to need to offer better performance and if Thermaltake switches to a copper radiator, preferably a Black Ice radiator of sorts, they can accomplish this. This will also remove the galvanic corrosion that will occur.
FINAL WORDS
Performance: 6.0/10 – Performs only slightly better than the Intel stock cooler but at the cost of higher noise levels.
Bundle: 8.0/10 – Thermaltake gives you everything needed to get you up and running. The included hardware is impressive if not daunting.
Value: 4.0/10 – At almost three times the price of quality air coolers with less performance it is hard to find value in a kit such as this until a new revision comes out.
Pros:
+ LED Fan
+ Allows new users to learn about water cooling
Cons:
– Loud pump & fan
– Expensive
– Long installation process.
– Performance marginally better than stock cooler
Final score: 6.0 out of 10 (Pretty good)


