The Armoris Is both functional, stylish, and also is easy enough for a novice to assemble his/her computer components, while at the same time provide thenecessary airflow needed to keep these components cool.
INTRODUCTION
Chassis, are the most looked at piece of computer component’s we have. Well, when our friends, family, or when we take pictures of our computers the first thing that grabs our eyes is the chassis.
As the old saying goes the first impression is the one that is remembered. With today’s computer component’s, chassis beauty has to be more then just skin deep. A chassis has to be functional on the interior as well. Whats the point in having a drop dead gorgeous chassis if it has the cooling capacity of a blow torch?
Today myself and Bjorn3D are going to bring you a chassis from Max Cube, the Armoris.
Max Cube is a computer company I never heard about till I received this chassis, in fact I completely forgot where I got the Armoris Chassis from. I had to look at the box this chassis came in and Google the name Armoris to even get a clue.
SPECIFICATIONS
| SPECIFICATIONS | |
| Model Name | Amoris 6010 |
| Case Type | Tower |
| Material | Chassis: SGCC / Bezel: Metal mesh + ABS |
| Motherboard | 12” X 9.6” (ATX), 9.6” X 9.6” (Micro ATX) |
| Drive Bay | External: 5.25″ x 4, 3.5″ x 2 / Internal: 3.5″ x 4 |
| Expansion Slot | 7 |
| Front I/O Port | USB2.0 x 4, eSATA x 1, Audio, MIC |
| Cooling | Front (intake): 12cm Blue LED Fan x 1 Rear (exhaust): 12cm Blue LED Fan x 1 |
| Power Supply | Support Standard ATX PS2 or EPS |
| Dimensions | With Bezel: 210 mm (W) x 480 mm (H) x 510 mm (D) W/O Bezel: 200 mm (W) x 420 mm (H) x 450.7 mm (D) |
| Clear CMOS | Yes |
| Security Lock | Yes |
A couple of things that stand out with this chassis is the rearward clear CMOS switch (not tested, because the motherboard tested had one) also a chassis intrusion switch, again I did not test this feature, mainly I would not even know how to hook this switch up to the motherboard, plus I did not want to keep resetting it through the BIOS every time I entered the chassis.
PACKAGING

Starting off on a 3/4 view of the box the Armoris chassis came in, Max Cube gives us an image of the chassis on the outside. What this? It appears a corner got smashed in during transporting. Sometimes I think the UPS guys try and kick for field goals with the boxes.

Yep, the corner is definitely smashed in. Lets hope that Max Cube did just as good of a job packaging the Armoris as they did with the presentation of the box.

Well it is apparent that Max cube did use good packing to keep the chassis from getting damaged during shipping.

 |
 |
 |
 |
 |
 |
 |
 |
Removing the chassis from the box, I did a quick look through making sure everything was in good order. So far the chassis looks good, so on with the review. As you can see Max Cube put a plastic type wrap on certain areas of the Armoris to make sure that those parts did not get scratched during shipping.
OVERVIEW
 |
 |

It is time for us to take a look at how Max Cube built the Armoris chassis. Looking at the back side of this chassis, we can tell this chassis has pretty much the standard layout we have seen on so many different chassis. Also Max Cube uses a clear CMOS button for those who still don’t have that rear button on their motherboards.
 |
 |
 |
 |
The one thing I found to be rather unique with this chassis, was what Max Cube used for the feet of the Armoris. Looking at one these images more closely you will notice there is a gear inside on of the feet of this chassis.
 |
 |

Looking at the front top and the IO ports on the Armoris chassis. The power/reset buttons both look unique also have a rather soft feel to them. There is a sticker that will have to be removed to gain access to the E-SATA port.
 |
 |

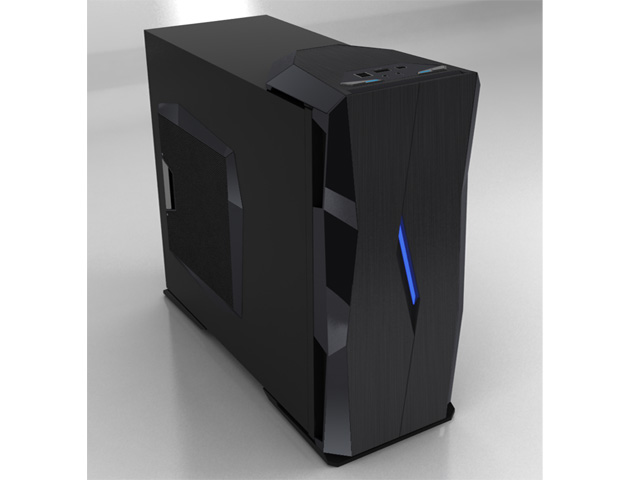
Time for the front of the Armoris chassis. The front door utilizes a split design. Opening this front door was effortless.
 |
 |
Now we get to see where the 5.25″ drives are placed in this chassis. The covers used has a mesh over them to help improve airflow in the chassis.

The top front cover on the armoris chassis also uses a gear to help open the doors. These doors are rather smooth when opening them.
 |
 |
Removing the protective plastic over the side panel. Max Cube also uses a mesh over the side panel to help with airflow.

Time for us to go over the interior of the chassis.
 |
 |
To install the 5.25″ drives is a simple task as the Armoris is virtually toolless. The 5.25″ drives, HDD’s or PCI expansion cards do not need screws to secure them. To put in a 5.25″ drive (or device) just turn the green knob to the left till it stops, insert your device, then turn to the right to secure that device into place. The 3.5″ devices are held in by the same means.
 |
 |
 |
 |
 |
 |

The HDD carriers are pretty simple to remove and place back into there respective spots. I will go over how to install the HDD later in the review. These HDD carriers will not support the use of a 2.5″ HDD/SSD. If you have these types of drives you will have to get creative on there mounting. Thankfully I have some 3.5″ HDD’s to put into this case.
 |
 |
The front IO/fan port connectors, and the rear fan connector.
 |
&  |
 |
 |
This is where our PCI expansion cards go. To open these up, was a simple enough task, simply squeeze the two tabs together and slide back. The only issue I had was when I put in a expansion card. Once I locked that card into place the card would still wiggle in the port. It did not wiggle a whole lot but I would prefer no movement on my expasion cards.

The included screws and motherboard stand-offs to secure the motherboard into place. This is the only time screws will be used.
 |
 |
 |
Just some added images of the armoris chassis.
INSTALLATION
Once my niece, (yep the same one who claimed the pink Xtrac Logic mouse pad from me) saw this chassis, she told me (mind you “Told” me) that she wanted to use it. She also informed me that if I did not allow her usage she would rip my arm off, and beat me with it. Who am I to argue with my niece, especially when she offers to bring bodily harm upon myself……

Well we need to put in the motherboard stand offs first.
 |
 |
Well since installing into this chassis was/is easy I went ahead and did the entire thing in one motion. There is enough room inside the chassis to accomidate large video cards and or CPU coolers. The only issue you will have with this chassis are the extremely large (long) GPU coolers.
 |
 |

Installing the HDD was again not hard, just be careful not to twist the cage to much because you could snap it in half.
 |
 |
 |
Everything installed, and ready.
ENDING THOUGHTS
The Max Cube Armoris is a good all round designed chassis that is both easy enough for a novice to use while giving an experienced builder the necessary airflow they may need.
There are only a couple of main issues I need to mention about the Armoris chassis. One being I prefer to have my PSU’s mounted on the bottom of the chassis as this is better for cable management as well as it helps airflow on or near the computer components. The semi loose nature of the PCI expansion locks is not a real con, but it does warrant to be mentioned. Lastly the chassis manufacturers need to consider utilizing 2.5″ HDD holders in their chassis. My niece only has 3.5″ drives, but I have 3 2.5″ HDD’s, and 1 3.5″ HDD. For myself to use this chassis I would have to make my own adapter to accommodate my unique system.
I could not find a price point on this chassis. So I will try a determine my score upon the basis of ease of installing, cooling capabilities, and overall looks.
- Performance 8
- Value ??
- Quality 8
- Warranty 8
- Features 7
- Innovation 7
Pros:
+Ease of installing computer components
+Good cooling capabilities
+Looks good on any computer desk
Cons:
–PSU mounted on top not on the bottom
I give the Armoris a: 8.0 and the Bjorn Seal of approval


