When it comes to water cooling, we need to keep our minds and thoughts open to the endless ways. This article pertains to one of those possible ways.
INTRODUCTION
Since the introduction of the GeForce 6000 series video cards, the need to run alternative cooling on these multi GPU’s as become mainstay. With the adding more video cards, comes the added heat these cards produce in our computers. The question remains, how do we set up our water blocks? Do we run these in the everyday standard we have all seen? By daisy chaining each video card to one another? What’s daisy chaining water blocks anyways? Well, let’s explain this before I continue. Daisy chaining water blocks is where you run two or more blocks together in the same loop example: Res> Pump> Video Card> Video Card> North Bridge> CPU> Rad> Res. The advantages of daisy chaining blocks is hose management. The bad thing is that each block that is added to the loop gets progressively hotter. Not to mention the flow of the water gets lower each time we hook up another component.
So, a lot of us enthusiasts have decided to run multi water cooled loop set ups in our computers. This tactic minimizes the progressive overheating of computer components, like daisy chaining does, and keeps our components at their coolest while at the same time allowing us to keep our flow rate at its highest. The problem is for these types is that hose management starts to become problematic. An example of a multi looped water cooling system is: Loop 1 Res> Pump> CPU> Rad> Res, Loop 2 Res> Pump> Video Card> Video Card> Rad> Res.
When water cooling multiple video cards we still daisy chain the two video cards together. This becomes increasingly problematic when dealing with “High Restrictive” video card water blocks. This guide is a modification of these types of cooling systems, and with a bit of time, luck, and also a lot of patience, they can be integrated into other aspects of water cooling.
So, without further ado, let’s get on with the guide.
TESTING METHODOLOGY
Before I go on with the testing procedure, let’s run down the system specs.
| Test Setup &Testing Methodology | |
| CPU | Lapped Core i7 920 @ 3.8 GHz |
| Motherboard | MSI X58 Platinum |
| Case | Cooler Master Cosmos |
| Memory | Gskill Trident 2000MHz |
| Video Card’s | HIS 4870, XFX 4870X2 |
| Hard Drives | 2 x Seagate 2.5″ HDD’s Raid-0, 1 160 gig WD HDD Backup. |
| CDRom Drive | Lite On Sata1 DVD Burner/ Lite On Blue ray |
| Power Supply | SilverStone 1200 watt PSU |
| CPU Speeds Used | 200 x 19 |
| Operating System Used | Microsoft Windows Seven 7100 |
| Type of Software Used During Testing | Gaming for several hours. |
| Video Card Cooler |
300 GPH Pump Koolance 487, 487×2 water blocks, Loop 2 |
| CPU Cooler |
300 GPH Pump Koolance 340 CPU water block, Loop 1 |
| Radiators | Loop 1, Swiftech 320 Radiator: Loop 2 Danger Den 240 GTX , Danger Den 120 GTX |
|
Any attempt to copy these system specifications will result in assimilation by your computer Assimilation COMPLETE !!!!! |
|
This is a guide of a how to. I will demonstrate the benefits of splitting the video card water cooling loop into two separate loops while using “High Restrictive” video card water blocks. At the end of this guide I will give you the temperatures of running one single video card and the results of running both video cards in a split water cooling loop. Because of the complications of running a daisy chained video card loop I am unable to give you the temperature results with this type of water cooling loop. As this type of cooling is extremely complicated and not exactly user friendly either, especially when you need to remove the video cards.
The video cards I will be basing this guide on is none other than my trusty HIS HD4870 Ice Q 4+ video card cooled by a Koolance 487 water block and my ever faithful XFX HD4870X2 being cooled by a 487X2 Koolance water block. The pump I am using with this guide is a Regant 170 GPH (Gallons Per Hour) Power head, with two Danger Den Radiators. The radiators are the 120 GTX rad that will be cooling the HD4870 and the 240 GTX rad that will cool the XFX HD4870X2 video cards. The fluid during this guide is Straight 100% white vinegar. I figured since I am pulling apart the video card loop for a guide, I might as well clean ’em up a bit. I added a bit of green/red dye to the vinegar to make it easier to see the flow rate. Once everything gets put back into the computer, the fluid then will be a blue Winterized Washer fluid 100% concentration that you would buy from Wally World (Walmart). Well, after I flush the video card water cooling loop completely clean, of course. And the pump will be changed to a much more powerful pump from the 170 GPH Regent Power Head to a 300 GPH Penguin model 1140 Power Head.
TEST SET UP PART 1
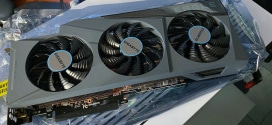
Well, time to give a quick look over of all of the parts I will be using.

To the far left of the picture are the two video cards with water blocks already attached to them. an HD4870, and an HD4870X2 video card. Moving to the right is one Danger Den 240 GTX radiator, a single 120 GTX radiator (both of these radiators are dual pass, dual rowed rads) and below these rads is a Regent 170 GPH Power head (modified for my specific needs), a Y-adapter, an extra bit of hose (there is more hose just not in the picture), and a bunch of worm drive clamps. I will be using an 8 cup measuring device as a res as the 4 cup shown was a tad too small for what I needed.

Now A good way to get a good seal on your hoses is to heat ’em up a bit before using with a lighter. All that is needed to warm up is about an half an inch on each end. So, when you use your hose clamps they will make a better seal.

Before I start all of the hooking up the blocks and such, I need to show you the actual flow rate of the Regent 170 GPH pump through a half inch hose.

A better up close picture, considering this is such a small pump, the water does flow quite nicely.

Since my water is green, I did not like that color so I added a bit of red into this mixture. Nice and dark.

Let’s start off with one video card. I am going to hook up an HD4870 to the 240GTX rad, simulating a single loop with one video card.

Yikes, Just one water block with one rad dropped my flow rate darn near by half.

Since I got two video cards, it is time to hook up a second video card and see how the flow rate is.
TEST SET UP PART 2
On the last page I hooked up a second video card to the loop, in effect, daisy chaining them. Starting off from there and continuing on.

Now it is hard to see, but the water flow has decreased a bit more since I hooked up a second video card in the loop. The water has become more subtle and less violent coming out of the end of the hose.

Now it is time to split a single water cooling loop into two separate loops. To do this you will need two rads, a Y-adapter, four equal lengths of hose (after the Y-adapter). The Y-adapter will keep the flow somewhat equalized. Pretty simple to hook up. As the picture shows how it is done, I come from the pump into a Y-adapter, then from the adapter 1 side I went into the HD4870, then to a Danger Den 120GTX rad, while the second side of the loop (other end of the Y-adapter) went into the HD 4870X2 video card, into a Danger Den 240 GTX rad, then returned into the res, to complete the loop. My roommate said all I needed to make this guide more complete was a kitchen sink.

Here is the Kitchen sink, hahaha.

Here is the end result of the return of the water from the single split water cooling loop. Notice the flow rate is about equal to each other, and each side has about the same flow rate as when I just ran with one video card. There is slight difference between the two returns. The one loop that has the HD4870 video card has a bit higher flow rate vs. the HD4870X2 video card. The reason for this is because I need to push more fluid through the HD4870X2/240 GTX rad.

This is just thrown in this guide to show you, what the flow rate would be without any video cards hooked up after the Y-adapter.

An up close image of the flow rate without the video cards while using a Y-adapter.
TESTING RESULTS
I am sorry I could not include daisy chained water cooled video cards. I will still include a single video card loop with just the HD4870 video card/Danger Den 120GTX radiator combo, and one with just the HD4870X2 video card/Danger Den 240GTX radiator combo. I will also include a single split loop with both video cards and both radiators hooked up.
This testing is performed, with a dual loop system, Loop 1 is cooling my CPU a Koolance 340 CPU water block paired up with a Swiftech 360 radiator, Loop 2 is the video card loop (already explained how these will be run), in a shared reservoir.
Idle Load

Starting off on idle temperatures, we see that the only difference between from running these video cards separately and in a split loop water cooling set up is a mere 3°C. The HIS HD4870 the difference was 2° from a 27°C single, increasing to 29°C while in a split water cooling set up. The XFX 4870X2 video card on core 1 increased 3°C from 25°C to 28°C and core 2 increased 2°C from 25°C to 27°C.
Full Load

Once I brought up these video cards from idle load to a full load, that gap decreases. At most, only separated by 2°C when comparing these video cards single vs. having these same video cards in a split loop water cooling set up. As always, there is a small margin of error. Your results will vary from machine to machine.
Screen Shots
Here are a couple of screen shots showing you the difference in the video card temperatures while in a split water cooling loop. As you can see, the temperatures only fluctuated by a mere 1°C between all 3 GPU cores. GPU0 is the HIS HD4870 (default clock speeds of 770/1000), GPU1/GPU2 is the XFX HD4870X2 (default clock speeds of 750/900 x2).

I allowed the computer to idle in Windows 7 desktop for roughly 30 mins. to get my idle temperatures.

I then ran Far Cry 2 at maximum resolution of 1920 x 1080 Ultra high x4 AA for 45 minutes to get my full load temperatures. I marked each core’s maximum temperatures reached in Riva Tuner.
ENDING THOUGHTS
When it comes to water cooling, there is no specific way on setting it up. We are no longer bound by “This is how it has to be done.” We have a lot more flexibility when setting up a water cooled rig. Whether you want a nice clean look or you are going for a more all out cooling performance no holds barred set up, water cooling gives us this flexibility, not to mention the WOW factor we get when our friends and family see our water cooled rigs.
The one thing most water cooling fanatics can agree on (and it is one of few things we do) is that the need to keep the amount of blocks, 90° bends, turns, and hoses as short as possible. By adding more of these to a water cooling rig your flow will come to a crawl and your temperatures will suffer greatly.
Like all water cooling set ups, going this route is normally expensive and should not be taken lightly. Using water cooling is not just for half crazed lunatics any more, yet it is not exactly for the new people coming into computers and/or overclocking in general.
The most important thing that you need to remember when it comes to water cooling is to try different ways and different things out. Ask around in your favorite forum for advice and PM people who have had experience in setting up water cooling. The only limitation you have is yourself.


Is it a good idea to use a y adapter to split the water going to two gpus on one hand and to your cpu block on another?
thanks