Arctic Cooling has brought to us an affordable GPU cooler that is both silent and cools well.
Introduction
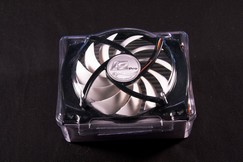
With all of these newer videocards come newer GPU coolers. As always Arctic Cooling is one of the first companies to present us a new GPU cooler. Today we are going to look at the Accelero L2 Pro. When I first received this GPU cooler I could have sworn that this was a CPU cooler and not a GPU cooler. When I looked closer at the packaging, I was finally convinced that this was in fact a GPU cooler and not a CPU cooler. Considering most GPU coolers we have been seeing these days are fairly long in length, I was not even remotely expecting a GPU cooler to look like this.
This GPU cooler fits a wide range of different types of GPU’s anywhere from a 1300 to a 5870 on the ATI side of videocards, from a FX5800 to the newer GT240 (except for the G90 series 8800 video cards and the 260-285GTX) from Nvidia videocards (more information on types of video cards visit here @ Arctic Cooling web site). We here at Bjorn3d.com are going to strap this GPU cooler to a proven little clocker of a videocard, the HD4770 video card.
Let’s break out the HD4770 videocard and lets see what this GPU cooler can do.
Specifications
| Specifications | |
| Dimensions | 119 L x 94 W x 51 H mm |
| Fan | 92mm x 1 |
| Fan speed | 900 – 2000 RPM (controlled by PWM) |
| Air flow | 27 CFM / 46m3/h |
| Maximum cooling capacity | 100 Watts |
| Weight | 250g |
| Warranty | 6 year |
Application
ATI Radeon HD 5870,5850,5770,5750
NVIDIA GeForce GT220/240,GTS250,9800
Up to 100 Watts
ATI Radeon
- HD 5870, 5850
- HD 5770, 5750
- HD 4850, 4830, 4730
- HD 4670, 4650
- HD 4550
- HD 3870, 3850
- HD 3650
- HD 3470, 3450
- HD 2600, 2400
- X1950 (Pro), X1900 (GT)
- X1800, X1600
- X1550, X1300 series
Nvidia GeForce
- GT220, GT240
- GTS250
- 9800, 9600, 9500, 9400
- 8800GT, 8800GTS(G92)
- 8600, 8500
- 7950, 7900, 7800
- 7600, 7300
- 6800, 6600
- FX5950, FX5900
- FX5800, FX5700 series
Like always, Arctic Cooling makes sure their products fits a wide range of different videocards.
Packaging
Like I said in the introduction, this GPU cooler looks just like a CPU cooler. Arctic Cooling pretty much uses the same blister packaging they have used for years on their GPU coolers.
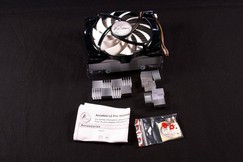
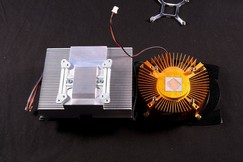
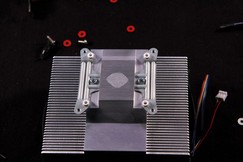
It was not until I took the heatsink out of the packaging, that I was convinced this heatsink is indeed for a GPU and not a CPU. Everything that comes with the Accelero L2 heatsink is shown above. Of course we get the heatsink with fan, we get 8 aluminum memory heatsinks, 8 aluminum power MOSFET/VRM heatsinks, a small bag of screws and stand offs, and an instruction booklet.
Overview
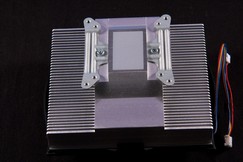
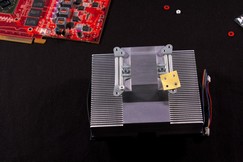
Lets start the overview of the Accelero L2 heatsink. Starting off on the base of the GPU cooler, Arctic Cooling uses a metal mounting system that secures the GPU cooler to our videocard. Also, Arctic Cooling places applies thermal paste over the majority of the base of this GPU cooler. Personally, I like to do several test fits and I wish Arctic Cooling include a small tube of thermal paste instead.
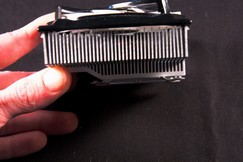
Looking at the fins of the Accelero L2 GPU cooler, this GPU cooler looks awfully close to an old AMD Athlon XP heatsink. Us old-school modders used to strap them on to our videocards, way back when the Earth was still new and when the Dinosaurs still were roaming the Earth as well. LOL. So there is no doubt in my mind that this GPU cooler should be able to cool a videocard quite well.
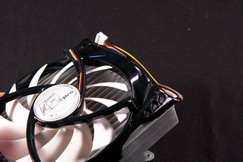
Arctic Cooling uses their signature white blades on a black frame fans. The use of the this cooler on the GPU should stand out in our chassis.
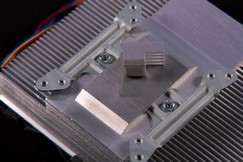
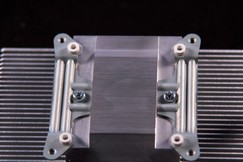
Time to move over the base of the GPU cooler. You can see how the base looks like with the pre-applied thermal paste removed. The base of the GPU cooler still has a semi rough feel to it. Not exactly what I like to see, but the base is still flat and should provide good cooling for our videocards.
Installation Part 1
Like all videocard and CPU cooler reviews I do, I will do a step by step guide on how this GPU cooler gets installed onto a HD4770 videocard. Your installation will vary from my own depending on the type of videocard you are using.
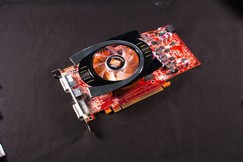
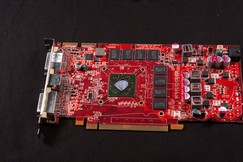
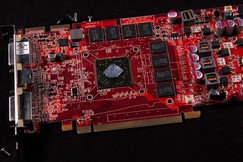
The videocard I am going to use is the VisionTek HD4770 videocard.
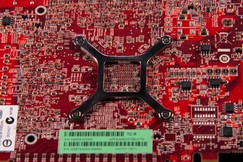
In order to install the Accelero L2 GPU cooler I need to remove the orginal GPU cooler from the videocard. This requires me to remove the videocard’s original mounting hardware that VisionTek uses. There are only 4 screws that secure the original heatsink to the HD4770 videocard.
|
|
|
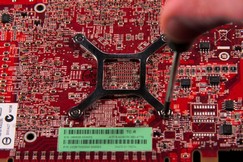

If you noticed I went in a diagonal pattern when I was removing the first two screws. This will ensure that the heatsink does not get tilted on the videocard during removal and will not result in damaging the videocard.
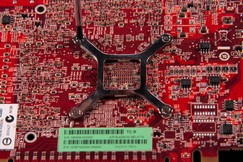
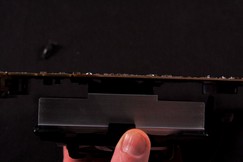
After the screws have been removed just gently lift up the videocard and the original GPU cooler should come right off. If it does not, then gently grip the GPU cooler give it a slight twist and carefully lift upwards. Note: do this step very CAREFULLY. The Accelero L2 GPU cooler dwarfs the original cooler.
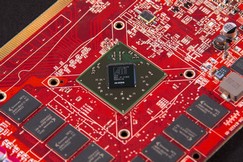
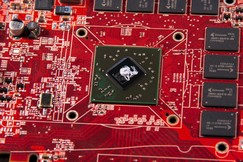
The naked HD4770 videocard core.
If you removed the pre-applied thermal paste, all you need to put on the core is a small 4mm drop of thermal paste onto the core of the videocard. If you left the thermal paste on the GPU cooler then just install it directly onto the videocard. I still recommend you do a couple of test fits anyways.
Since I like to do several test fits, I just placed the GPU cooler onto my videocard and held onto it with the weight of my fingers, then counted to 30 then removed the cooler.
What the thermal paste dispersal looks like after the first trial test fit. So far everything is looking good.

Again everything looks good as far as dispersal goes. I need to make sure the heatsink does not slide around on the GPU core next time, oops.
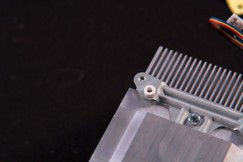
Time for me to use the double sided tape on the GPU coolers mounting plate. So I can mount the plastic stand offs on to the GPU cooler as well. Arctic Cooling normally places the adhesive directly to the mounts but this time has us do it. Not hard to do, just one more thing we have to do.

We can do this one of two ways, one way is to peel each sticker off individually then place it over the corresponding hole.
Or we can just line up the sticker on to the corresponding hole then peel that away from the mount.
Then you can stick the plastic stand offs onto the GPU cooler mount.
Continued to next page.
Installation Part 2
Now where was I at? Hmmmm, Oh yea I remember! I just installed the plastic stand offs onto my GPU cooler.
I installed all of the GPU coolers plastic stand offs. Notice the HD4770 videocard uses the inner bolts, just make sure you use the right mounting holes for your videocard.
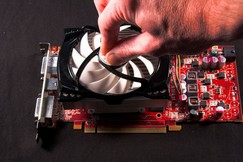
Oh wow, I forget to show you how I mounted the GPU cooler to the videocard. Not much different from removing the original GPU, just in reverse order, line up the holes of the video card to the holes of the Accelero L2 GPU cooler then in a diagonal pastern tighten them down snugly. As we can see this GPU cooler did not warp the HD4770 videocard.
Thermal paste dispersal looks perfect.
Nice, even and thin thermal paste dispersal.

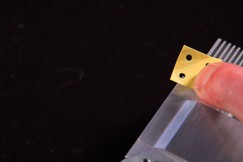
Time for the aluminum heatsinks for the memory and the powerMOSFETs/VRMs. These use a thermal tape, so the protective cover has to be removed.

Then we can place them on our video card.

Final installation with the heatsink in place and all of the additional heatsinks. Looks a lot better then the original heatsink. The use of this videocard cooler will use up 3 additional PCI expansion ports, compared to the 2 PCI expansion ports of the original heatsink.

Arctic Cooling’s 7/12 volt power hook ups always confuse me. The only way to get 7 volts is by crossing the 5 volt line with the 12 volt line of the PSU, which I hate doing anyways. That’s not what gets me. The fact that this fan is low flow and does not produce any noise on 12 volt power has me wondering. Why drop the voltage down even lower to make a quiet fan even quieter that barely spins? It’s like throwing a fan controller on a 25 CFM 120mm fan and setting the fan controller to 10%.
Testing Methods
| Test Setup &Testing Methodology | |
| CPU | Intel Core i7 920 C0 2.66GHz, @ 3.99GHz |
| Motherboard | MSI X58 Platinum |
| Case | Cooler Master Cosmos 1000 |
| Memory | GSkill trident 2000MHz |
| Video Card’s | Vistek HD4770 |
| Hard Drives | 2x Seagate 320Gig 2.5″ Momentus HDD’s |
| CDRom Drive | Lite On Blue Ray |
| Power Supply | SilverStone 1200 Watt Zeus |
| CPU Speeds Used | 3990MHz |
| Operating System Used | Microsoft Windows 7 |
| Video Card Cooler |
HD4770 stock cooler Accelero L2 |
| CPU Cooler |
Koolance 340CPU water block |
For testing the Accelero L2 GPU cooler, I ran Far Cry 2 on 10 looped runs of Long Ranch three times. I used Riva Tuner to measure my temperatures. I allowed the videocard to idle for 30 minutes in between each session to ensure my results were accurate. The hottest temperature reached was then recorded. I will also be including a default and overclocked run with both the stock cooler and with the Accelero L2 cooler. Also, the fan on the default GPU cooler will be using the BIOS preset. I like to try and keep the videocards temperature below 70°C. Ambient temperature of the room testing in was around 20°C, your results may vary greatly from my own.
Results
| Stock Clock speed of 750/800 |
Idle | Load |
| VisionTek HD4770 Default Cooler |
32°C | 53°C |
| VisionTek HD 4770 Accelero L2 |
28°C | 46°C |
During the default GPU speeds both GPU coolers mange the temperature quite well. The Accelero L2 GPU cooler did manage to beat the default GPU cooler by 7°C lower during full load. Lets see how things turn our once I start cranking the frequencies to some ungodly speeds.
| Overclocked 900/1000 |
Idle | Load |
| VisionTek HD4770 Default Cooler | 36°C | 69°C |
| VisionTek HD 4770 Accelero L2 | 30°C | 54°C |
The use of the default GPU cooler was quickly hitting my limitation of 70°C on the GPU. But I started having minor artifacts on the very last run of Far Cry 2. I suspect the memory was starting to get a tad warm. Once I threw on the Accelero L2 GPU cooler with the aluminum memory/power MOSFET heatsinks I was able to bring the temperature a staggering 15°C lower then when I used the original cooler. And this time I did not have any artifacting at all during my testing runs of Far Cry2. Unfortunately, I was unable to go beyond the 900/1000 MHz on the HD4770, but now I can hold this clock speed for long periods of time and not just short quick burst runs.
Conclusions
We all know that the original heat sink that comes with our videocards in most cases barely keeps our videocard cool. There are exceptions when a manufacturer uses an aftermarket cooler that provides plenty of cooling. Arctic Cooling has always provided affordable and easy to install aftermarket GPU coolers for as long as I have been into computers.
The only thing that I can see as a problem is the nature of this GPU cooler. Like most Arctic Cooling GPU coolers, the Accelero L2 GPU cooler will take up an additional 3 PCI expansion slots with its use. But having a price point of roughly $17 USD, anyone can overlook its shear size.
| OUR VERDICT: Arctic Cooling Accelero L2 |
||||||||||||||||||
|
||||||||||||||||||
|
Summary: Arctic Cooling continues to bring the users great products with great prices that perform extremely well. |


