Today we have a look at the Swiftech H20-220 Edge liquid cooling kit and how it performs. Is it worth your hard earned cash? Read more to find out.
Introduction – Swiftech h20-220 edge
 Swiftech has been in the enthusiast PC cooling market for over a decade now. Back in early 2000 they made their way into the Enthusiast PC cooling market with the MC370 line of heatsinks and have been an industry leader ever since. Swiftech has made many innovations in the world of PC watercooling which allows for better performance and easier installation. In our hands today we have the swiftech H20-220 Edge watercooling kit which is a complete custom watercooling setup in the form of a kit. With this kit Swiftech has picked top shelf components all packaged together into an easy to install DIY kit for the end user.
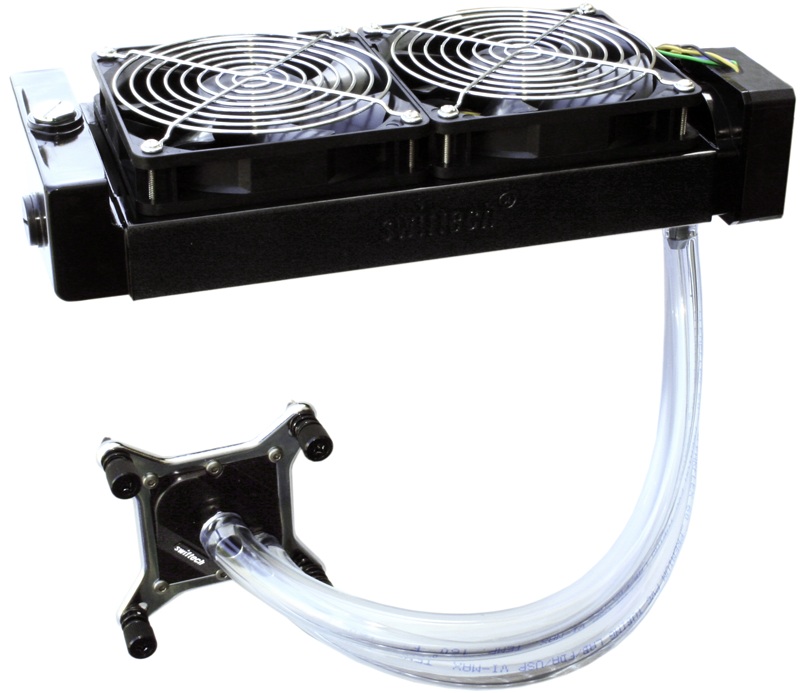
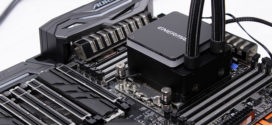
Here we can see what the kit could look like if we were to run it for a CPU only cooling loop. This is how we intend to configure our kit as well.
The following pages we will look into the installation and performance of the Swiftech H20-220 Edge water cooling kit to see if its worth your hard earned money to fit the bill on its $289.95 MSRP.
FEATURES
What Differentiates the H20-X20 Edge kits from other all-in-one kits available on the market?
- Versatility: the ability to add more devices to the liquid cooling loop; other all-in-one kits available on the market are completely sealed, and users are unable to either add more water-blocks for cooling the graphics, the chipset, or add more radiators if and when needed
- Performance Range: the ability to tune the cooling system from zero noise to extreme cooling performance
- Upgradability: the ability to upgrade the water-block when new CPU form factors will appear on the market, and thus to keep the core cooling system (the MCR Drive radiator-pump) in use for many years to come!
- Reliability: current all-in-one kits have little or no track record with regards to long term use; the H20-X20 Edge kits are backed by Swiftech’s 10 years of experience in the field of liquid cooling;
- Easy Maintenance: what happens when a low cost all-in-one kit fails? there is no possible DIY maintenance because these kits are factory sealed. If disaster strikes, all the parts in the H20-X20 Edge kits can be hot-swapped by the user easily, thus guaranteeing little or no interruption in the use of their system.
- Support: with 10 years of experience designing, manufacturing and setting up liquid cooling systems, Swiftech includes not only multiple hardware sets to accommodate various installation strategies, but also provides the most comprehensive installation guide in the industry, including fully detailed pre-built 3D models, so you can resolve any problem you may encounter when you personalize your system.
The MCR-220 Drive Revision 2 Heat Exchanger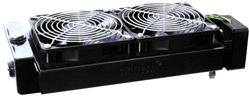
- The patent pending MCR-Drive Rev. 2 dual 120mm radiator has been designed to allow reliable operations in both horizontal and vertical orientations thanks to its new reservoir design. It means that the radiator can now be installed inside and at the top of the case for example, a type of setup which is increasingly facilitated by many new popular case designs.
- Built-in inside of the radiator, is the new PWM controlled MCP-35X pump. This pump can be adjusted in speed via the motherboard BIOS from 1300 rpm to run silent, or all the way to 4500 rpm maximum for extreme flow performance, as well as anywhere in between. This particular feature is being hailed by many enthusiasts and in the media as “a big deal” as it allows users to really fine tune their system in accordance to their needs and/or preferences.
- Just like a CPU fan, the pump can also be set on Auto, and be fully managed by the motherboard. Thanks to its unprecedented head pressure, the MCP35X pump is ideal to run several devices in the loop such as additional water-blocks for VGA cooling applications, and/or extra radiators.
The Apogee™ XTL Waterblock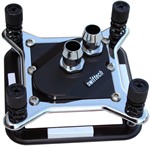
- The second element of these kits, the Apogee XTL, is a budget friendly variant of the Award Winning Apogee XT. It features the same 250 µm micro-pin matrix technology, mounting system, and has identical (world’s best) performance, together with the same flow characteristics. It only differs from the XT by the top housing which is made of black Delrin instead of chrome plated brass, and the absence of reversible inlet/outlet plate which allows use of extra large compression fittings in the XT.
Ease of Installation
Everything in the kits has been done to facilitate setup, and to create a professional installation: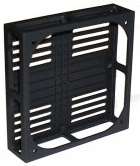
- The compact design in itself saves space and time of installation
- Several sets of hardware are included to hang the radiator internally in multiple fashions
- When internal installation is not possible, our MCB-120 “Radbox” is included to allow installation of the radiator at the back of practically any mid-or full tower cases.
- Hardware is included to create an optional external fill-port in the chassis upper panel for easy access to the radiator fill-port ;
New to Watercooling? No Problem!
- In addition to the comprehensive installation guide, a CD is included with no less than twenty-four 3D models showing fully detailed configurations that can be viewed with a free 3D viewer. You can see see some examples in the support section of this page.
SPECIFICATIONS
- Apogee XTL water-block: see general description HERE, and complete Apogee XT specifications HERE
- MCR220-Drive radiator: see complete specifications HERE
- MCB120 “Radbox” radiator mounting adapter: see complete specifications HERE
- Pump specifications: see complete specifications HERE
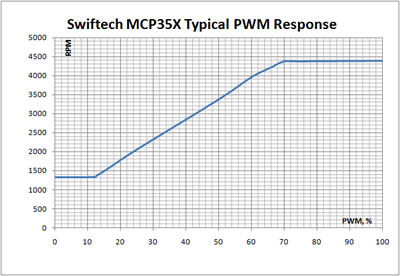
The PWM response curve exhibits the following characteristics:
- From 0 to 12%, the pump will run at ~1300 rpm (+/- 100)
- From 13% to 69%, the rpm will climb progressively
- From 70 to 100% the pump will run at full speed ~4500 rpm (+/- 100)
Fan specifications
Bearing type: sleeve bearing (for low noise)
MTBF: 40,000 Hrs
| Mfgr | Model | Current A | Speed RPM | Static mmH20 | Volume CFM | Noise db (A) |
| RS | RDM1225S @ 12v | .23 | 2000 | 2.7 | 81.3 | ~36 |
Tubing:
- Reflecting their true extreme-performance heritage, the kits are delivered with 1/2″ ID (3/4″ OD) tubing and fittings, but they can also optionally be used with 3/8″ ID tubing and fittings (not included).
Here we see that the kit has alot going for it but we have tested and built many custom water cooling configurations so impressing us will not be an easy task.
Unboxing & first impressions


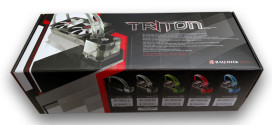
Now on another side of the packaging we can see the 2 available Edge kits that Swiftech offers. The H20-220 with a 2x120mm radiator and the H20-320 which is similar in design but with a 3x120mm radiator. Here you also see the included accessory bundle listed as follows.
- MCR Drive 3×120 radiator
- Apogee XTL Waterblock (mounting for Intel 775, 1155/1156 and 1366 mounting)
- Swiftech Radbox
- Clear Tubingmm
- Installation paper manual
- Installation disc
- Fillport fitting
- Multiple option fan speed wiring
- 2oz Bottle of Hydrx coolant
- Multiple mounting hardware sets


Here we see the Included Apogee XTL Waterblock. Based on the popular Apogee XT Waterblock this unit carries similar performance and features with the exception of having a Delrin top and it also does not carry the ability to rotate the fitting location to allow for larger compression fittings.


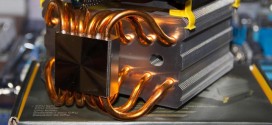
Here is the Part that makes it all possible. the 2×120 radiator with integrated pump at the lower half. This makes installation alot less trying as there is no longer a need to locate a place to mount a pump and run tubing to it through your case as it is part of the heat exchanger assembly.


Here you can see the business end of the pump where the fittings will be installed. Another thing we noticed was the need for a reservoir is virtually eliminated as well as the upper radiator tank has been enlarged to allow for greater capacity and therefore integrating the pump, radiator and reservoir into a single unit.
Installation
Installing watercooling is usually looked at as a daunting task and most are scared of the idea of water with electronics which is why they shy away from it and stick with a different solution. After unpacking the box we found that the hardest part was figuring out where we wanted to mount the Radiator. Once the location was decided that we would install the radiator into the top of the Level 10 GT the rest all just went in piece by piece. after the radiator was temporarily mounted we measured up the water hoses to ensure that we had proper length to route the hoses but also plenty of room in case we needed to remove the board from the case or service components. Since this will be used to test and benchmark future systems we wanted to ensure we had as much adjustability as possible.

Here we see the configuration installed. there is plenty of room to work and unlike a huge tower air cooler there is plenty of room for everything from tall memory sticks to pretty much anything else as the heat exchanger is now remotely mounted. The H20-220 Edge kit is only a few basic pieces (Radiator, Tubing and cooling block) which means installation with filling took about 45 minutes just to make sure all wires were routed nicely and lines were bled of air.
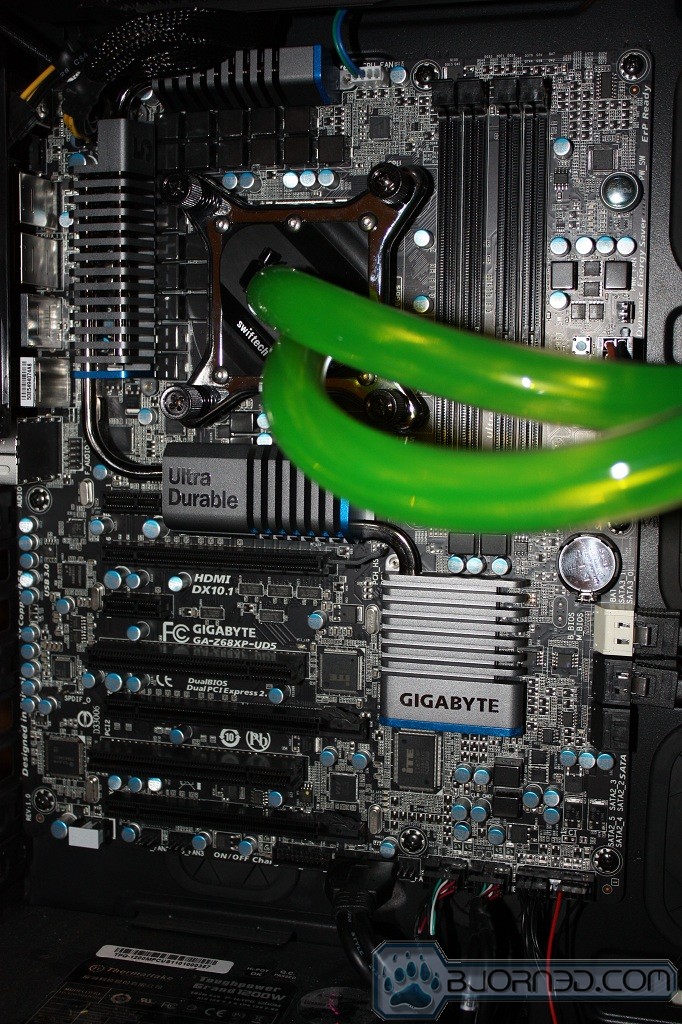
Here we see the complete board installed and ready to run with liquid cooling installed for the CPU cooling duty. One thing to note is that the back plate may require removal of the motherboard in order to install it but with the Thermaltake Level 10 GT the opening of the rear of the CPU socket allowed for plenty of room to install the cooler without removal of the motherboard. Now that its installed were going to see how well it performs.
Testing & Methodology

Testing this cooling unit we will compare it to some of the top end air coolers we have for testing as well. This should provide a direct comparison to the performance you get for what you pay. The testing we will try to max load the CPU for an extended period to see how well it not only handles a load but ensure that the cooler does not heat soak or become overloaded during extended loading periods. This CPU is known to max out at 49X multiplier or approximately 4.8GHz which is rather respectable and a sign of the obscene capabilities of the Sandy Bridge architecture. Therefore the cooler will be compared at both stock settings and in an overclocked mode as well.
Test Rig
| Test Rig | |
| Case | Thermaltake Level 10 GT |
| CPU |
Intel Core i7 2600K |
| Motherboard |
Gigabyte Z68XP-UD5 |
| Ram | 4GB Kingston 1600MHz CL 7 (7-7-7-24) |
| CPU Cooler |
Swiftech H20-220 Edge |
| Hard Drive | Western Digital Velociraptor 300GB |
| SSD |
Intel 20GB SLC Larson Creek SSD Intel 510 series SATA III/6G 120GB |
| Optical | ASUS BD-Rom |
| GPU |
Nvidia GeForce GTX 580 |
| Case Fans |
Front (intake): 200 x 200 x 20 mm ColorShift Fan x 1 (600~800RPM, 13~15dBA) Rear (exhaust): 140 x 140 x 25 mm Turbo Fan (1000PRM, 16 dBA) Top (exhaust): 200 x 200 x 30 mm ColorShift Fan (600~800RPM, 13~15dBA) Side (intake): 200 x 200 x 30 ColorShift Fan (600~800RPM), 13~15dBA) |
| Additional Cards |
N/A |
| PSU |
Thermaltake Toughpower Grand 1200W |
| Mouse | Thermaltake esports Black gaming mouse |
| Keyboard | Thermaltake esports Challenger Pro gaming keyboard |
Testing Method
We will use the program Wprime with the 1024 calculation run 5 times back to back to provide a real world load and see how well the cooler handles the load. Many may disagree with this testing as many use programs such as linpack tests to stress their cooling units. The issue with this is that we have seen where the temperatures and load you see from these synthetic stresses are that they can be much higher and much hotter than is possible in real world environments. Also these sort of synthetic stress tests can damage and overload components.
Results
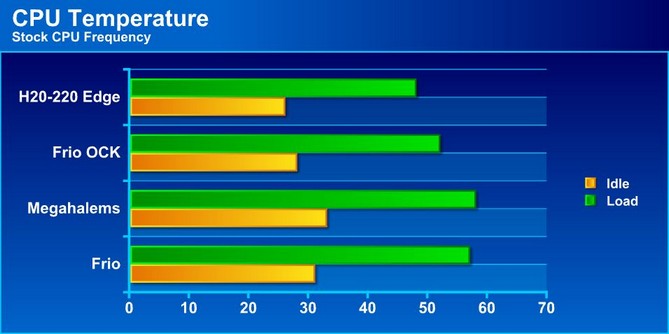
Here we can see that the H20-220 makes a small amount of headroom in idle but definitely begins to shine as you put it under load. But this cooler was designed to be pushed so lets see what happens when we pump it up to 4.8GHz and put it under some heavy load.
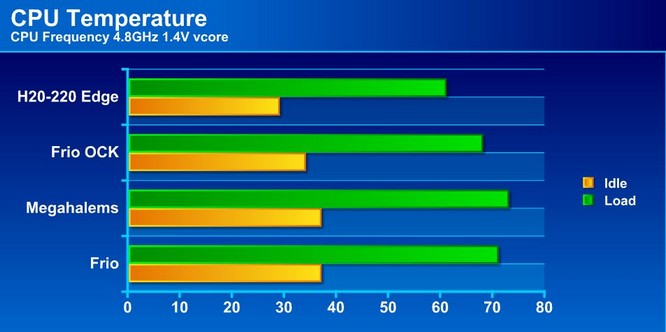
Here we can see that when cranking up the Vcore and frequency the temps really start to climb. Once again the H20-220 really shines and proves the advantages of a liquid cooling setup. We have built many custom built liquid cooling setups piece by piece and this kit runs very close to those as well as beating out our top air coolers by a decent margin.
CONCLUSION
The Swiftech H20-220 Edge kit not only looks like a custom water cooling kit but it performs like it as well. We were pleasantly surprised as to how easy the kit was to install and get up and running. Idle and load tests both placed the H20-220 kit well ahead of our top air coolers however at a significant price premium. However when considering the sum of the parts this kit actually is a decent value and the parts plus performance helps easily justify the price. anyone looking to get into the liquid cooling scene but not sure exactly what parts they may need or afraid of forgetting something, this kit is for you. The kit has everything a user would need to install the kit along with likely some extras to cover pretty much any configuration.
| OUR VERDICT: Swiftech H20-220 Edge | ||||||||||||||||||
|
||||||||||||||||||
|
Summary: The Swiftech H20-220 Edge kit offers everything needed to liquid cool your PC quickly and easily. Add to that a decent value and you have a combination that cannot be beat, it earns the Bjorn3D Gold Bear Award. |