
MSI has been around the motherboard market for a very long time, and like many of the players nowadays, is really pushing the overclocking ability on both its motherboard and graphics card lineups. The Big Bang series of MPower boards are built around the idea of being highly overclockable and enthusiast-targeted. Today we look at what the MSI Big Bang Z77 MPower board and what it has to offer.
Introduction – MSI Big Bang Z77 MPower

MSI has been building boards for a very long time, much like Gigabyte or ASUS. Today’s growing trend is overclocking enhancements for boards and it seems like there are so many more players in the game now pushing for the title of best overclocker. For a while, MSI pushed for the super-bencher status, with boards such as the MSI Big Bang XPower and XPower II which had an immense amount of PCI-E expandability and loads of features all based around pushing performance.
Current generation Big Bang MPower boards are a bit more refined, and are more friendly to 24/7 users, as the extreme benchmarking market is small. MSI realizes that while it may be cool to have a boatload of new features all based on benching, it really will not be used by most everyday users. With this noted, MSI took the initiative to redefine the way MPower boards are handled by making them very user friendly, with good expandability and also some overclocking tricks and features in place for those that want to push the limits.

The board comes in at a price of $199.99 on Newegg, which is quite competitive with other boards on the market, especially considering the fact that it is marketed as an overclocking-centric board. If it can perform close to how the big boys on the overclocking scene can, this could turn out to be a value leader in the overclocking community. Let’s take a look at what this board offers and more so what it can do.
Features & Specifications
WiFi/Bluetooth onboard
The WiFi/Bluetooth onboard antennae are separate and therefore each has its own section and antennae. The Bluetooth has its own module whereas the WiFi dongle has a separate included antennae to allow better positioning for WiFi signal reception.

As you see here the 2nd and 3rd IO blocks are topped with the Bluetooth and WiFi dongle. One really cool feature we noticed is that these dongles can be removed individually and for anyone who benchmarks knows the less enabled devices the better. Well if you remove it completely there is nothing for the OS to even see so overall system load is reduced.

Here we have the area with the dongles removed, and you can see this is really a neat feature to just be able to pop them off easily and re add them as needed. Most people will probably never remove them but its a cool innovation in my opinion. Looking at the pins it looks like its a standard USB interface which makes sense for easy integration with the board.
24-Hour Prime95 Burn-in test
One of the key features MSI discussed when we were talking about this board is that every board is 24-hour stress tested with 4.6GHz overclocked settings. This may not seem like much but this is MSI’s way of showing that every board can perform to this level for a long duration which means that anyone looking for the free performance boost offered by overclocking will know their board is up to the task.
6 Pin PCI-E slot power
We have seen many implementations of supplemental PCI-E power which always includes a 4 pin PATA connector, or on the more extreme boards, a PCI-E 6 pin connector all located below or above the PCI-E slot area. This means PCI-E cables will have to be strewn across the lower or even mid board to reach that connection, and that is going to be just flat out difficult for cable management.
MSI did away with this kind of placement and instead opted for a PCI-E 6 pin connector very close to the 24 Pin area so that all of the cables can be routed the same way and it is quite close to the board edge for better cable management without having to resort to a large cable laying across the board.
Many will say that it is better to have it closer to the slots like some boards have it but we have to rebut with the fact that before we started seeing supplemental connectors the slots got their power from the 24 Pin connector. So this design in essence adds extra power with no worse of a power run than if it was not connected at all and not to mention it is still extra dedicated power to the PCI-E slots.
If we were talking CPU power and 8 pin ATX connectors then we could agree as that voltage needs to be right on top of the VRM components to keep everything perfect and stable but in the case of the PCI-E power this is supplemental power to what the slots draw from the 24 pin anyways. Having the connector in this position would be of no consequence.
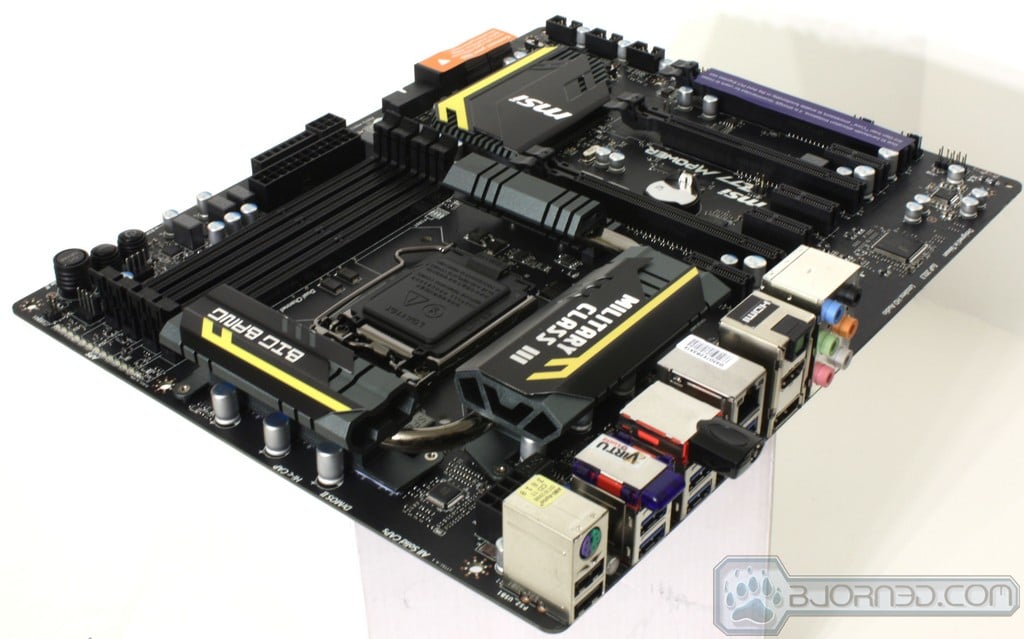
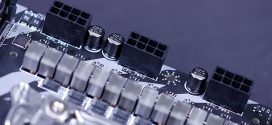
MSI 12 Phase CPU Power
The MPower Z77 board comes with the Military class components we had looked at previously, but the real point of interest here is the 12 Phase CPU power design which should ensure some nice CPU overclocks. The board for 24/7 usage overclocks without even a thought and the voltage is very consistent from idle to load transitions. This speaks well to the strength and accuracy of the VRM design which we are sure will lead to some nice overclocks during testing.
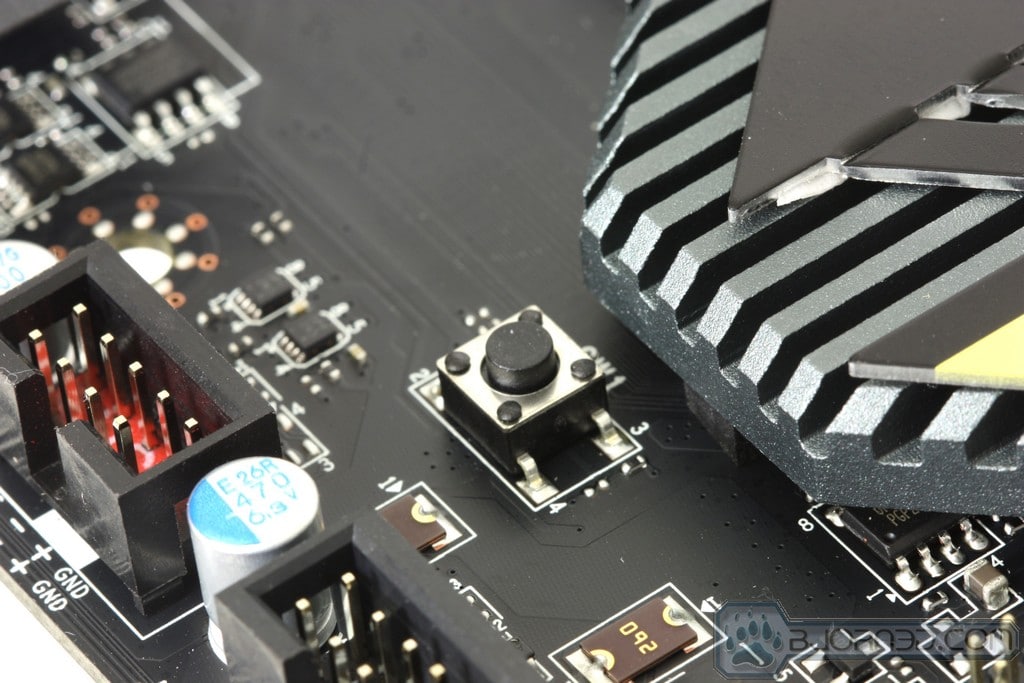
MSI Go2BIOS
Anyone who has used a newer system knows these things can really POST fast. We have found ourselves many times trying to catch the POST screen to enter BIOS or even worse blindly tapping the DEL key in hopes of getting in. MSI installed a button on the board and with a single press it will boot the system into the BIOS directly so no spamming of the DEL key is required.
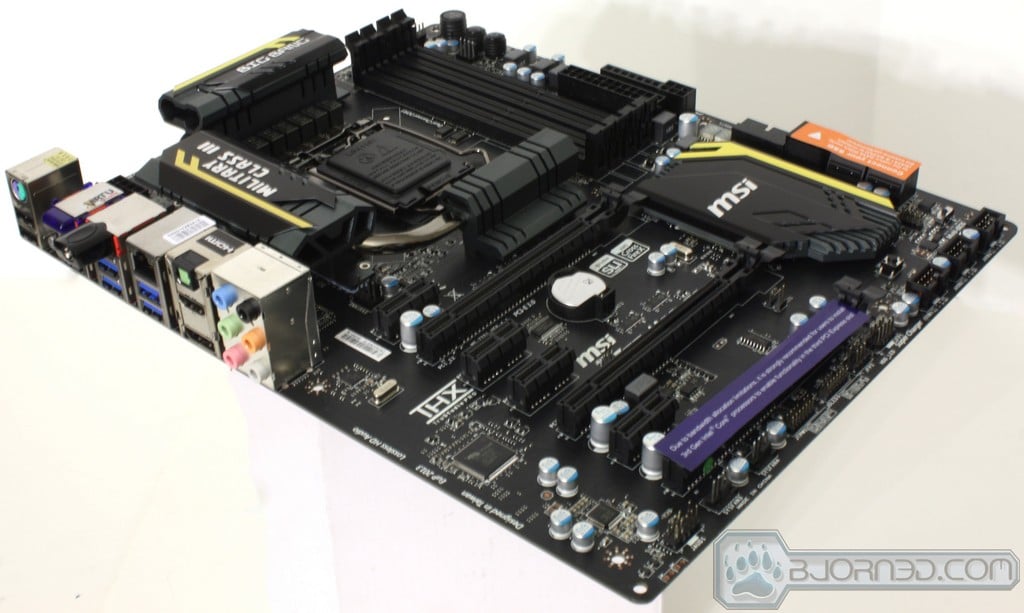
Overview of the MSI Big Bang Z77 MPower


The packaging is on the extreme end when it comes to design as the graphic is pretty impressive and it has a iridescence to it that makes for an eye catching appeal. Overall the front has most prominently the name with just some much smaller icons showing supported features. Flipping the flap exposes more detailed info about supported features, and some included technologies. the rear has a full size image view of the board along with some call outs with basic descriptors for certain features.
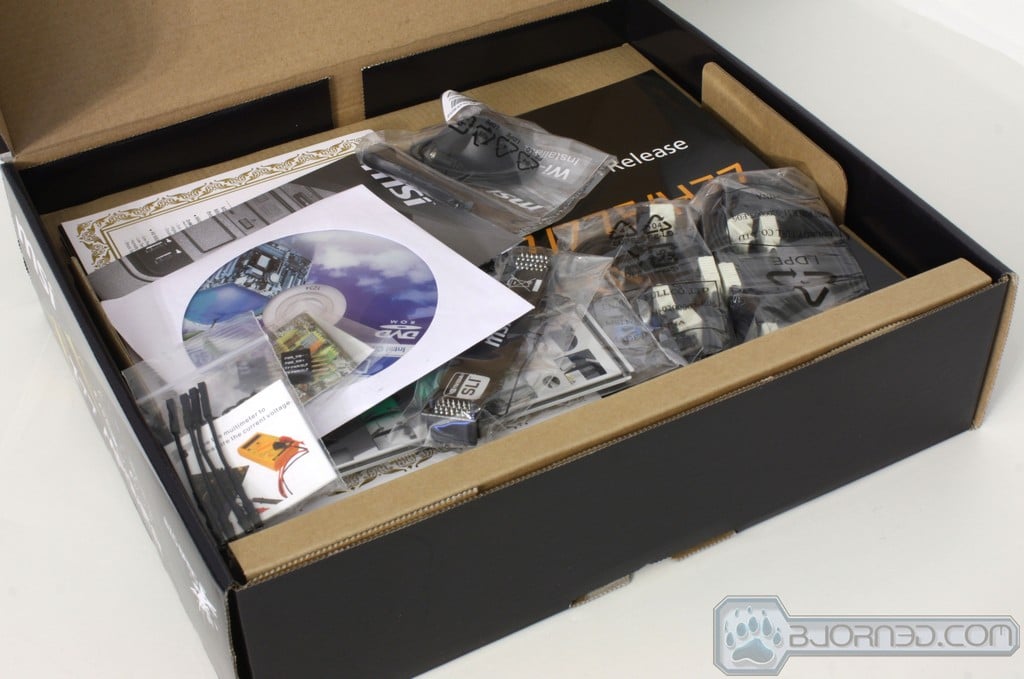


- User Manuals
- Installation Discs
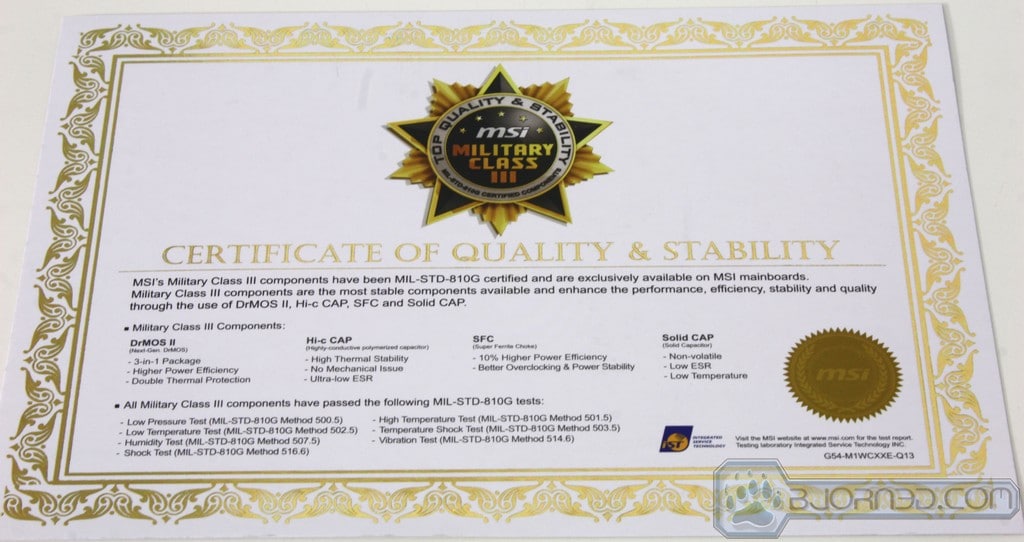
- MSI Military Class Components Certificate
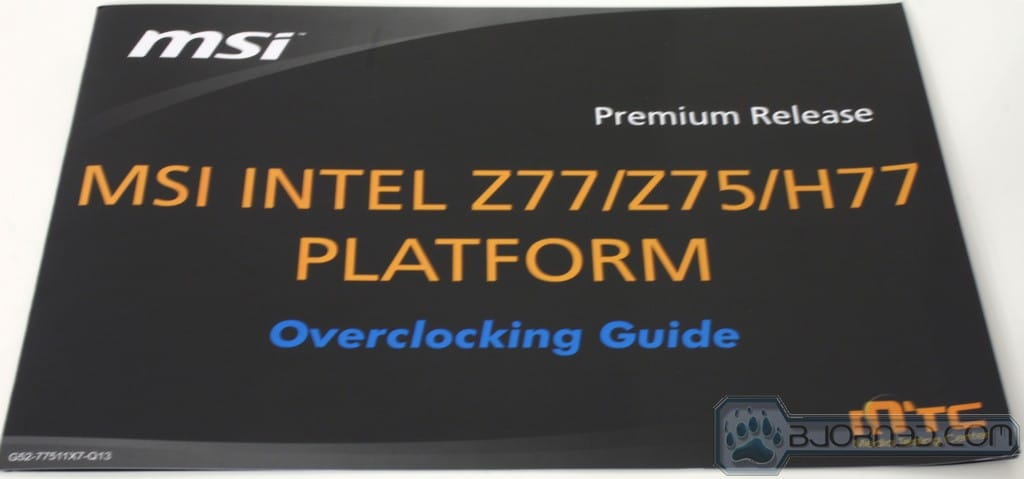
- Platform overclocking guide
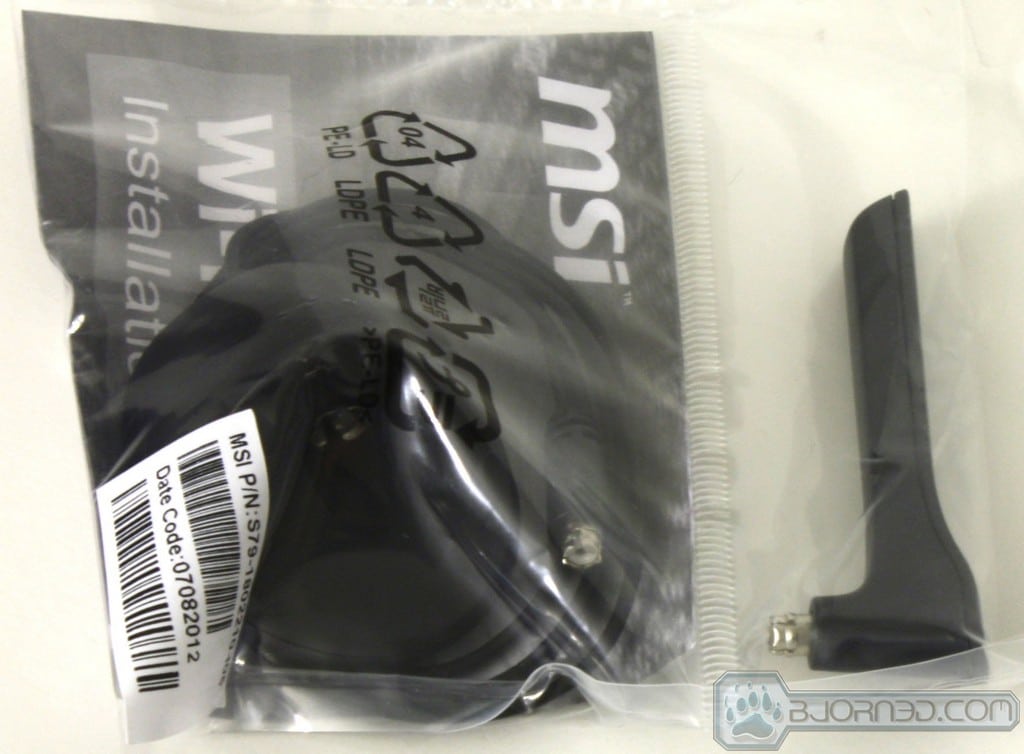
- WiFi Antennae and base
- SATA Cables (Qty 4)
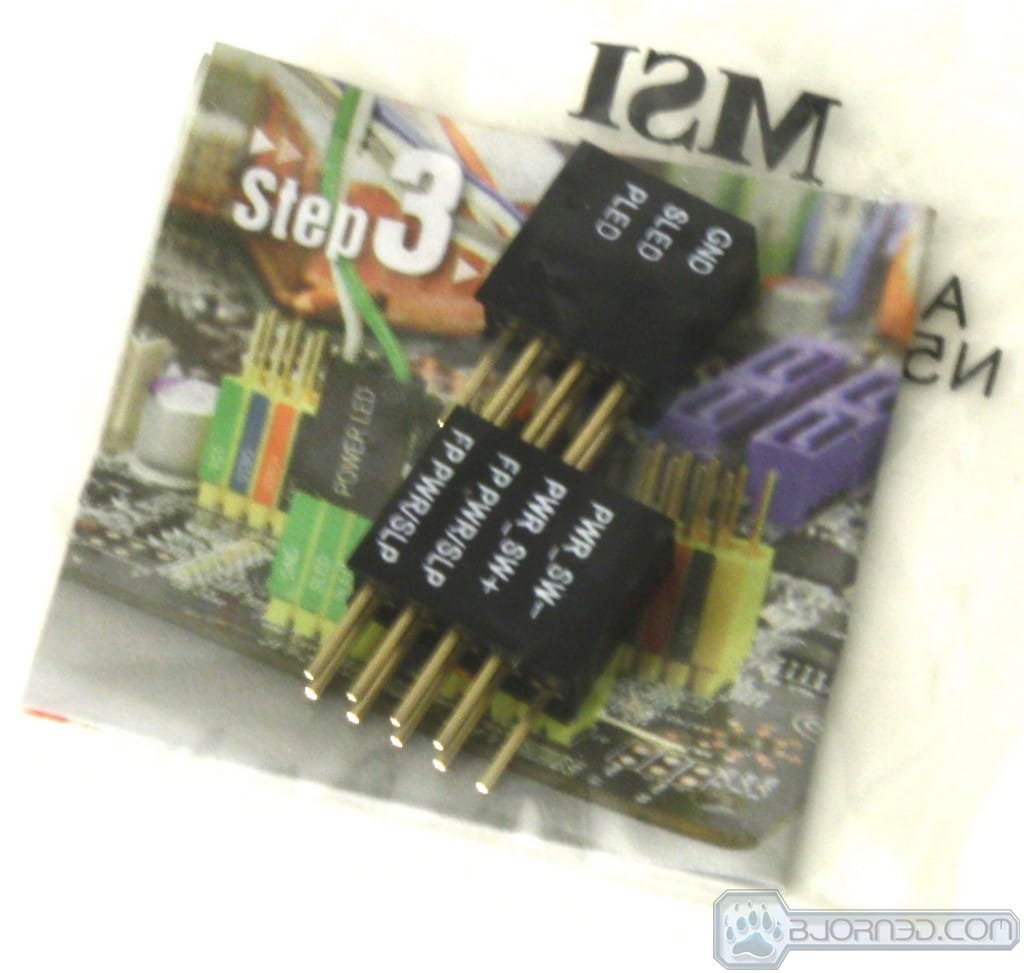
- Quick Connect Front Panel Connectors
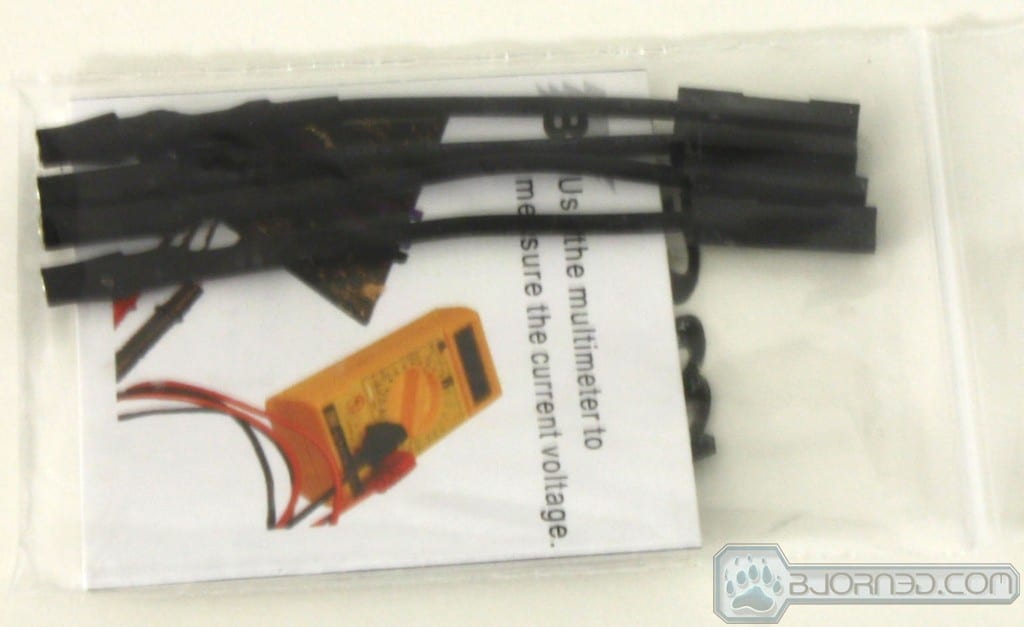
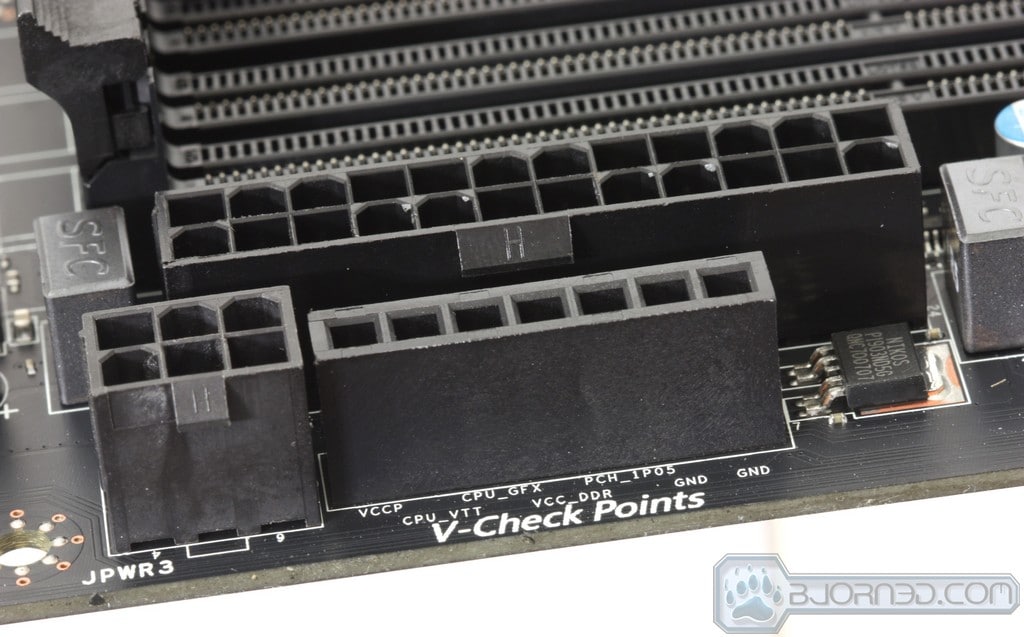
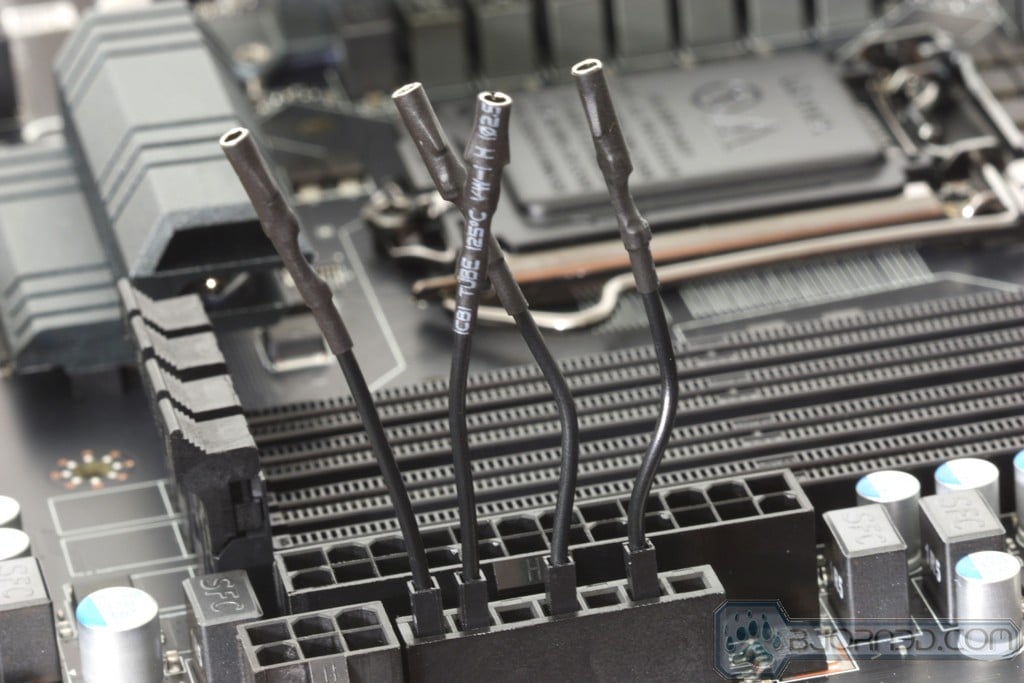
- V-Check Point Leads
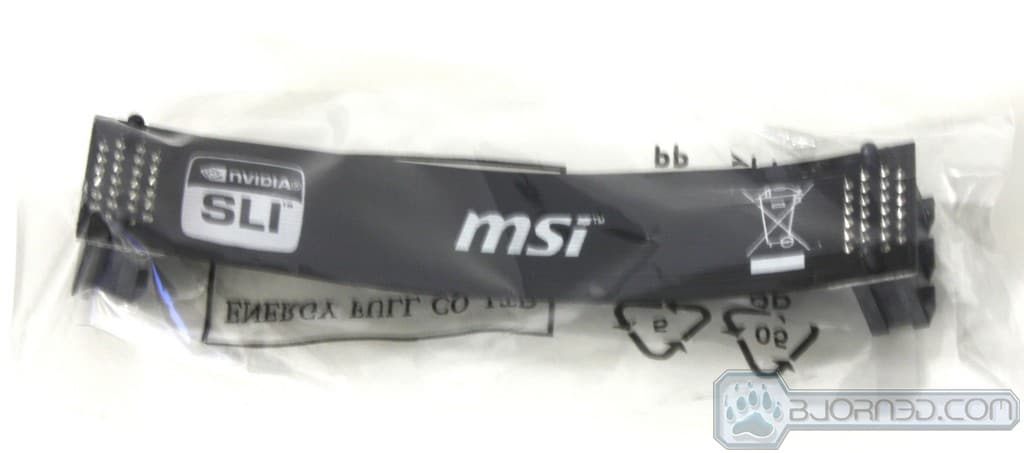
- SLI Ribbon
- IO Shield
This Accessory bundle is more than sufficient to cover many of the features except the included SATA cables as there simply are not enough to cover the 6 onboard SATA ports. We thought it was a mistake, and that the review sample had been mis-packed, but after checking Newegg, we confirmed it only comes with 4. The extra two probably wouldn’t be used by most anyway, but it seems like a small expense on a higher end board.
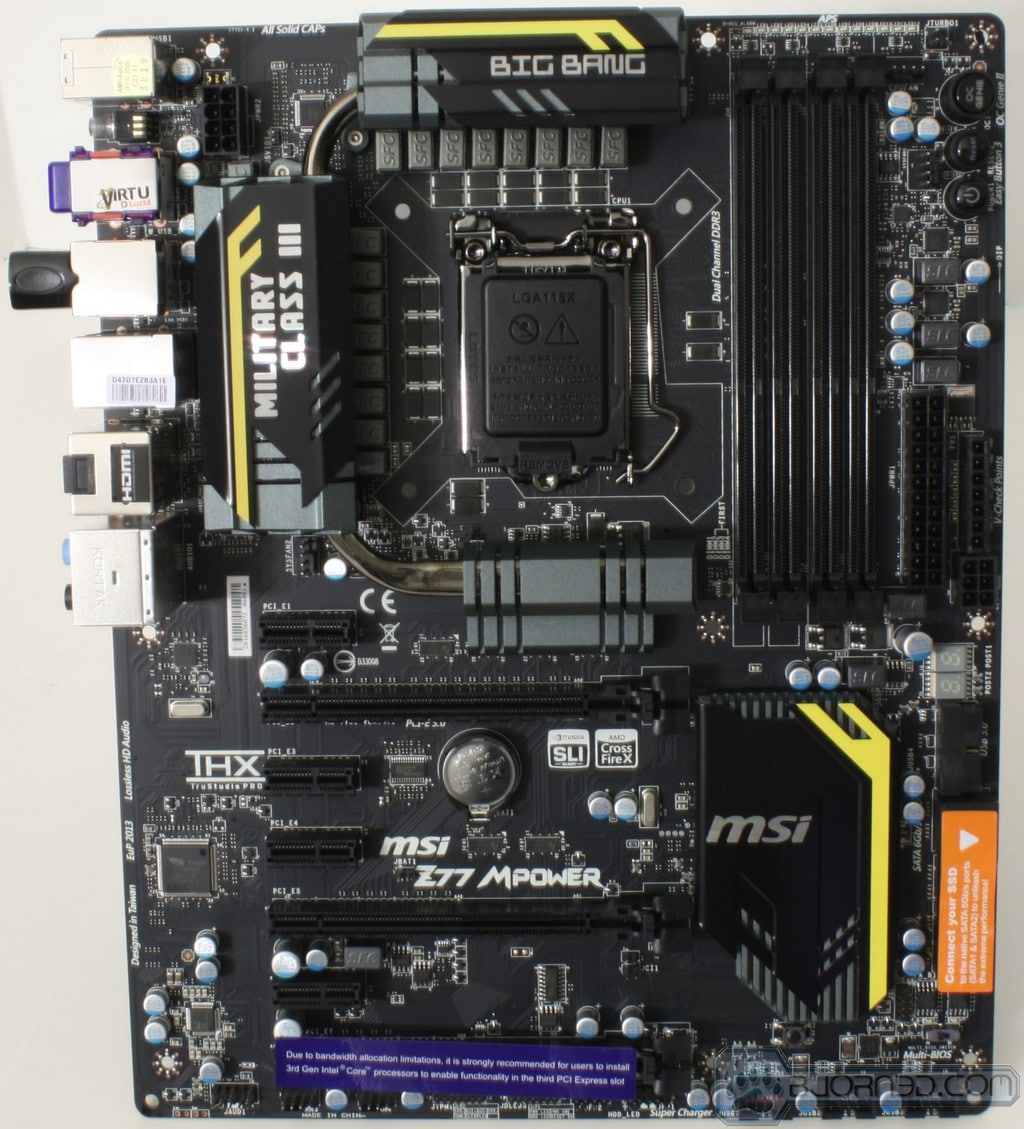
Here we see the whole board standing on end. This gives us a good look at everything especially connector placement and overall board layout. The connector placement is very good as you come to expect from a enthusiasts designed board and the thing to note here is the 6 pin PCI-E connector which serves as the supplemental power to the slots. In our opinion this is excellent placement. If the connector is above or below the slots toward the left hand edge of the board then you have to run a thick PCI-E cable across the board to reach it. Having it closer to the board’s edge means now it can be routed with the 24 pin main ATX connection which will eliminate that long unsightly cable. One thing is that the V-Check Points are located in between the board edge and the 24 pin connector, which is fine, but would be much better moved upward a few inches on the board so that the probes do not interfere with the 24 pin in any way. This is not a huge issue but something we think could be better in the layout.

Click Image For a Larger One
- PS2 combo keyboard/mouse port
- 2x USB 2.0 Ports
- Clear CMOS Button
- Bluetooth Dongle (Removable)
- WiFi Dongle (Removable)
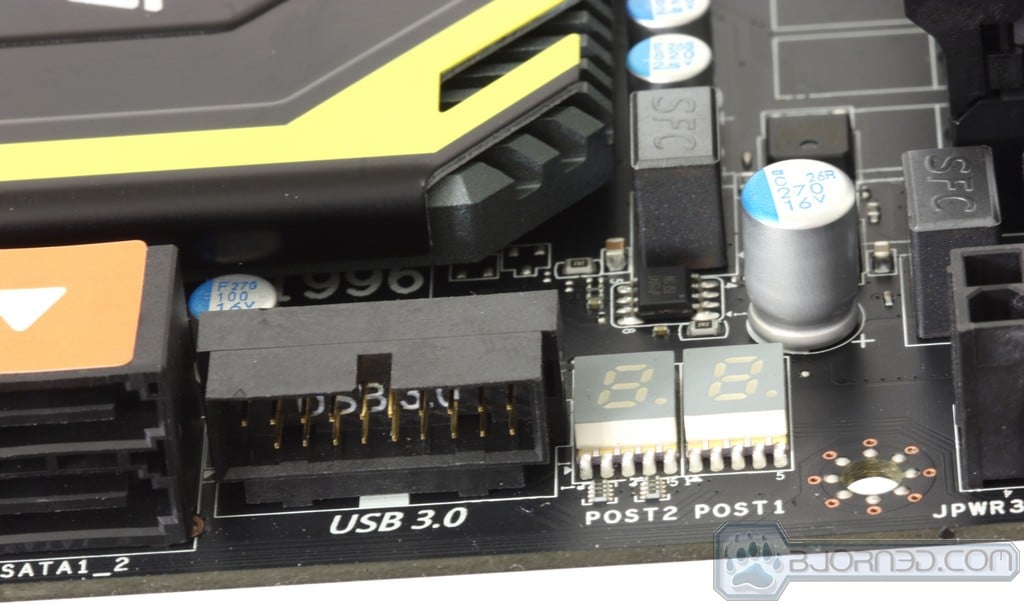
- 6x USB 3.0 ports
- Gigabit LAN port
- Optical SPDIF port
- HDMI port
- DisplayPort connector
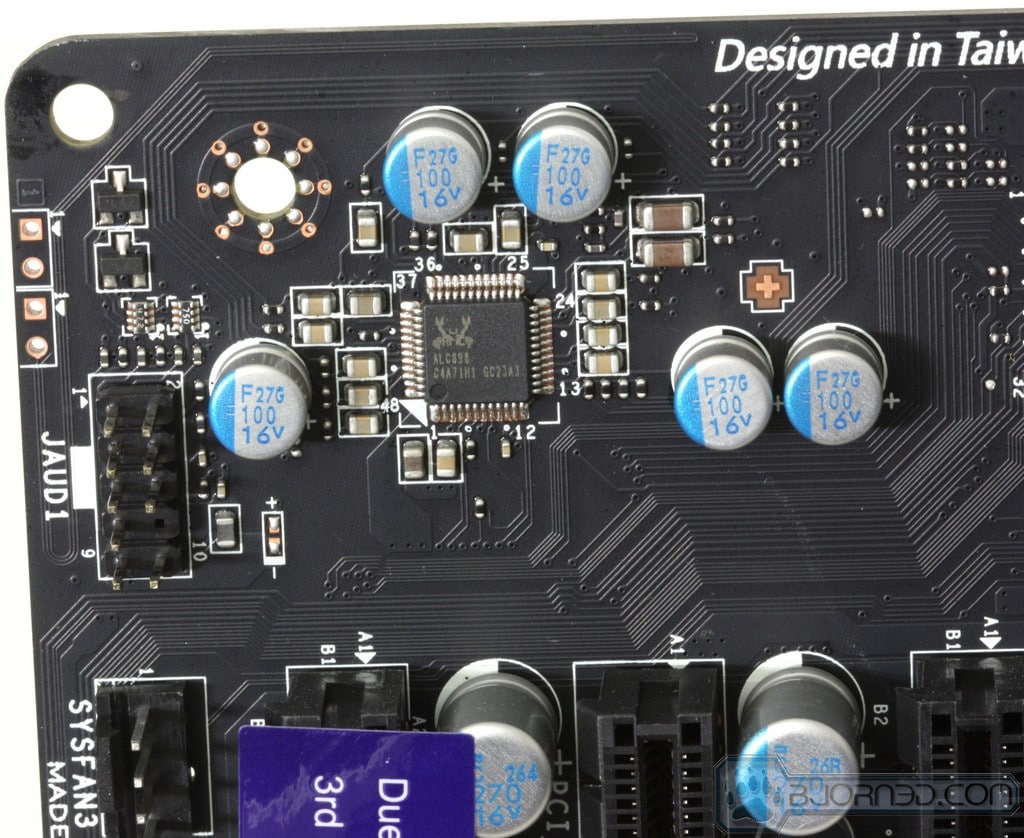
- up to 8 Channel HD audio via Realtek ALC898
The connectivity is complete very good for this board and what we really like is the fact that the WiFi and Bluetooth modules can actually be physically removed. This means that when you are benchmarking and want to reduce system overhead as much as possible, you don’t even have to disable them in BIOS; you simply remove them completely.

Click Image For a Larger One
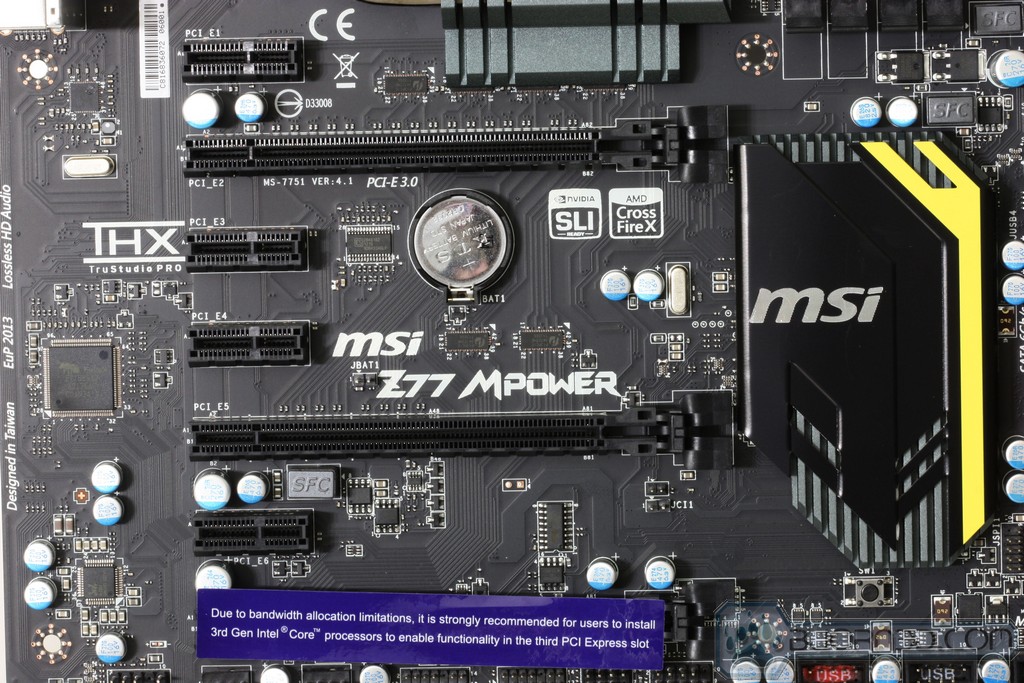
The lower left edge holds the audio side of things and is powered by the Realtek ACL898 chipset which pushes this audio solution for up to 8 channel audio. We like the slot layout as many higher end cards now are using triple slot coolers the spacing for the primary GPU slots is excellent. Triple slot spacing means that if using a standard dual slot card you have a slot space for air to get to the card for plenty of cooling or that extra slot space ensures a triple slot cooled card will fit right in as well. Also, the inclusion of 4 total PCI-E x1 slots means plenty of expandability along with the 3rd x16 slot which will drop the middle slot down to x4 if used. Keep in mind that Ivy Bridge CPUs are required for the 3rd slot to function. The BIOS button is really cool as it puts you direct into BIOS without having to spam the delete key during some of those very fast boots. Lastly here you see the BIOS toggle which is in place to change physical BIOS chips being used. This allows for using different BIOS versions for testing or even different BIOS settings for benching and gaming.

Click Image For a Larger One
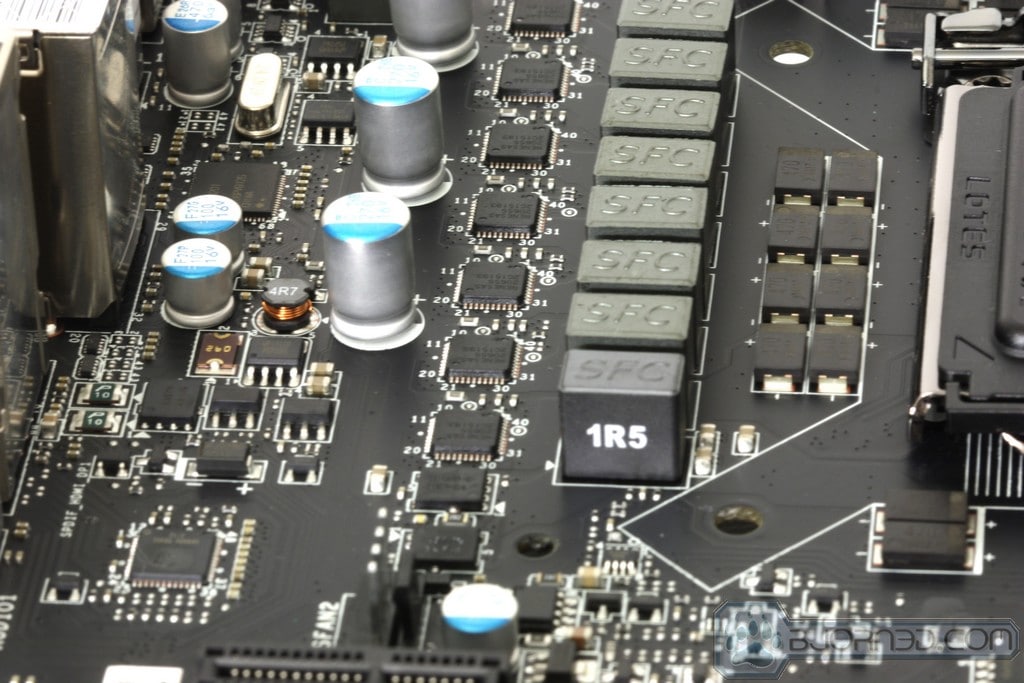
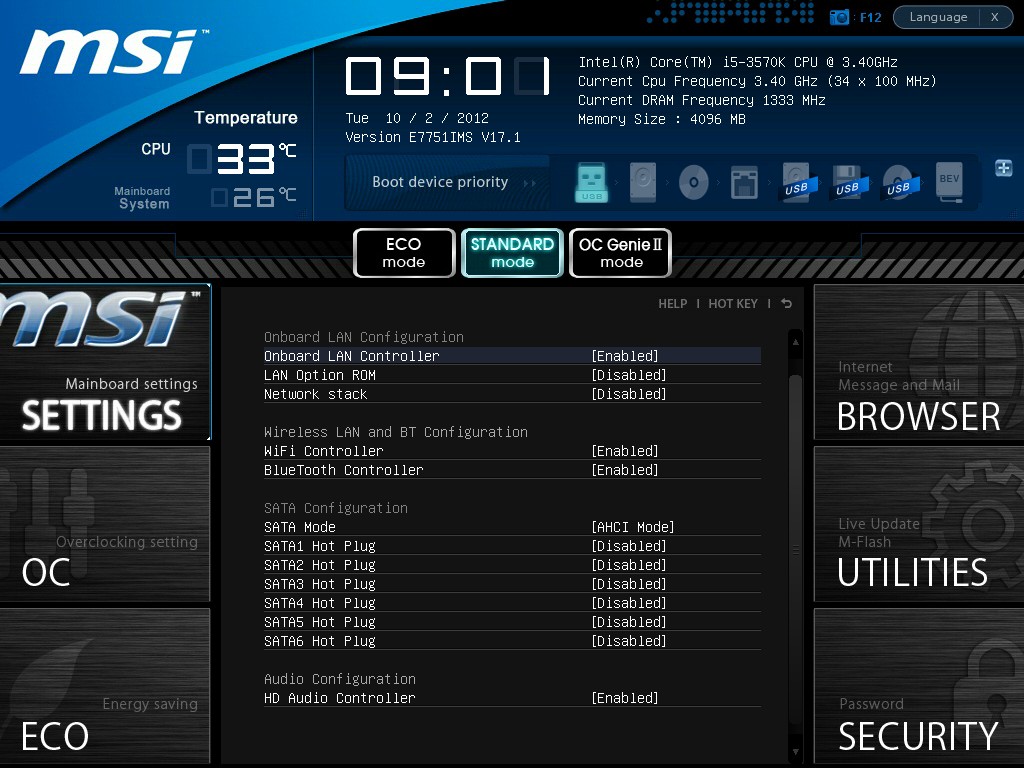
Moving further down the line to the storage side which is standard for Z77 as it offers the PCH quad SATA 3G ports along side the dual SATA 6G ports. There are no extra controllers for extra ports, mSATA, or eSATA. The USB 3.0 header up near the LCD poster and 24 pin is quite nice as it is right angled, which we believe will allow for better cable management, as the hard internal plug will not be jutting upward from the boards surface but instead be running parallel to the PCB. Some may complain that it is seated roughly 1/4″ or so inboard on the PCB but in reality I think it makes good sense as the board will now be right next to the connector so that if it is impacted during component swaps or maintenance it will not simply snap off but may actually offer a buffer to avoid breakage. The V-Check Points are nice as you can use any standard multimeter to monitor key voltages from the board. The standard probes coming from a multimeter snugly fit into the metal sleeved leads and allow for hands free monitoring as they will stay put. We like the connector at the boards end as well so that you can quickly swap the whole lead to another port for quick readings without fumbling with re-installing a probe into the sleeved end of the lead. It is worth noting that the board comes with 4 total leads so you will not be able to populate all of the connectors simultaneously, but then again you would need just as many grounds so we really don’t see that as an issue.

Click Image For a Larger One
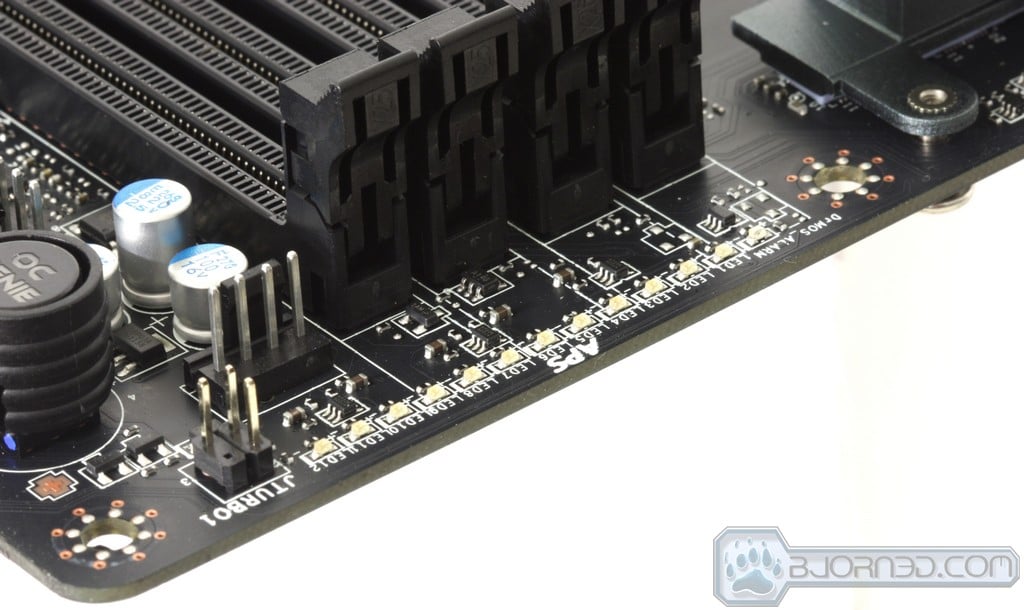
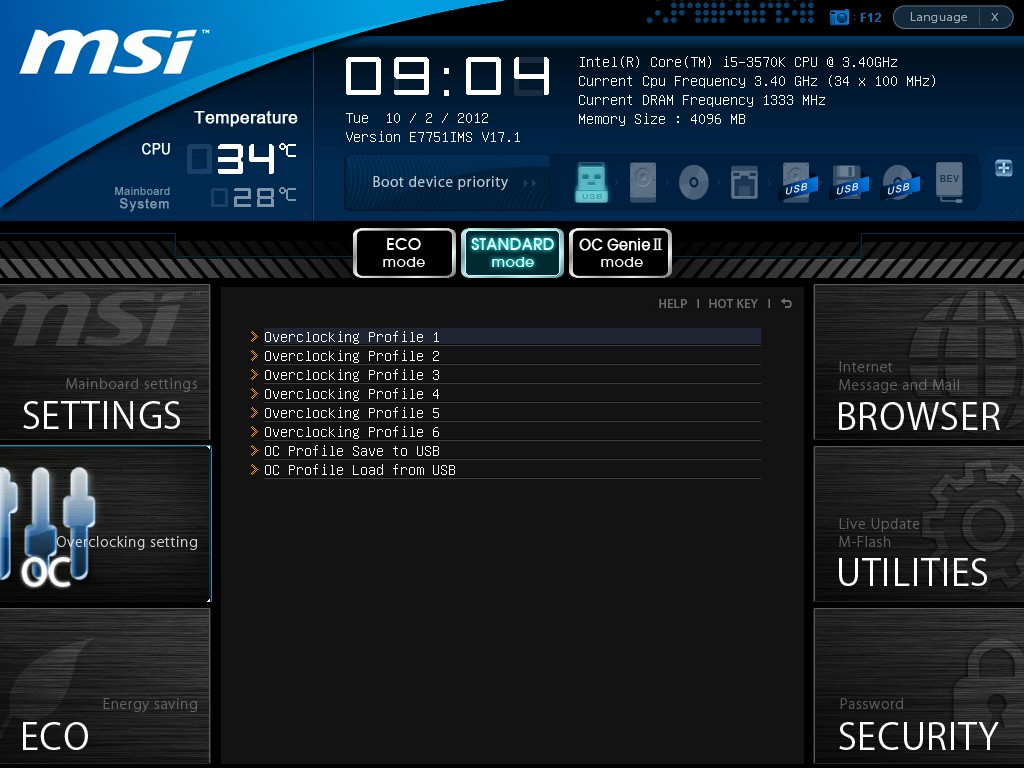
Here is the overclocker or bench station control center. We have seen connectors, switches and LCD posters amongst so many other things in this area. Here it is much more simple as the LCD poster was located a bit lower on the board near the 24 pin and the voltage read points are lower as well leaving this area open for power components and the control buttons for the board. The control buttons consist of the standard power and reset switches and also here you will find the OC Genie button which loads up a pre-determined profile that is a nice safe overclock that anyone can easily enable. What is really neat about this profile is that you can adjust it in the BIOS so that when you press it, it will enable the overclock settings you choose. Above the DIMM slots you see a long row of SMD LED’s which are used to indicate loading of the VRM and its 12 phase design. There is also an Alarm LED which will illuminate if the VRM is over temperature which is quite helpful especially if trying to diagnose a stability issue as you will have a solid indication staring you in the face.


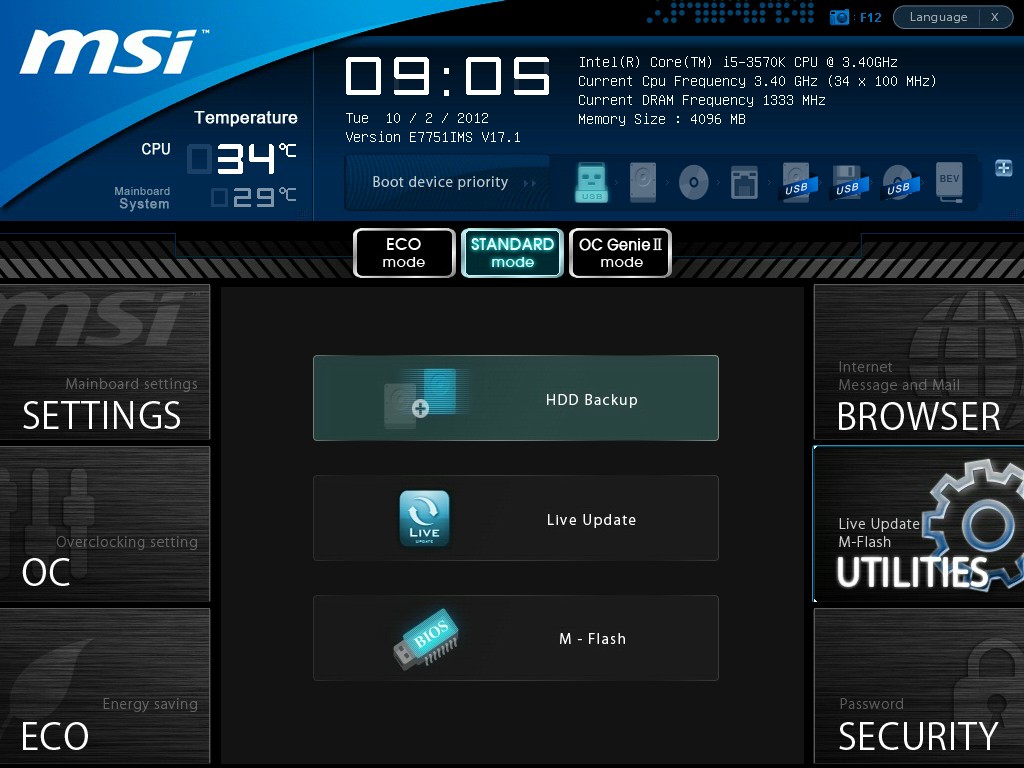
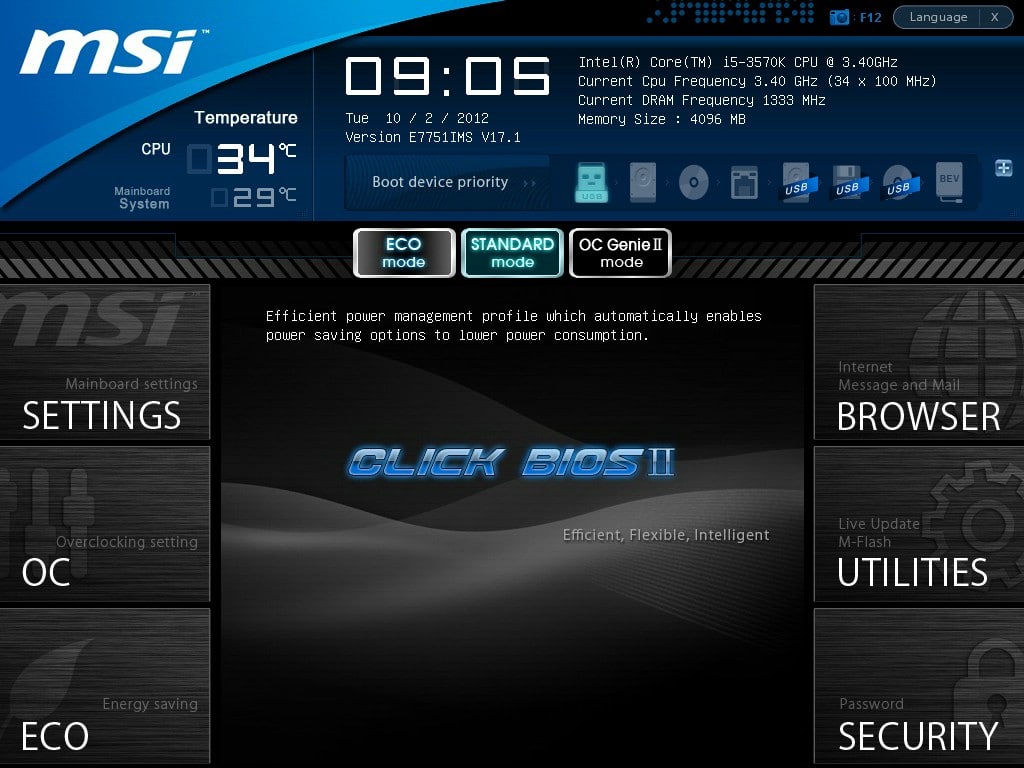
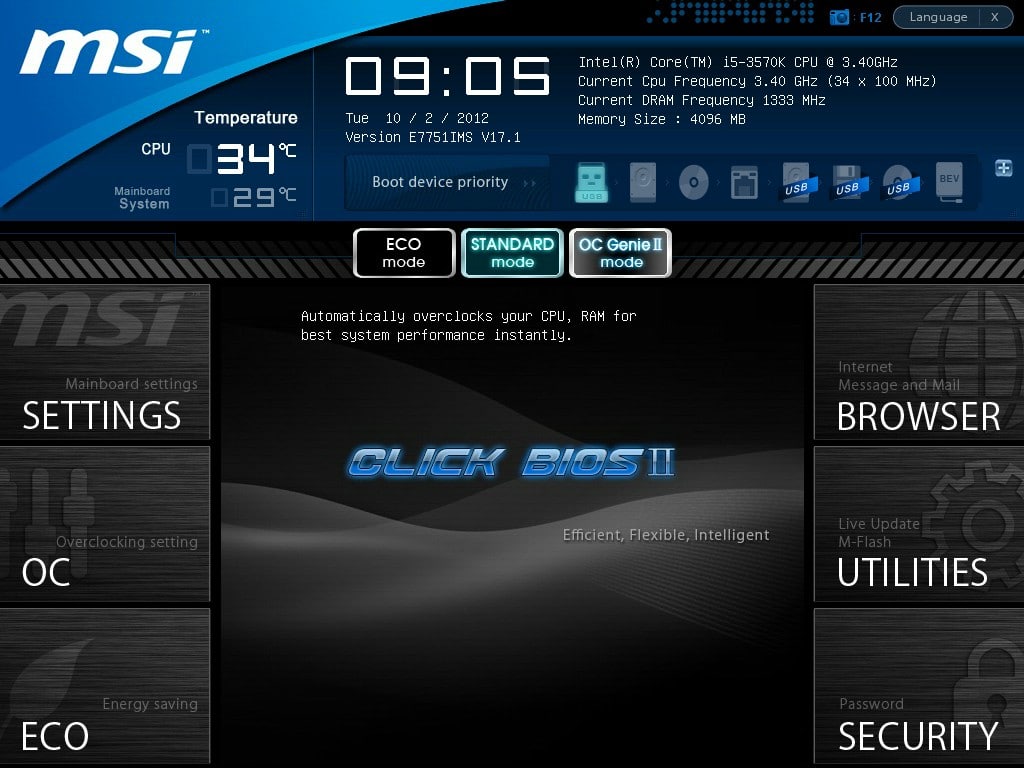
BIOS Overview
Click BIOS II
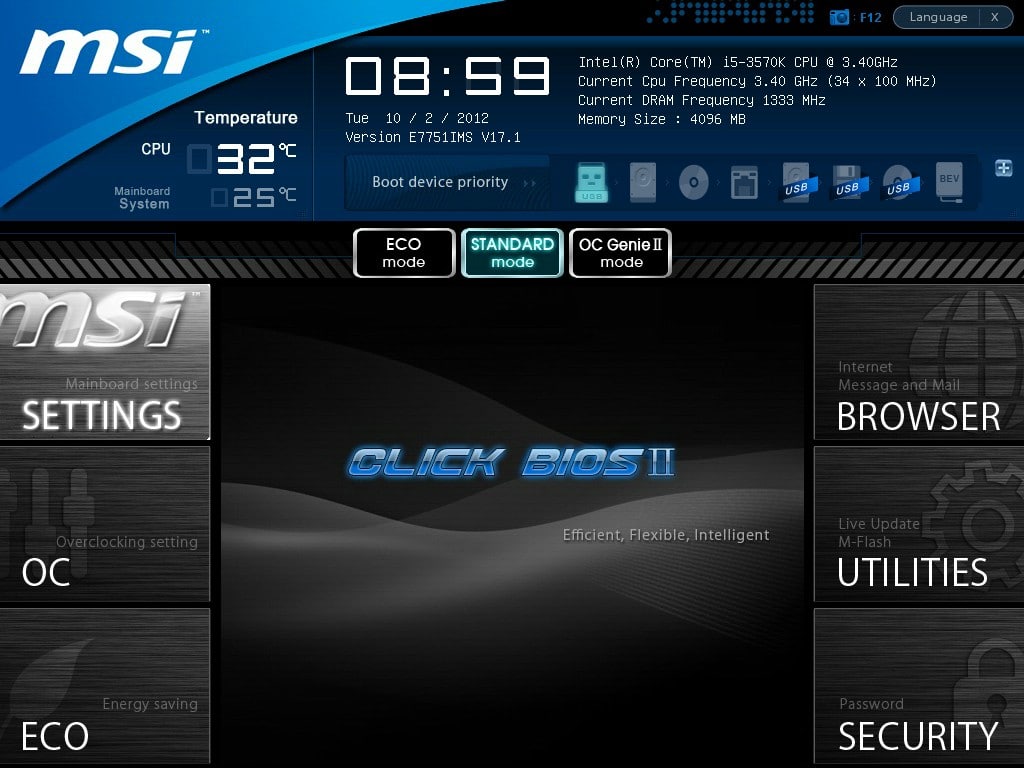

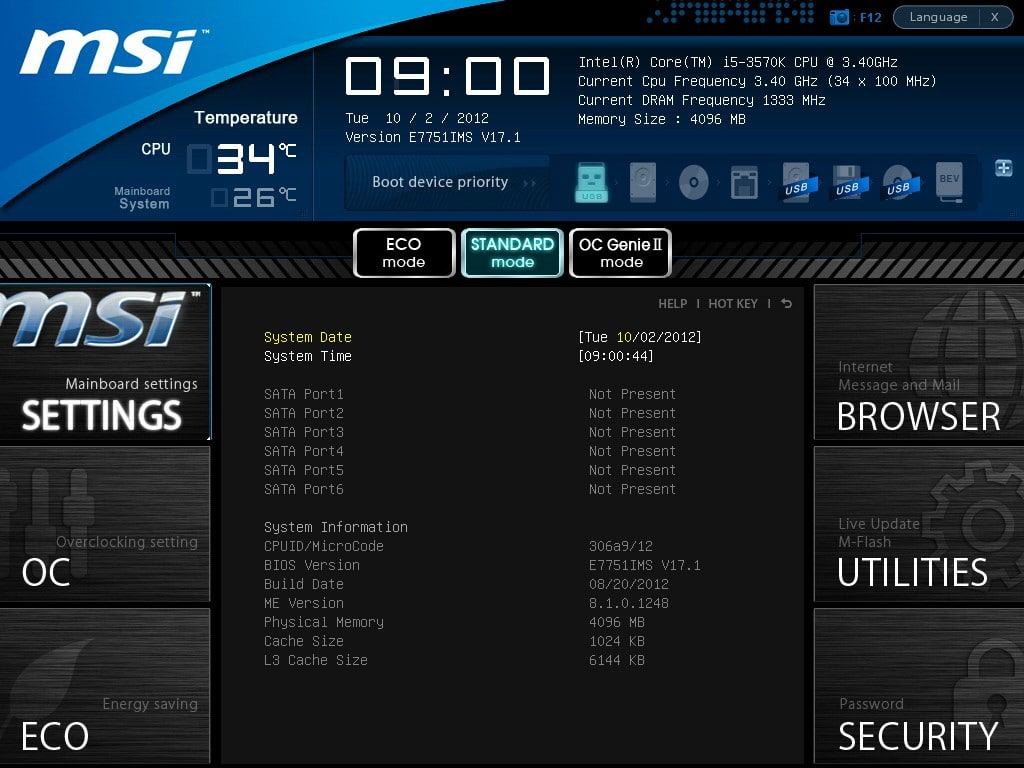


Click Image To Enlarge
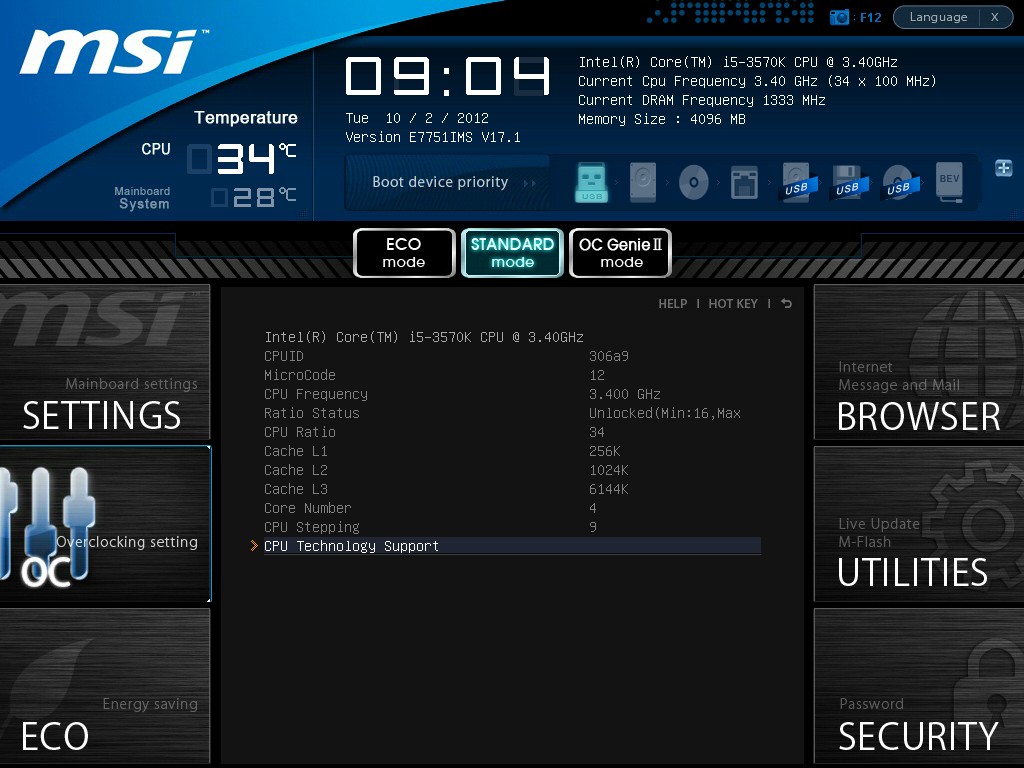
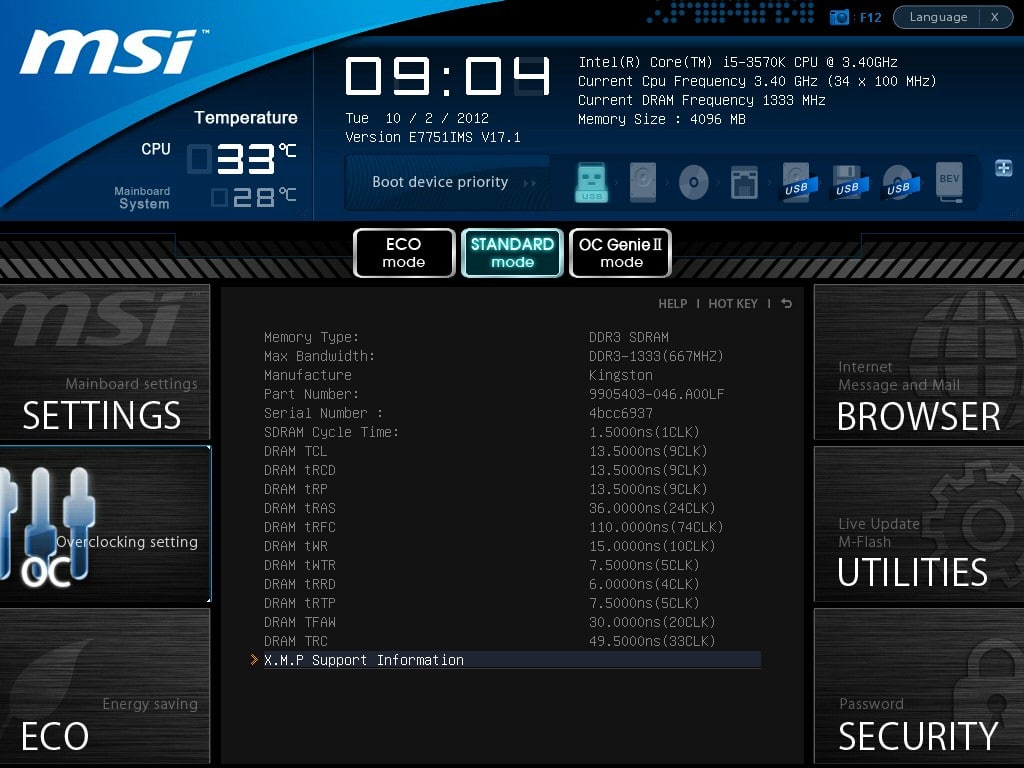
The Overclocking section is nice and easy enough to use. setting the BCLK via 10kHz increments was a forgotten thing as last time we had done it was on the MSI X79 board. all in all it works well and once used to it you can make adjustments quickly. The overclocking section has many settings and also sections such as the integrated Memory-Z and CPU specifications which can give you specific in depth on installed components. This BIOS made easy work of getting the CPU up to 4.6GHz which is our standard testing speed and very little voltage addition was needed.
Click Image To Enlarge
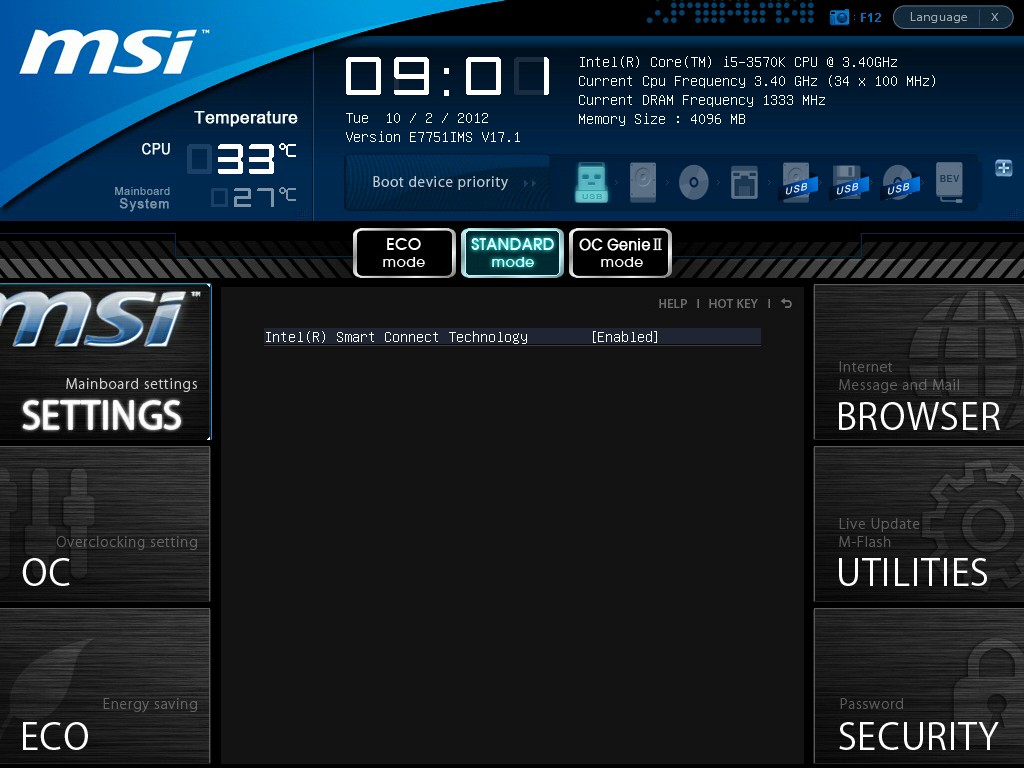
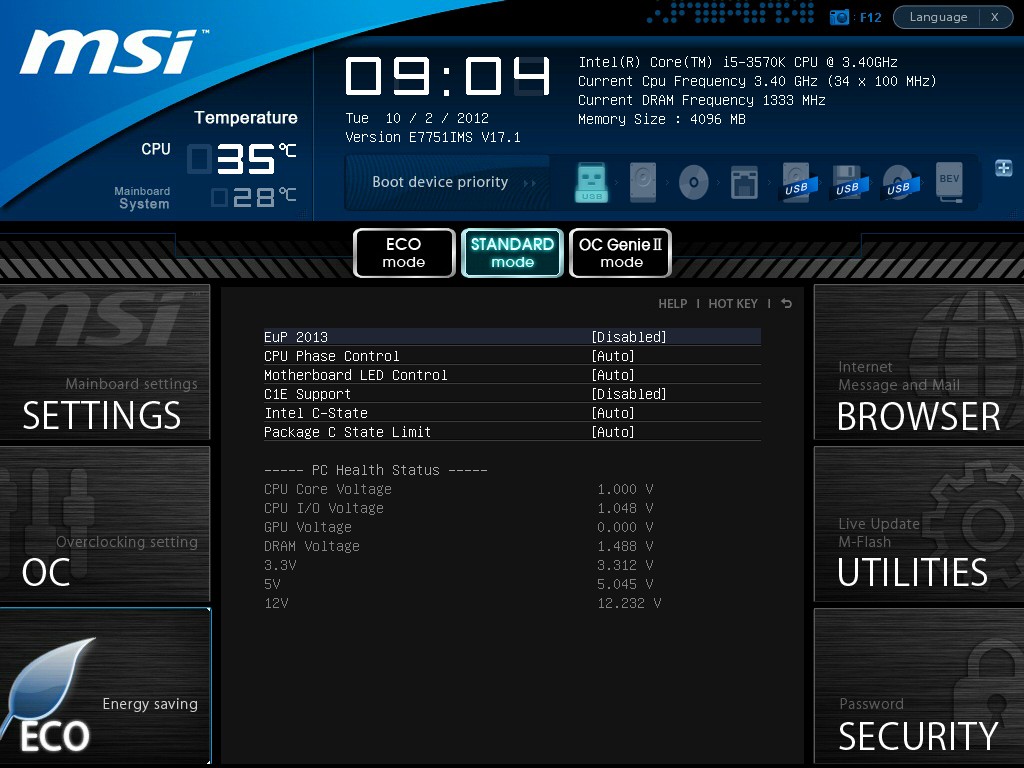
Here we see the ECO section, it is all based around power saving technologies for the board and covers processor C-State and other power saving controls.
Click Image To Enlarge
Here is the BIOS utilities which allows effortless bios flashing, backups and updates.
Click Image To Enlarge
Here are the performance presets which are easily selectable from top mid bar in the BIOS.
Testing & Methodology
We’ve expanded our testing suite considerably since the X79 chipset release, and will continue to use the same methods for most of the motherboards and CPU’s we test. In the interests of thoroughness and accurate results, we run each test at least three times, and some tests more than that. We average the total of all the tests from each benchmark then report the average here.
The OS we use is Windows 7 Pro 64bit with all patches and updates applied. We also use the latest drivers available for the motherboard and any devices attached to the computer. We do not disable background tasks or tweak the OS or system in any way. We turn off drive indexing and daily defragging. We also turn off Prefetch and Superfetch. This is not an attempt to produce bigger benchmark numbers. Drive indexing and defragging can interfere with testing and produce confusing numbers. If a test were to be run while a drive was being indexed or defragged, and then the same test was later run when these processes were off, the two results would be contradictory and erroneous. As we cannot control when defragging and indexing occur precisely enough to guarantee that they won’t interfere with testing, we opt to disable the features entirely.
Prefetch tries to predict what users will load the next time they boot the machine by caching the relevant files and storing them for later use. We want to learn how the program runs without any of the files being cached, and we disable it so that each test run we do not have to clear pre-fetch to get accurate numbers. Lastly we disable Superfetch. Superfetch loads often-used programs into the memory. It is one of the reasons that Windows occupies so much memory. Vista fills the memory in an attempt to predict what users will load. Having one test run with files cached, and another test run with the files un-cached would result in inaccurate numbers. Again, since we can’t control its timings so precisely, it we turn it off. Because these four features can potentially interfere with benchmarking, and and are out of our control, we disable them. We do not disable anything else.
One thing to note is that we are revamping our testing method in order to better represent motherboard performance and offering to you guys the consumer. Also we want to make it an easier read for you without miles of endless charts. Please feel free to provide feedback on what you think as many benchmarks will be shuffled or removed completely.
Test Rig
| Test Rig | |
| Case | Thermaltake Level 10 GT |
| CPU | Intel Core i7-3770K |
| Motherboard | MSI Big Bang Z77 MPower |
| Ram | 16GB Patriot Viper Xtreme 2400MHz + |
| CPU Cooler | Swiftech H20-220 Edge |
| Hard Drive | Western Digital Velociraptor 300GB |
| SSD | Intel 510 series SATA III 120GB |
| Optical | ASUS BD-ROM |
| GPU | Asus GTX680 Top/Intel HD 4000 |
| Additional Cards | N/A |
| PSU | Thermaltake Toughpower XT Platinum 1475W |
| Mouse | Tt esports Black gaming mouse |
| Keyboard | Tt eSPORTS Meka G1 mechanical gaming keyboard |
Test Suite
We will use the following applications to test the performance of the Motherboard. Benchmarks
| Benchmarks |
|---|
| PCMark 7 |
| 3DMark 11 |
| Cinebench R11.5 |
| Unigine Heaven 3.0 |
| SuperPi |
| Metro 2033 |
| SiSoft Sandra 2011b |
| X264HD |
Overclocking

The Z77 platform is still very new and just like Z68 we had tested before the BCLK increases are quite small. With that being said these chips rely heavily on Multiplier to get the job done. With the new 22nm chips we are facing much higher thermals which is the opposite of what were used to with a process change like this.
The Z77 MPower too very minor adjustments to get the board overclocked. We were able to get to 5GHz although it was some trial and error with voltages to find what the board liked. We feel like this board has the potential to overclock very well its just a whole different learning curve as the board behaves differently than the Gigabyte and ASUS models we have used as of recent.
We have not had the chance to put the MPower under LN2 yet so its prowess in that respect is still up in the air but its ability to overclock to 5GHz+ with some tweaking tells me this could do very well. As I have noted before the limit is not really the board anymore but more the chip I think this board could run pretty close to the pack given the proper cooling being employed.
Below we have included the screenshot of what this 3770K CPU is capable of and this tells you there is definitely some headroom to be exploited pending your willing to go cold.
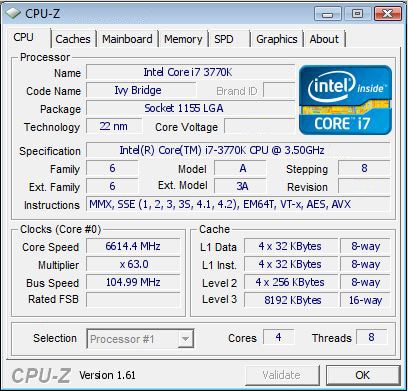
For the Ivy Bridge benchmarks we stuck to a modest 4.6GHz overclock as we found it easily obtainable with acceptable temperatures without too much tuning hassle. This is not an indication of the board’s inability to overclock, but more a representation of what any user could expect with a decent air cooler and a few minutes of tinkering. This can also be attributed to the large amount of heat dump from the chip when overclocking which is why we always recommend maximum cooling capability such as a liquid cooling system to ensure thermals are kept under control.
Important note: Overclocking can cause component failure. Please exercise caution when attempting any level of overclock on system components.
Temperatures

The temperatures were recorded with RealTemp while running wPrime 1024 right before the end of the 5th run. The results were recorded carefully. After the results were recorded, we waited for 30 minutes before taking Idle temperature measurements. The results were as follows:
| CPU Temperatures | Temperature (Idle/Load) |
| MSI Z77 MPower OC (4.6GHz) | 34C/68C |
| MSI Z77 MPower | 27C/52C |
| Chipset Temperatures | Temperature (Idle/Load) |
| MSI Z77 MPower OC (4.6GHz) | 45C/51C |
| MSI Z77 MPower | 36C/48C |
We used the same Swiftech LCS to ensure similar temperature comparisons available as similar application and mounting conditions were used.
Power Consumption

The power consumption was tested while running Wprime 1024 for a few minutes at stock settings. The results were recorded carefully with a Kill-A-Watt power consumption measuring tool at the wall. After the results were recorded, we waited for yet another few minutes minutes before taking Idle power consumption measurements.
| Configuration | Power Consumption (Idle/Load) |
| MSI Z77 MPower (4.6GHz) | 209W/427W |
| MSI Z77 MPower | 159W/364W |
The power consumption is not with GPU usage. This is with CPU/system loading but nothing graphically intensive in order to provide the most accurate results by not ramping up the GPU, which will pull significantly more power.
Synthetic Benchmarks
SiSoft Sandra 2011

“SiSoftware Sandra (the System Analyzer, Diagnostic and Reporting Assistant) is an information & diagnostic utility. It should provide most of the information (including undocumented) you need to know about your hardware, software and other devices whether hardware or software. It works along the lines of other Windows utilities, however it tries to go beyond them and show you more of what’s really going on. Giving the user the ability to draw comparisons at both a high and low-level. You can get information about the CPU, chipset, video adapter, ports, printers, sound card, memory, network, Windows internals, AGP, PCI, PCI-X, PCI-E (PCI Express), database, USB, USB2, 1394/Firewire, etc.”


SiSoft Sandra is one of those benchmarks that gives a good idea of how a platform can handle specific tasks. We like this benchmark as it does a decent job of showing small efficiency differences from board to board while not taking too long to run. We did find that the performance here was quite close to our first Ivy Bridge benches we have run and this just goes along with what we have seen as since Sandy Bridge was first introduced. Most boards perform within a percent or so of each other and therefore the separation from board to board is more based on features rather than performance. The MSI Z77 MPower handles the tests well and are within or even beating some models we have tested.
Superpi
SuperPi is a single threaded benchmark which measures efficiency and is heavily influenced by architectural changes as much as it is by clockspeeds.

SuperPi is a great efficiency benchmark and one we always use just because its simple and it shows improvements when they exist. The MSI Z77 MPower does very nicely here as well and it seems like there is definitely some optimizations that are happening along the way as the Z77 platform matures causing the boards to be just flat out more efficient.
X264HD

The X264 benchmark is all about encoding, and how well your CPU can do it. We know the 6 core chips for LGA2011 and 1366 are going dominate this as it has 50% more cores. For a comparison between Sandy Bridge and Ivy Bridge, there is a nice little performance increase likely due to the efficiency of the new die shrink. The Z77 MPower shows some good performance here, not the very best we have seen but within a percent or two.
Real World Benchmarks
3DMARK 11
![]()
3DMark 11 is the newest in Futuremark’s suite of benchmarking utilities. Its a fully capable DirectX11 benchmark which also stresses and analyzes the system performance as a whole to simulate a heavy rendering environment, such as a high end game or other application the end user may run. This benchmark was run with Performance settings 5 times and all runs were averaged for the results below.

In 3DMark 11 we opted for the Physics score as this test is CPU based and relies on no graphics, so we just see the CPU’s ability to render the preset Physics test. The MPower shows a strong performance here as it mixes up with some of the est scores we have seen on Z77.

Here we see the performance scaling in the 3D side of the benchmark and with a ASUS GTX680 installed. Now the i7-2600K has a PCI-E GEN 2 controller where the 3770K offers full PCI-E GEN 3 compatibility. This shows a small improvement without the help of the Virtu MVP software. With MVP we do see some very fast results which we have seen previously but still is quite impressive that using the iGPU for this kind of performance increase can be done.
Unigine Heaven 3.0

Unigine Heaven is a benchmark program based on Unigine Corp’s latest engine, Unigine. The engine features DirectX 11, Hardware tessellation, DirectCompute, and Shader Model 5.0. All of these new technologies combined with the ability to run each card through the same exact test means this benchmark should be in our arsenal for a long time.

Here we see once again the GTX680 getting a slight increase from the switch to GEN 3 lanes, but once Virtu MVP was enabled it gets interesting again as the discrete GPU simply can do its job more readily and it shows in the FPS numbers.
Metro 2033
![]()

Here Virtu takes it again making the gaming performance better and stronger.
PCmark 7


PCMark 7 is a worthy synthetic full system benchmark, and we have found it a good measure of total system performance. The Z77 MPower is right in line with some of the best we have seen and its efficiency keeps it well within range of a top spot.
CONCLUSION
The MSI Z77 MPower is a very capable board marketed for overclocking at a quite reasonable price.
The board has WiFi/Bluetooth both included and removable individually which is a cool and useful feature. The BIOS button is great as it makes a otherwise occasionally annoying chore as easy as a button press. The UEFI is smooth and just works really well with little I could see for improvement. The onboard buttons make for a easy to use experience along with the ability to customize your OC Genie profile to whatever settings you like.
Some areas we would like to see improvement in are things like inclusion of at least enough SATA cables to cover the standard PCH ports. Also we think the layout of the V-Check Points could have been moved more toward the button area which would allow better placement of the 24 pin and 6 pin connections. The overall feel of the overclocking felt a little more difficult than other board but its probably just that we are more used to their BIOS at this point.
All in all the MSI Big Bang Z77 MPower board is a good performer, it has some solid overclocking features, good performance capability and a very nice price point. The important thing to remember here is that even when I talked to MSI they did not want this board to be in the epeen contest with the big overclocking players, as MSI was perfectly happy being a capable player just as adept on the test bench as it is in a gaming rig and I think they pulled it off well.
| OUR VERDICT: MSI Big Bang Z77 MPower | ||||||||||||||||||
|
||||||||||||||||||
| Summary: The MSI Big Bang Z77 MPower has the right parts in the right places to be a serious contender at a great price. For this it received the Bjorn3D Golden Bear Award. |


hello guys!
I’d like to know just one thing: why when you make a review of a new motherboard (not the chipset), you don’t compare it with the motherboards of the same chipset but, you compare it with other chipsets? That compare dosen’t tell me anything about how performant this board comparing to the other options out there.
Best regards
Hey DT,
Yes and if you read the review in its entirety amongst the countless other Z77 boards I have done. The performance difference between each board is marginal and within the margin for error which to me means a graph with basically scores that vary less than 1% in most cases will be just a flat and uninformative result. Therefore I chose to compare with other boards that users may upgrade from to give a comparison of benefits.
If the CPU was not the limit on this platform then I could see comparing them but this generation/architecture is so efficient that it really makes little to no sense to compare board to board.
The only time you will see marked differences in performance is once you go to the extreme overclocking level (5.3GHz+) is where you might start to see a difference.
I hope this clears some information up for you and provides some insight into how II and the team works to ensure we provide the best possible comparison and overviews for you.
I’m wondering what you used to test power consumption. As in what program was running to stress the CPU? I ask because your power consumption numbers are off the charts high. For example, I run F@H on the same board 4.5GHz 1.2v and PEAK at 185W at the wall (90% efficient PSU so around 170W actual). That is also with 1 HDD, 1 SSD, 1ODD, 5 fans + water pump and HIS 7970 X Turbo… I cant even see applications like IBT/Linx/OCCT/Prime95 more than doubling my results. I idle around 91W (4GHz 1.2v fixed) Those numbers appear to be woefully off on the high side.