
With black computer chassis and hardware in style, Thermaltake has started a new category of products called the “Snow Edition” in an attempt to stand out from the crowd. These products come mainly with a white color scheme. This time around we’re checking out Thermaltake’s Armor Revo Snow Edition Gaming chassis.
Introduction
Back in the 90s, we saw plenty of white desktop chassis, but as color styles and system requirements shifted, manufacturers started bringing black and silver chassis to the market. With less variation in color schemes, Thermaltake saw the chance to bring back the white chassis to the market, with not only some gamer design, but also plenty of features. Today, we’re taking a look at Thermaltake’s Armor Revo Snow Edition gaming chassis, which comes in a combination of white, black and blue colors. The chassis follows the style of the previous Armor series cases from 2006, but with many improvements in its features and design.
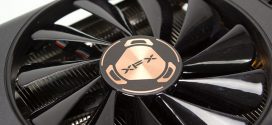
The Thermaltake Armor Revo Snow Edition chassis comes with three massive 200 mm fans, and a 140 mm fan in the rear. It has many features gamers will love, like the headset hook on the side panel, plenty of air circulation, lots of ports and connections for gaming gear, and of course armor shield look in the front, which kind of reminds us of the medieval times. The Armor Revo Snow Edition chassis is not as cheap as we’d like it to be, coming in at $189.99, but with its features, it might just be a desktop chassis to consider for this holiday season. If you’re thinking about getting this case, order soon, because supplies are limited and many e-tailers (including Newegg at the time of publishing) are out of stock.


Features
|
Plug&Play side-panel fan |
More power, less heat |
|
Liquid cooling ready |
Clean up the mess |
|
SuperSpeed USB 3.0 |
You are in control |
|
Hot-swap hard drive docking station |
High-end graphics card supported |
Specifications
|
Feature/Specification |
Thermaltake Armor Revo Snow Edition |
|
Case Type
|
Full Tower
|
|
Material
|
SECC
|
|
Front Bezel Material
|
Combination of plastic and high air flow mesh
|
|
Color
|
Interior: Black
Exterior: White |
|
Side Panel
|
Swivel Door with Transparent Window
|
|
Motherboard Support
|
9.6” x 9.6” (Micro ATX)
12” x 9.6” (ATX) |
|
Motherboard Tray
|
No
|
|
5.25″ Drive Bay
|
4
|
|
External 3.5″ Drive Bay
|
By using 5.25″ to 3.5″ Converter
|
|
Internal 3.5″ Drive Bay
|
6
|
|
Expansion Slots
|
8
|
|
Front I/O Ports
|
USB 3.0 x 2
USB 2.0 x 2 eSATA connector x 1 MIC & Speaker (support AC’97 & HD Audio) |
|
Cooling System
|
Front (Intake) :
200 x 200 x 30 mm Colorshift fan x 1 (600~800rpm,13~15dBA) or 120 x 120 x 25 mm x 2 (optional) Rear (Exhaust) : 140 x 140 x 25 mm TurboFan, 1000rpm, 16dBA or 120 x 120 x 25 mm x 1 (optional) Top (Exhaust) : 200 x 200 x 30 mm Colorshift fan x 1 (600~800rpm, 13~15dBA); 200 x 200 x 30 mm x 1 (optional) or 140 x 140 x 25 mm x 2 (optional) or 120 x 120 x 25 mm x 2 (optional) Bottom (Intake) : 120 x 120 x 25 mm x 1 (optional) Side (Intake) : 200 x 200 x 30 mm x 1 (optional) |
|
Liquid Cooling Capable
|
Yes
|
|
Liquid Cooling Embedded
|
No
|
|
Power Supply Supported
|
Standard ATX PSII Power Supply
|
|
Power Supply Included
|
No
|
|
Dimension(H*W*D)
|
586 x 254.0 x 552 mm
23.1 x 10 x 21.7 inch |
|
Net Weight
|
11.5 kg
25.35 lb |
|
Security Lock
|
For peripherals only
|
|
Application
|
Suitable for gaming, enthusiast, DIY and modding
|
|
Warranty
|
3 Years
|
Closer Look: External


Click Images to Enlarge
Just like any Thermaltake desktop chassis, this case comes well packaged in a hard hardboard box with Styrofoam protection on both sides of the chassis. The packaging is nothing too special, it shows the front of the chassis with its key feature of “Internal USB 3.0 Support” and a picture of an armored knight. The back of the box shows the specifications of the chassis with additional photos of its features. Easy way of removing the chassis from the box is by cutting the tape on the bottom of the box and then slowly lifting the box. The chassis should just slide right out with the documentation on the top. Once the two Styrofoam pieces are removed, the chassis will be covered by a plastic bag. Before we took the pictures below, we did remove a plastic protection film from the side window. There are also additional Styrofoam pieces placed around the armor cover on the front of the chassis to prevent it from being damaged during shipment.


Click Images to Enlarge
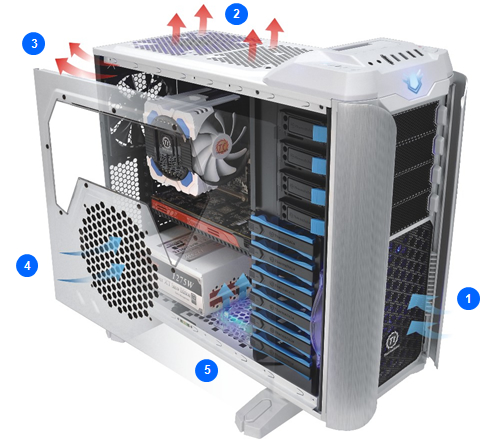
With the chassis out of the box, we can take a look at the Armor Revo Snow Edition chassis’ design. Right off the bad, we notice that this is a large case. It’s not necessarily the largest we’ve seen, but it is definitely not a mid-tower chassis. The case comes in at 586 (h) x 254 (w) x 552 (d) mm dimensions, or in inches it would be 23.1 (h) x 10 (w) x 21.7 (d) inches. The front bezel of the chassis comes with two flaps which are to resemble a shield or an armor cover. The addition of the armor shield explains the naming of the chassis and why previous Armor series chassis also had the armor flap. The front of the chassis has 4x 5.25″ drive bays, but as we will see the accessories, there is an additional 5.25″ to 3.5″ converter bracket that can go in the front to accommodate a 3.5″ fan controller, floppy drive, or anything else. While the Armor Revo Snow Edition is a snow white colored case, it does come with a black front and fan filter. This actually gives a nice contrast to the case and makes it look less old school, and more in style with today’s generation of modern gaming chassis. The side panels have a strange design but also some interesting additions to the case. The left side panel has a plexiglass window to provide a nice view at the computer hardware installed within the case, and there is an additional 200 mm fan included on the side panel, to provide more air intake for the main hardware components within the system, including the GPU, CPU, Motherboard and Memory (RAM). The Front 200 mm fan provides cool air intake for the Hard Drives and Solid State Drives installed in the system, while the top 200 mm fan and the rear 140 mm fans exhaust hot air out of the chassis. Thankfully, Thermaltake did include all the fans that all gaming chassis should come with. Of course there are additional places where optional fans can be installed, but more about that later.
On another note, the design aspect of the Armor Revo Snow Edition gaming chassis might no appeal to all gamers, but this is why there are so many varieties of gaming chassis out there. While the Armor Revo Snow Edition is a white chassis, Thermaltake does offer a black version of the same chassis for $10 less.


Click Images to Enlarge
Taking a look at the back of the chassis, we see that the Armor Revo is designed mainly for standard ATX motherboards, due to the 8 expansion slots available, but it does support Micro ATX motherboards as well. Unfortunately, the Armor Revo Snow Edition chassis did not qualify for Extended-ATX or any other form factor motherboards. A closer look at the back of the chassis reveals three 3/8″ water cooling rubber holes. Why three? Two are used for the tubing of the external liquid cooling system and a third one to pass through fan or power cables. Additionally, the power supply gets installed at the bottom and it looks like the Armor Revo also comes with plenty of honey comb mesh vents for better air circulation within the chassis.
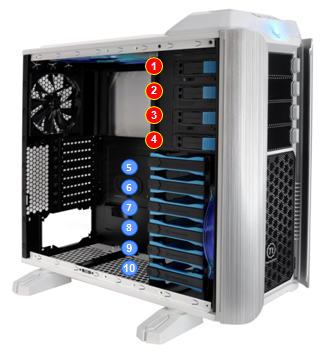
Here we have a closer look at the included intake and exhaust fans. The fan locations labeled as 1, 2 , 3 and 4 are included. The locations 1, 2 come with a 200mm blue LED fan, while location 4 comes with a standard 200mm fan. Location 3 comes with a standard 140mm exhaust fan, and finally location 5 does not come with any fans, though an optional 120mm fan can be installed.


Click Images to Enlarge
The top bezel of the Thermaltake Armor Revo Snow Edition chassis comes with 4 USB ports, 2 of which are USB 2.0 (black) and two of them supporting USB 3.0 (blue). The The connector right next to the USB ports is an external SATA port or e-SATA, and right next to it there is one headphone and one microphone jack. Right above the ports, the Armor Revo sports an external 3.5″ SATA port, with the possibility to use 2.5″ HDDs or SSDs. This external HDD/SSD port works much like plug-n-play external docking station for storage devices. On the left we can see three buttons, two of which enable the user to change the fan speeds from High or Low, and a third button to turn the Fan LEDs ON or OFF. On the right side, we can see a Power and Reset switch, along with the HDD activity LED indicator. The front Armor logo lights up blue when the system is turned on. The side panel comes with a plastic hook that can be lowered to hold your headset for those intense gaming sessions. This is a great addition for those that use headsets all the time and keep their cases close by.


Click Images to Enlarge
The front of the Armor Revo can easily be removed. With just a quick pull from the bottom, it detaches itself from the main body of the chassis and you get quick access to the fan filter in the front covering the 200 mm in the front. The 5.25″ drive bay covers can easily be detached and placed back just by squeezing the two white latches on the sides. These covers come with fan filters as well. The armor shield sides can easily be taken off with the black clips visible in the first picture. One thing we’d like to add is that in the first image we can see a partial photo of the bottom of chassis. In this image we can see the feet of the Armor Revo case. While the feet are extremely well made to keep the system on its feet even when you shake the chassis, it does not come with any anti-vibration rubber padding. This means that if you have hardware in your system that might generate some vibration (fans, hard drives, etc) the system might create a vibrating sound. We can’t believe Thermaltake didn’t put any rubberized feet. On the other hand, the feet are adjustable and can be flipped 90 degrees to provide extra stability to the case.

The PSU ventilation holes also come with a removable fan filter to keep the power supply dust free.


Click Images to Enlarge
Here we have some of the additional parts that come with the Armor Revo chassis. You will get a quick User’s Manual and Product Warranty information paper. Thermaltake does offer a 3 year warranty for parts and labor on all of their chassis. In the box, you can find all the accessories that come with the Armor Revo series cases.


Click Images to Enlarge
Here we check out the parts included in the accessory box. The first item on the list is a 5.25″ to 3.5″ adapter for installing 3.5″ drives, fan controllers, floppy drives, or anything else in the 5.25″ drive bays. The 2nd item is a 5.25″ to 3.5″ drive bay front cover adapter. Next up we have a 8-Pin CPU power extension cable. This is to help organize your chassis cable management or to help extend the power supply cable in case it is not long enough to route behind the motherboard around the motherboard tray. Next there are 10 cable management zip ties included, though we’d like to see a few more pieces for better and neater cable management, especially as these zip ties only cost pennies. There are plenty of screws included to fully utilize the Armor Revo chassis with as much hardware as it can support. Finally, a speaker is included for the system booting or error reporting that connects to the motherboard I/O front panel connectors.
Closer Look: Internal


Click Images to Enlarge
Now that we have take a look at the exterior of the Armor Revo Snow Edition and so far the case seems promising, let’s take a closer look at its interior. Right off the bat, we are presented with something very neat. The side panel that has a 200 mm fan included comes with a connector on the side panel, which when it makes contact with the side of the chassis, will automatically power the side fan. This is something we’ve first seen on an Alienware Area-51 gaming system, but to our knowledge Thermaltake got a patent on this design, and they will be the only ones offering such design. One down side to this design is that if the fan dies, the user would have to find another fan with the specific connection on the bottom, which most likely would only be available through Thermaltake directly or through an RMA process. However, this does not mean that you are only limited to Thermaltake fans, as you can technically still remove the connector on the side and the fan itself and install your own 200 mm fan.

Here we have a peek under the fan, and can see that the 200 mm side fan comes with a fan filter. Unfortunately this fan filter can only be cleaned through the honey comb mesh from the outside, unless the fan is removed completely.


Click Images to Enlarge
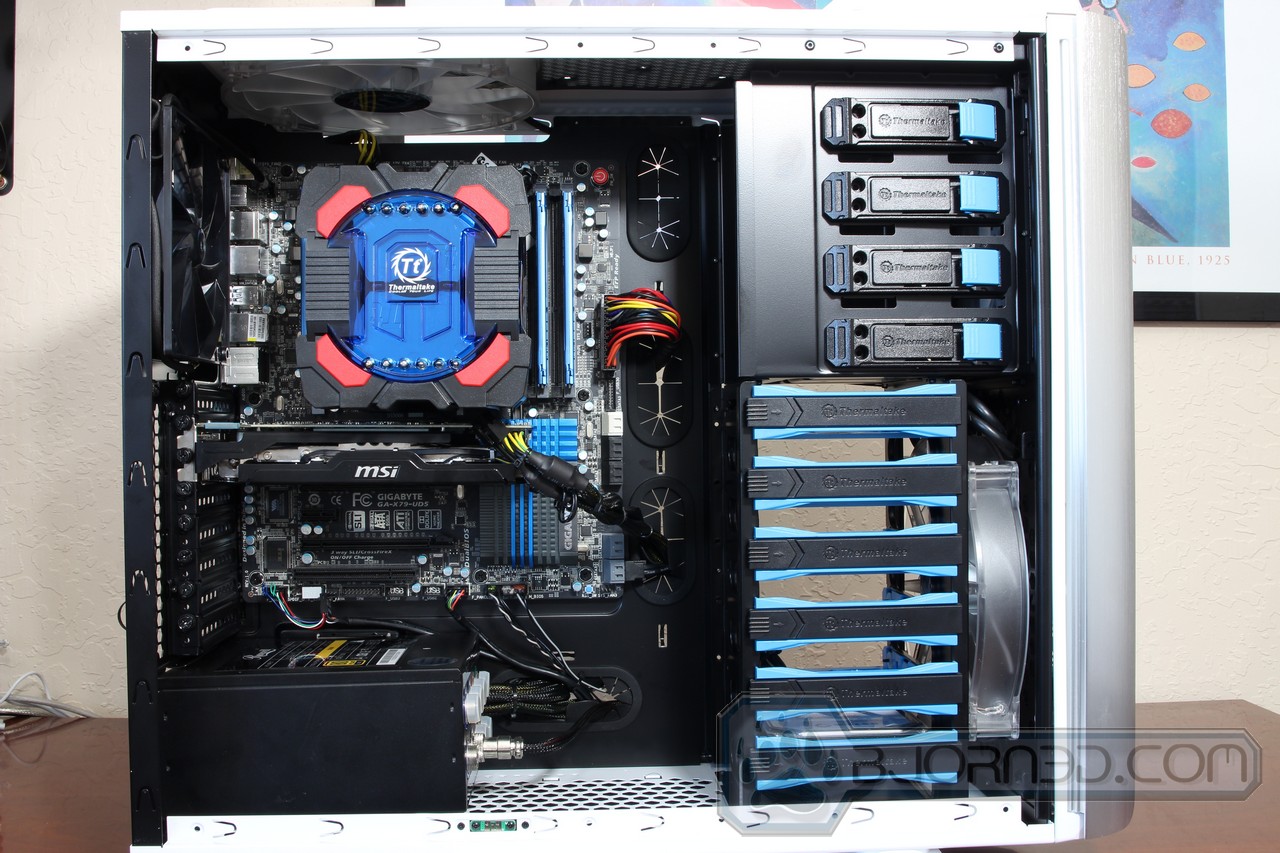
An interior view of the Armor Revo reveals a nice black finish with a massive motherboard CPU cooler cutout area. The top of the chassis already has a 200 mm fan installed however another 200 mm fan can be installed for additional cooling capability. At the top, you are able to use either two 200 mm, 140 mm or 120 mm fans. This means that you can also use a 120, 140, 240 or 280 sized radiators for internal liquid cooling solutions. The rear 140 mm black fan also accepts either a 140 mm or 120 mm internal liquid cooling solution
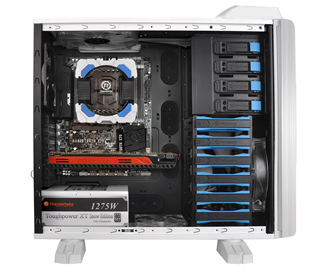
Here we can see some basic hardware installed in the Armor Revo Snow Edition chassis. We can see a full sized video card. This case supports up to 12.9 inch long cards (33 cm). It also supports coolers up to 7 inches in height (180 mm). Standard power supplies are definitely supported with the possibility to also install extended power supplies for the high-end system builders. Of course if the power supply is too long, the optional 120 mm fan on the bottom will not be usable.
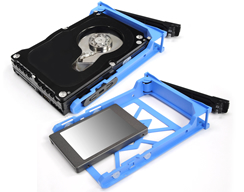
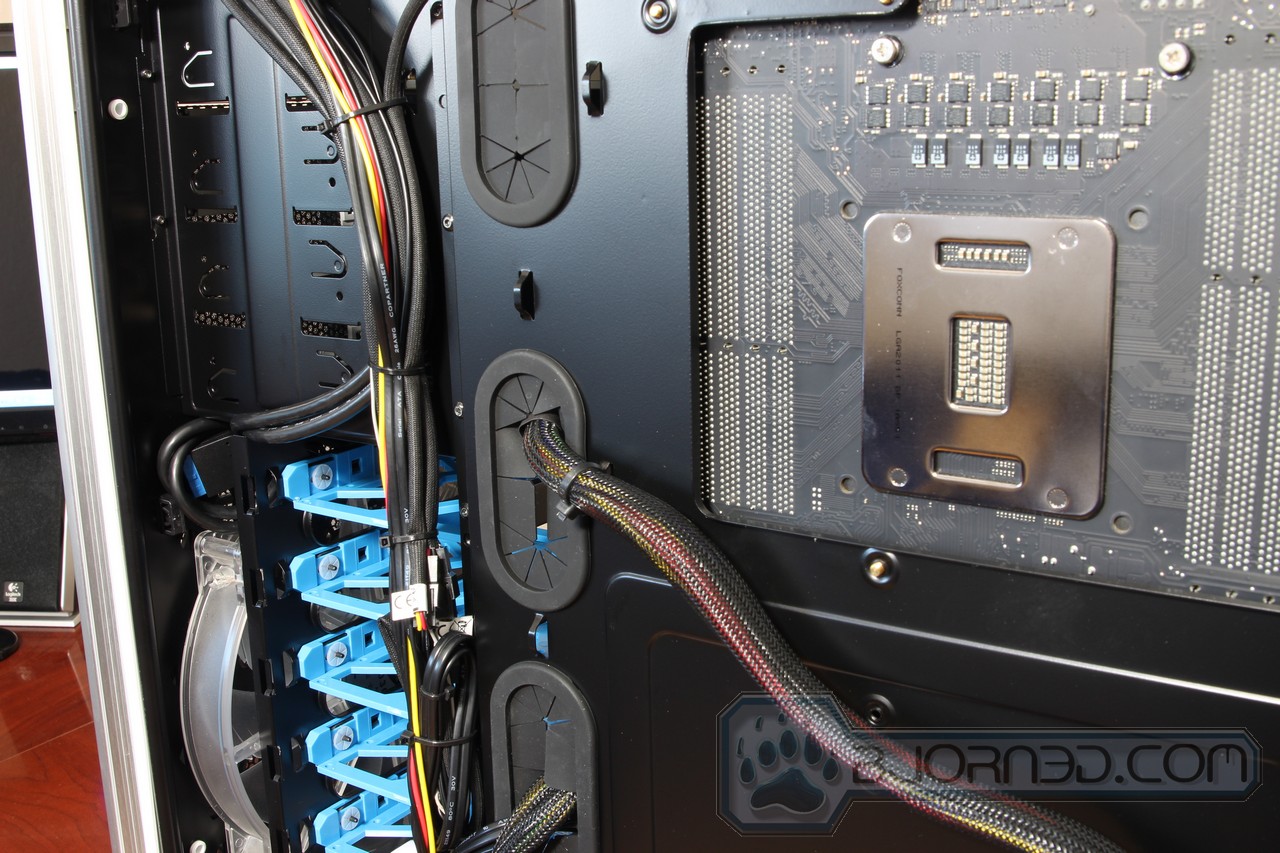
The Armor Revo chassis supports up to 6x 3.5″ and 2.5″ drives for hard drives or solid state drives. There are 4x 5.25″ drive bay on the top with one of them that can be used as a 3.5″ drive bay. Of course all of these drive bays are completely tool-free, meaning that no tools will be required to install your hard drives and optical drives. Screws will be necessary in case SSDs are mounted into the hard drive cages, however, if a 2.5″ to 3.5″ adapter is included with your SSD, you can always install the SSD into the adapter and then into the hard drive cage.


Click Images to Enlarge
These hard drive cages are not hot-swappable. After installing your storage devices, the connectors for each drive will be on the right side of the chassis behind the motherboard tray. The hard drive cages can easily be removed by simply pushing a little push button on the side and pulling on the black lever. Once your storage device is installed its as simple as sliding it back in until the hard drive cage clicks. The 5.25″ drive bays work by simply sliding in your desired 5.25″ drive. It clicks once it slides into position. If you need to remove your optical drive or any accessory installed in the drive bay, just pull on the blue latch and it will release the drive from the drive compartment. Screws can be used to secure accessories that might not work with the automatic latch system.
The Power Supply standoffs are not rubberized, which means additional vibration could be generated by the fan on the power supply. We are not sure why Thermaltake did not include rubberized standoffs.


Click Images to Enlarge
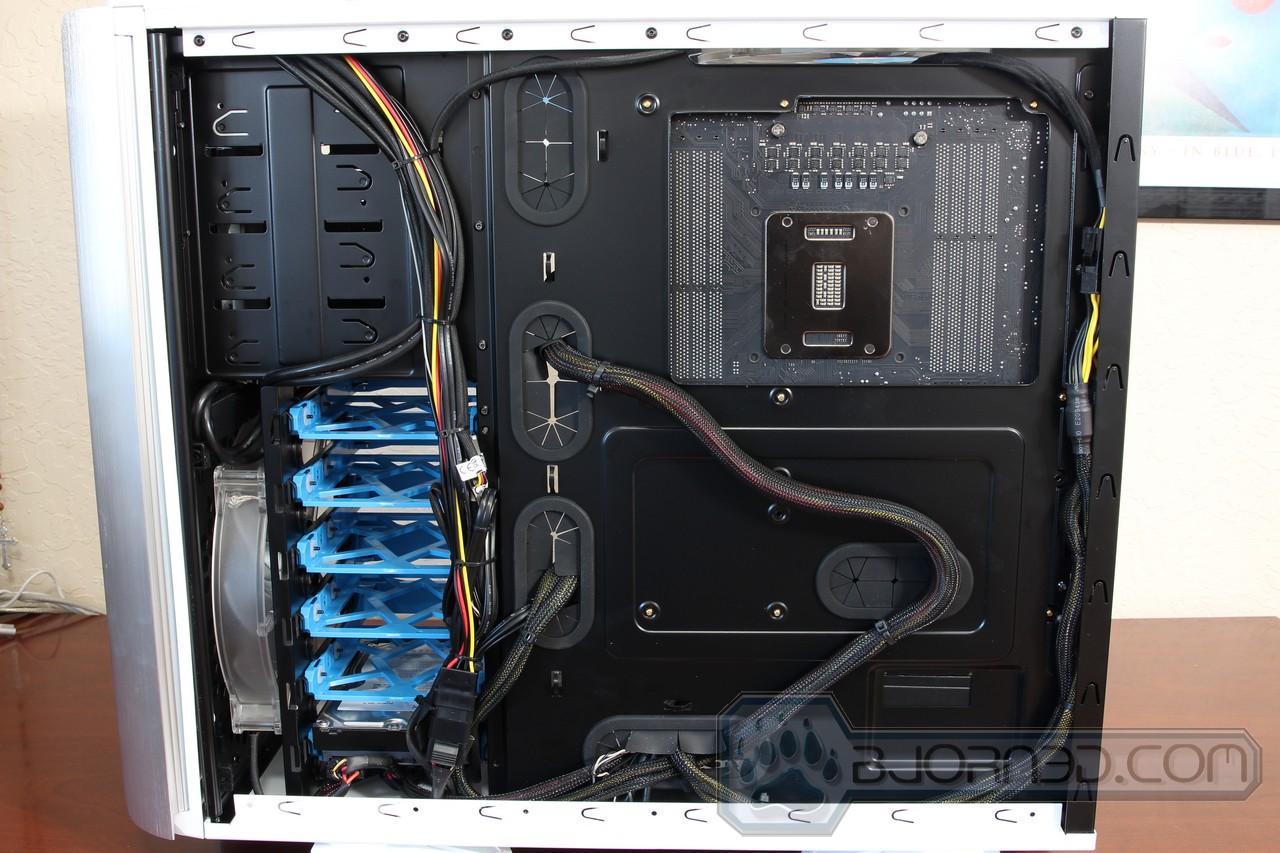
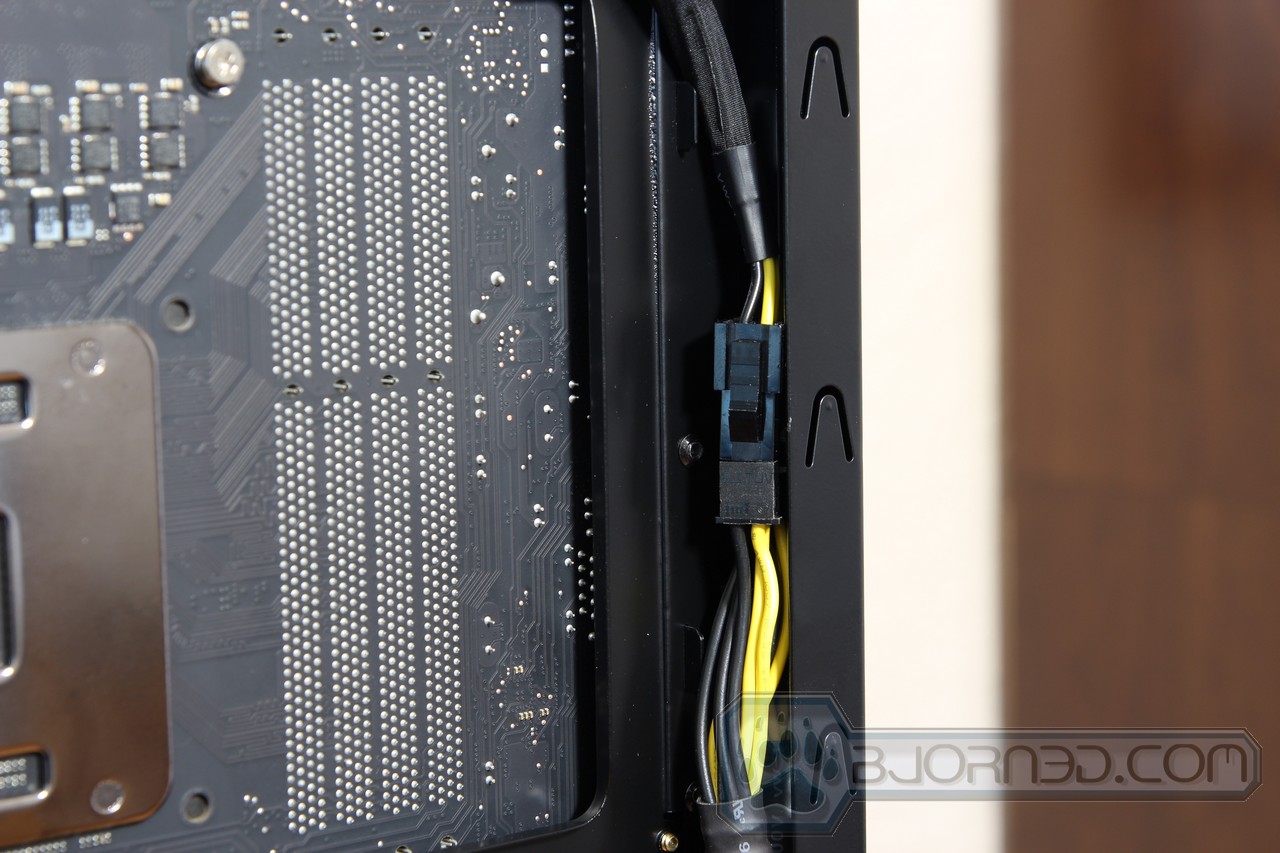
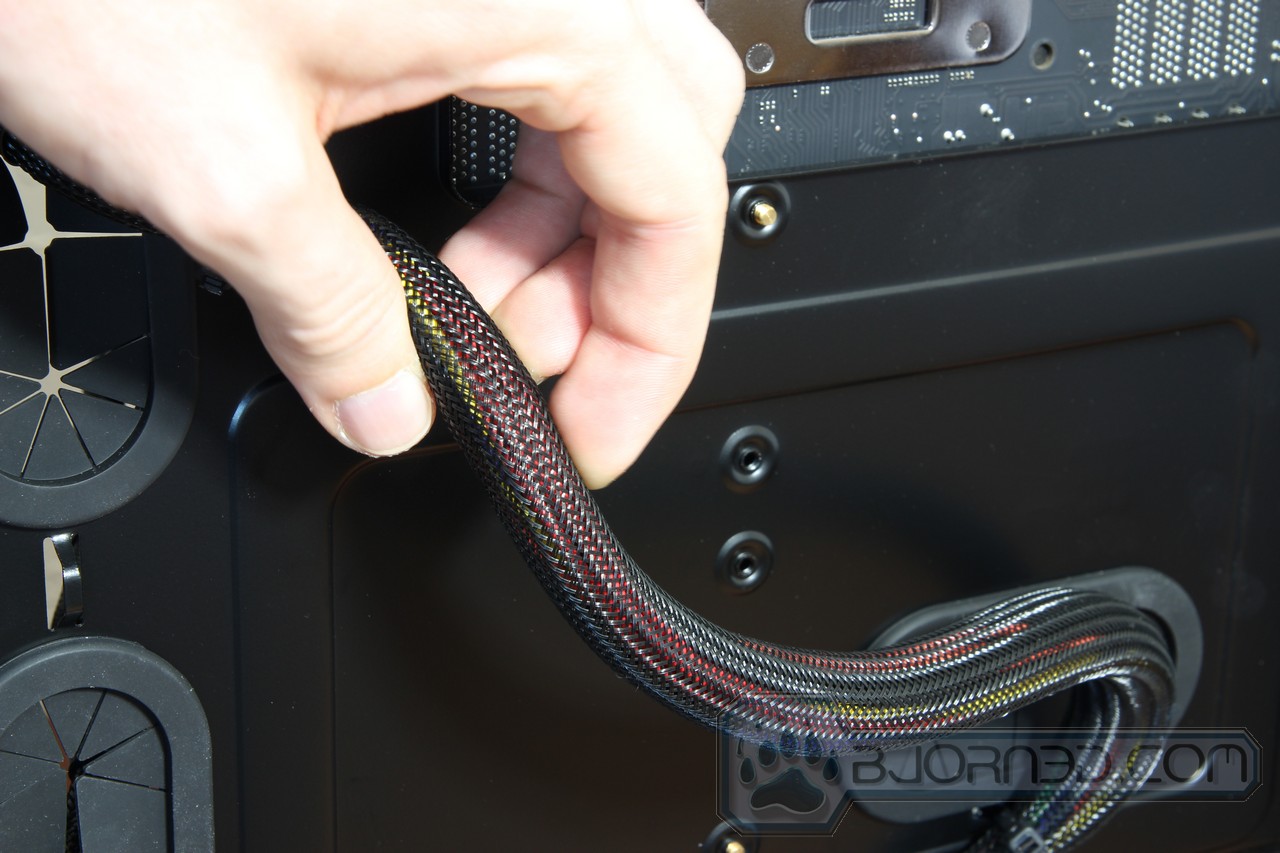
The right side of the chassis of course has all the case leads for the buttons, fan controller, USB ports, audio ports, etc. You’ll find all these connectors that will need to be connected to the motherboard I/O ports. Power cables are included to power the LEDs and fans within the chassis. The motherboard tray does come with plenty of motherboard cable management holes with robber grommets, however in our opinion it would have been nice to include another rubber grommet hole right above the first rubber grommet on the bottom. This way cables can be routed closer to the chassis. The cable management hole towards the middle of the motherboard tray and under the motherboard CPU cooler cutout is the cable management hole for the Mini-ATX boards.
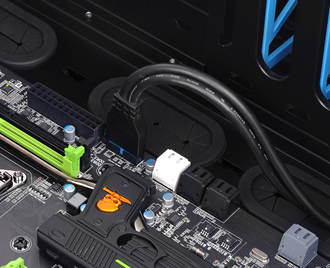
Here we have a closer look at how the Internal USB 3.0 port gets hooked up. You need to have a compatible motherboard with a internal USB 3.0 connector.
The System with Hardware Installed


Click Images to Enlarge
The installation of the hardware is simple and goes without a hassle. However, do keep in mind that it is probably the easiest to connect the 8-Pin CPU power connector on the motherboard before you install the motherboard into its position, as doing so later would require quite a bit of maneuvering due to the limited space. Of course if you do not have a CPU cooler already installed onto the motherboard, this should not be a problem.
Click Images to Enlarge
We did encounter a few annoying problems during cable management. As we’ve mentioned above, we would have liked to see an additional cable management hole with a rubber grommet a bit closer to the motherboard by the I/O connectors. Otherwise you are forced to route the cables either through the power supply cable management hole, or through the first bottom left hole. It is possible to route the cables through the middle motherboard cable management hole, but you’ll have to do that before installing the motherboard. Additionally, the cables might not be long enough to route it all the way around through the middle cable management hole designed for the Mini-ATX boards. Also, there are not many places where you can neatly hide the cables. You either route it by the side of the motherboard tray like we have, or some other way, but there is no way to hide most of the cables. Some cases do come with a flap right by the front fan, which allows the user to neatly hide all the chassis cables at the edges of the case. While the 8-Pin CPU extension cable was very handy in our case for better cable management, there are no hooks provided on the side to keep the cable from coming out from the corner of the chassis. We’d like to see more hooks everywhere.

Click Images to Enlarge
And where did the hooks go in the middle of the motherboard tray? Once again we are left with cables that have to be tightly zip tied to random locations around the motherboard tray because there are no hooks along the middle of the motherboard tray. The top CPU motherboard power cable also has a very limited space due to the 200 mm fan on the top. Only way to pass the cable through the hole is by either taking apart the 8-Pin extension cable into the two 4-pin parts, and then putting them together once they fit through the space, or by removing the top 200 mm fan. This was a considerable nuisance. Finally we have a fully finished system on the last picture in this array of pictures.
Click Images to Enlarge
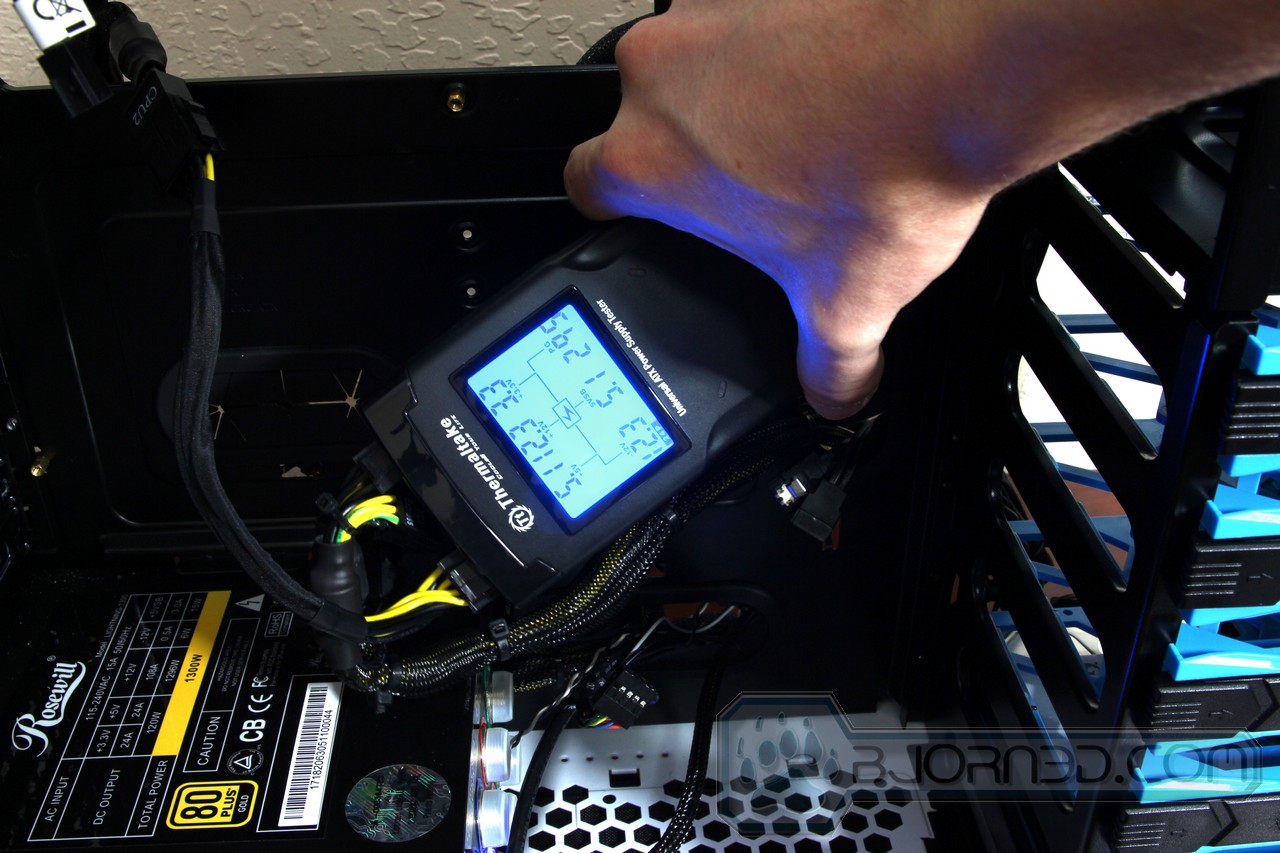
During our testing, we came to realize that our motherboard was dead. We had to go and RMA the motherboard with GIGABYTE, and thankfully our replacement was fully functional, and we were able to perform our tests. At first we believed the problem to be the a short circuit because the system would turn on for a second, but then would shut down. After unscrewing the motherboard and all the components and by unplugging hardware one by one, we were only left with the motherboard, CPU, CPU cooler and the main motherboard connectors attached in our system. The system would still not start. After replacing the CPU with another CPU, the system was still not starting, therefore we were down to testing the power supply and the motherboard. When in doubt, it is good to use Thermaltake’s Universal ATX Power Supply Tester, also known as the Dr. Power II. With Dr. Power II, we were able to see that the power supply turns on without any problems and there were no faulty rails or strange voltages present.
Testing Methodology
Our testing methodology is rather simple for cases. We let the system idle for 30 minutes and we measure temperatures. Then we turn on OCCT to load the video cards and the processor to 100%. After 20 minutes of 100% load, we measure the overall temperatures. If there are multiple fan settings available, we test the lowest and highest fan settings.
Test Rig
| Test Rig | |
| Case | Thermaltake Armor Revo Snow Edition |
| CPU | Intel Core i7-3820 @ 4.8 GHz – Quad-Core Processor (130W TDP) |
| Motherboard | GIGABYTE X79-UD5 Motherboard |
| Ram |
Kingston HyperX 16GB (4x4GB) 2133MHz Memory
|
| CPU Cooler | Thermaltake Frio OCK |
| Hard Drives |
1x Seagate Baracuda 1TB Hard Drive
|
| Optical | ASUS DVD-Burner |
| GPU |
MSI R7850 Power Edition 2GB
|
| PSU |
Rosewill Lightning-1300 1300W Modular PSU
|
| Mouse | Razer Imperator BF3 Edition |
| Keyboard | Razer Blackwidow BF3 Edition Mechanical Keyboard |
Results
Temperatures
CPU Measured with CoreTemp and averaged all cores. GPU temperature measured with MSI Afterburner and averaged all GPUs. Motherboard temperature measured with Ai Suite II.
Here are the temperatures we got from our testing:
| Temperature | ||||
|---|---|---|---|---|
| Idle (Low Fan) | Idle (High Fan) | Load (Low Fan) | Load (High Fan) | |
| CPU | 31 C | 29 C | 72 C | 69 C |
| GPU | 33 C | 31 C | 65 C | 63 C |
| Motherboard | 32 C | 30 C | 41 C | 39 C |
| HDD | 28 C | 26 C | 30 C | 29 C |
The temperatures speak for themselves. Even though our processor is overclocked to 4.8 GHz we are still getting exceptional performance at both Low and High fan speed settings. Needless to say, the GPU also performs at very low temperatures. Unless lots of high-end hardware are used in a build with multi-GPU configuration, it is safe to say that having the fan controller set to Low is fine for an average gamer. Of course having the fan settings on High will provide better cooling, but the system will also be a tad bit noisier.
Conclusion
The Thermaltake Armor Revo series chassis are definitely one of the nicest gaming chassis we have currently seen on the market. With lots of features, including a built in fan controller, plenty of USB ports with USB 3.0 support, lots of fan filters, 3 x 200 mm fans and 1x 140 mm fan are included, and much more; the Armor Revo chassis can be any gamer’s dream come true. Since we’re taking a look at the Snow Edition chassis, this specific model will come in a white exterior color scheme, but the Armor Revo chassis is also available in black for $10 less. Is the chassis worth the $189 price tag? Possibly, but with similar features to the Overseer RX-I chassis, which costs $139.99, the price difference is a bit too steep in our opinion. Of course, there are always days when the Armor Revo might go on sale for much cheaper, but until then it is not something we’d consider for the $189 price tag.
Unfortunately, we have a couple of issues with the Armor Revo Snow Edition case’s design. Hopefully, Thermaltake will take note of these issues and try to address them in future revisions of their Armor series chassis. First off, there are no rubber or silicone anti-vibration feet. The Armor Revo comes with plastic hollow feet, which makes it easy to scratch delicate surfaces, like table tops, and could also result in system vibration. The PSU standoffs do not come with any anti-vibration rubber or silicone material to prevent fan vibrations. Finally, while it is easy to keep the Armor Revo chassis organized with its implemented cable management system behind the motherboard tray, there are quite a bit of places where we would have like to see hooks for zip ties. Additionally, there are almost no places where cables can be hidden at the corners of the chassis, which somewhat adds to the cable clutter when additional hardware are installed in the system. It is small things like these that make us believe that the price is a bit too much for what the case offers. If these minor problems would be fixed, the price would be more appropriate.
| Our Verdict: Thermaltake Armor Revo Snow Edition Case | ||||||||||||||||||
|
||||||||||||||||||
| Summary: Overall the Thermaltake Armor Revo Snow Edition chassis is an excellent chassis with unique design, color scheme, and comes with features not offered on any other chassis on the market. The Armor Revo Snow Edition chassis receives the Bjorn3D Silver Bear Award. |


I prefer Thermalkakes’ PSU tester to their chassis. Definitely not for me.
I’ve had this case for about a year and absolutely love it; however, the logo in the front doesn’t light up as shown in the pics…it’d look pretty cool if it did though!