Gigabyte Z170X-Gaming G1 Review, Game With Kings!
It seldom happens that you come across a motherboard that covers every feature on your Motherboard Bucket list but Gigabyte has successfully fielded the GIGABYTE Z170X-Gaming G1 their flagship Z170 Skylake LGA 1151 board which comes close. Opening the box and just glancing at the board sent a surge of blood through our gaming veins. Starting with a glance at the Creative® Sound Core 3D chip and it’s 2 x JRC NJM2114 and 1 x TI Burr Brown® OPA2134 operational amplifiers we knew we were looking at a special board. Sound Core 3D is a multi-processor Audio and voice system that accelerates SBX Pro Studio and CrystalVoice processing effects improving your gaming experience with crystal clear sound and voice.
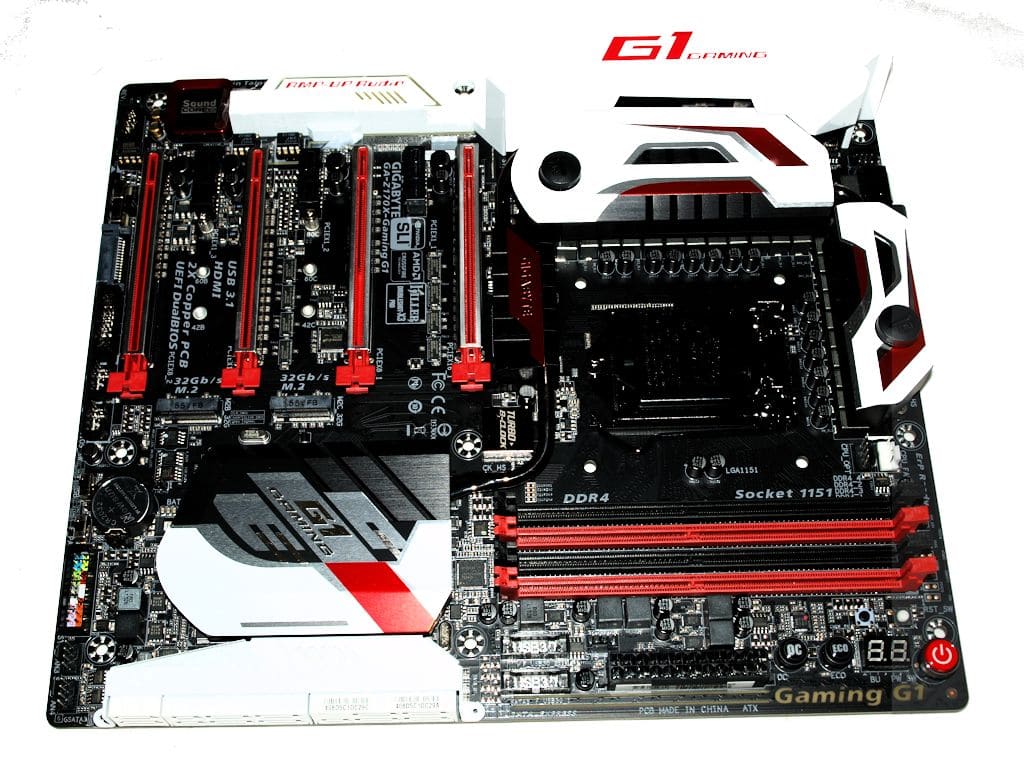
Gigabyte went whole hog on the Gaming G1 board and use 22 Phase Digital Phase Power Delivery to the CPU equipped with 4th generation digital power controllers and 3rd Gen PowlRstage IC’s with Isense technology. The Digital Power delivery system provides more precise power delivery for a more stable higher OC. With the power load spread over 22 PowlRstage ICs spreading the thermal load reducing the heat load on each IC resulting in a longer life and better dependability.
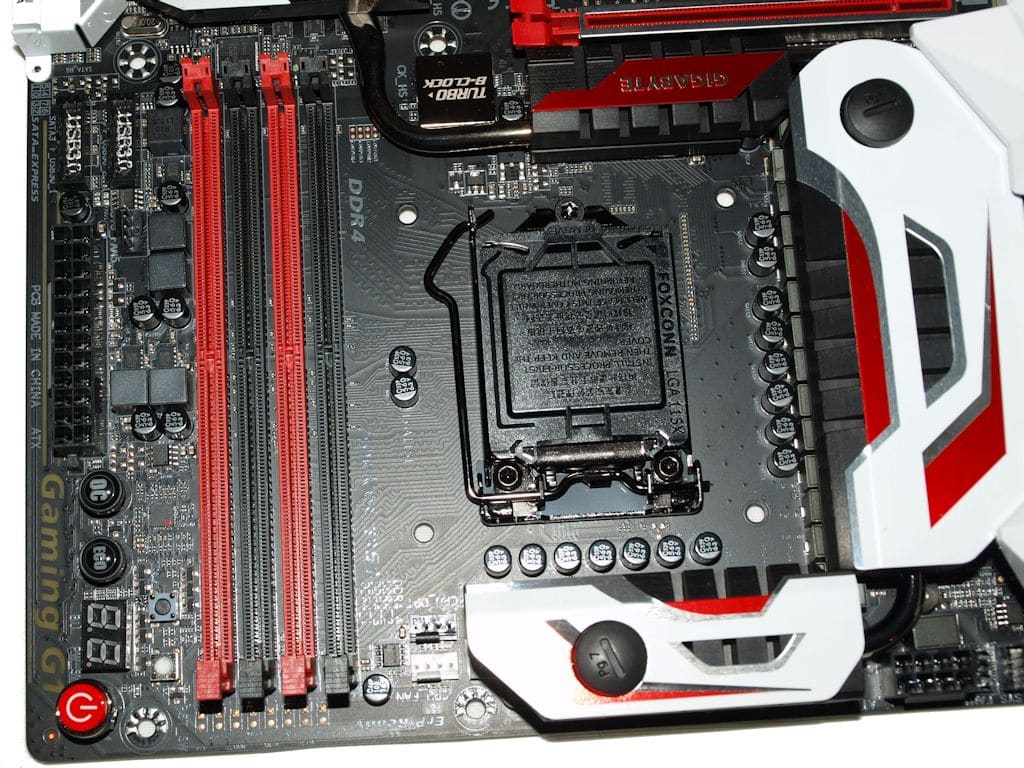
Here’s a close up of 22 phase power heaven for your CPU. The IC heatsink is Water Cooling ready to provide even greater cooing to the PowlRstage power delivery system. Gigabyte might have gone overkill on the 22 phase power but we’d much rather see overkill than just barely scraping by with 6 phase power killing our OCing glory. Z107 is a little different on the CPU power setup and there are 4 input lines to the CPU: VCC (Vcore), VCCSA (System Agent), VCCGT (Graphics core) and VCCIO (CPU IO). The CPU VRM gets 16 phases, VCCGT gets 4 phases and the VCCSA and VCCIO each have a phase.
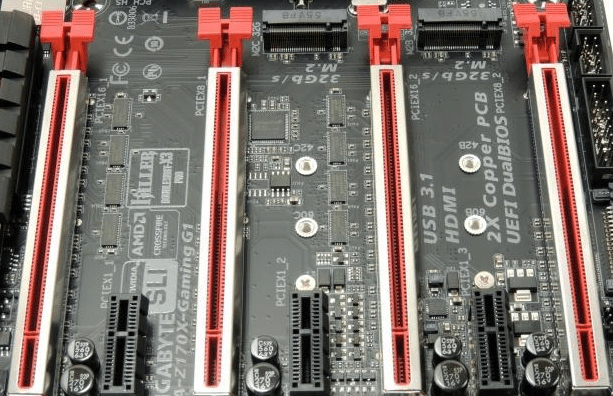
Take a look at the metal covered PCI-E slots 1.7 times as strong as a standard PCI-E slot and with Retention clips 3.2 times as strong as conventional clips and 4 full-sized PCI-E x16 slots (in size). The PCI-E setup on the GIGABYTE Gaming G1 is a bit unusual. The Skylake CPU’s have 16x PCI-E lanes and GIGABYTE re-routes those 16 lanes through a a PLX bridge which outputs 32x PCI-E 3.0 ports downstream. GIGABYTE routes two 16x slot to the first and third slots so you can actually run two x16 video cards and have a space between them to keep them cooler than stacking them side by side. You can run 16x 0x 16x 0x or 8x 8x 8x 8x and even run 8x 8x 16x. Gigabyte tossed in 3x single (1x)PCI-E slots for add-on cards like sound cards and other 1x PCI-E addons.
Mixed in those PCI-E slots are two M.2 slots that draw their bandwidth from the PCH but depending on your setup some of the Sata slots may be disabled. GIGABYTE has provided a chart on page 36 of the manual showing the Sata setup but we’ll post it here so you can see the trade offs. What it boils down to is if your drive isn’t working in a Sata slot then likely you’ve used an M.2 or PCI-E SSD and the slot is disabled. It’s not the best solution but given today’s variety of storage options something has to be done to accommodate them.
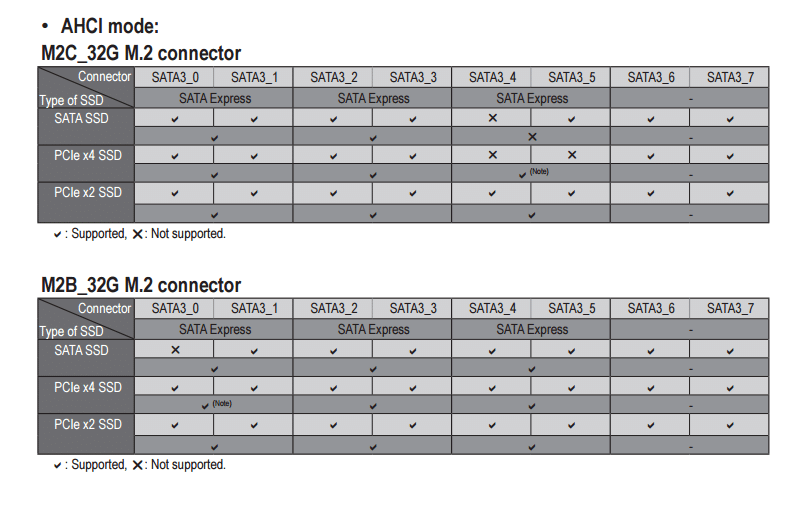 We don’t particularly like having to study Sata ports to see what can be used where and an LED indication system is warranted on a $500 motherboard that will tell us which slots are disabled and which can be used. To Top it off included in the bundle is a USB 3.1 drive bay tray that uses a Sata Express slot and two Sata Connectors to further complicate the Sata situation.
Four Sata ports are provided by ASMedia and 6 by the Z170 Intel Chipset PCH for a total of 10 ports All 6 of the Intel Z170 PCH ports are invested in the Sata express interface.
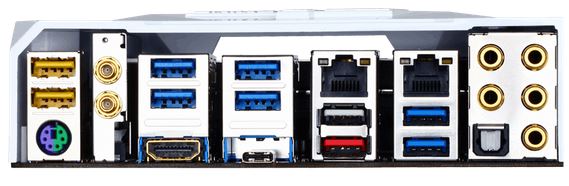
Now that’s a feature rich I/O port. 7 USB 3.0 ports (the White one can be used for USB BIOS flashing without a CPU or Memory Installed), a shared Keyboard / Mouse PS2 port, two USB 2.0 “Dac-Up” ports, Two 2 x Qualcomm Atheros Killer E2400 chips (10/100/1000 Mbit) for the network ports, two Wi-FI connectors (MMCX antenna ports), HDMI with future support for 2.0. Two USB 3.1, one Type-A and one Type-C (Type C is also Thunderbolt 3.0), the 7.1 Audio ports and a TOSLINK (Optical). Just looking at the I/O plate should be enough to tell you this isn’t some lightweight board.

We are big big fans of on-board buttons. On-board buttons allow the freedom to debug a board prior to case installation. In our case we use an open testing station during high volume motherboard periods (new CPU releases) so we don’t have to dink with case connectors or aftermarket button kits that attach to the case connector port. The Gaming G1 features a double-digit post code block start button, Economy button, OC button, reset button and CLR CMOS button.
Just left of the button bank is a 24 pin power connector and you get a sneak peek at the 2 phase power each Dual Channel Ram Bank gets. We realize that this is a mainstream platform (Z170) but it seems like a step back to force dual channel on a board when well established Quad channel ram is plentiful. We have successfully used Qua channel in the Z170 boards but it can cause hidden problems so you are better to stick with Dual channel designed for the Z170 Intel Chipset.
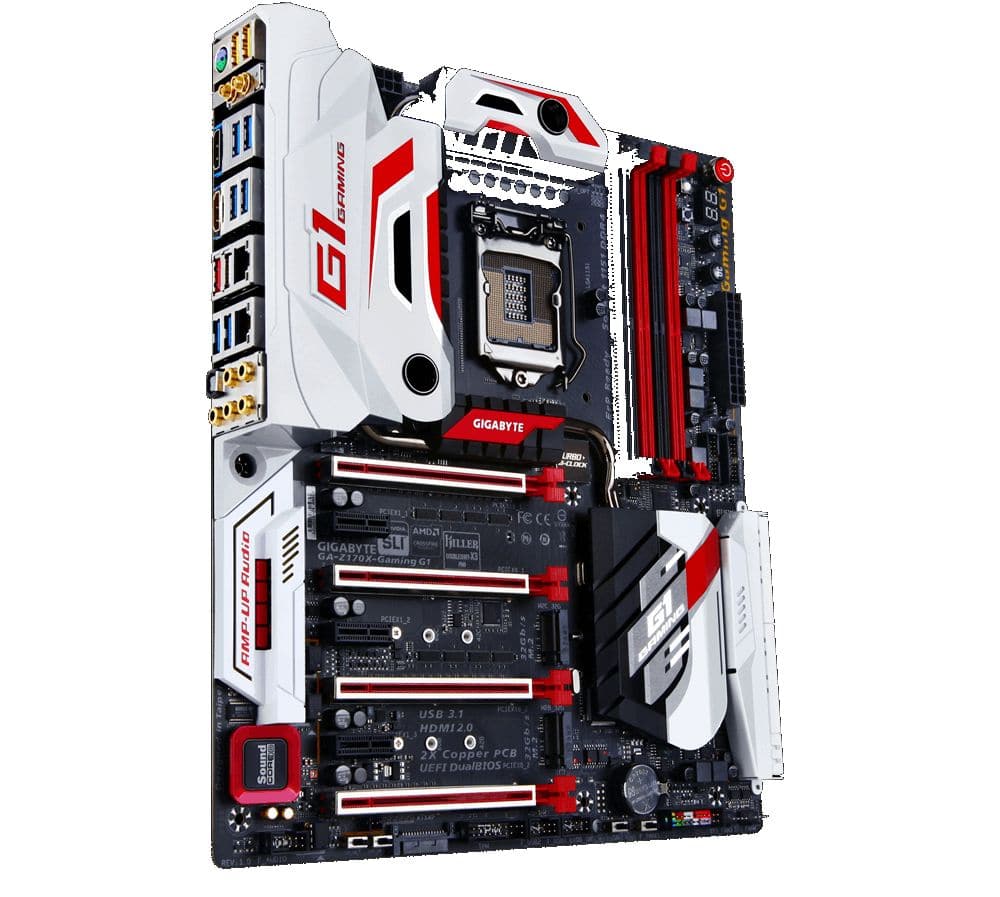
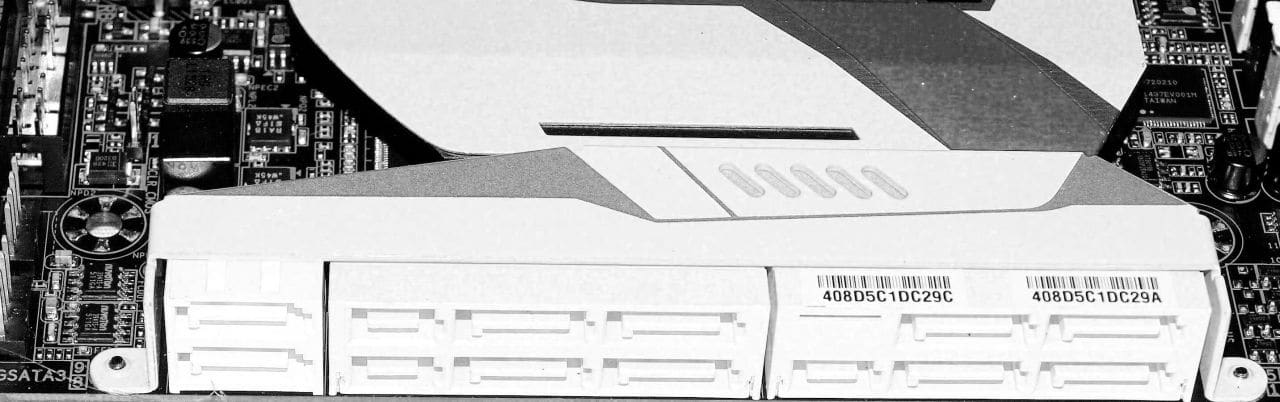
Pulling back from the individual components you can get a better look at how well composed the Gaming G1 really is. Want to take a killer rig to a Lan Party, this board shining through the window on your Lan Case should send shivers of jealousy through your fellow Lan Mates. Notice the white block right below the expansion ports?

The audio is so sweet on this board we broke out our two wooden Dolby 2.0 PC speakers and cranked the volume and got enthusiast level audio caressing our ears. GIGABYTE is using a Creative® Sound Core 3D chip, 2 x JRC NJM2114 and 1 x TI Burr Brown® OPA2134 operational amplifiers to churn out 120dB+ of sweet sound. The setup also includes support for SoundRecon3DI.
To put a little Icing on the GIGABYTE cake:
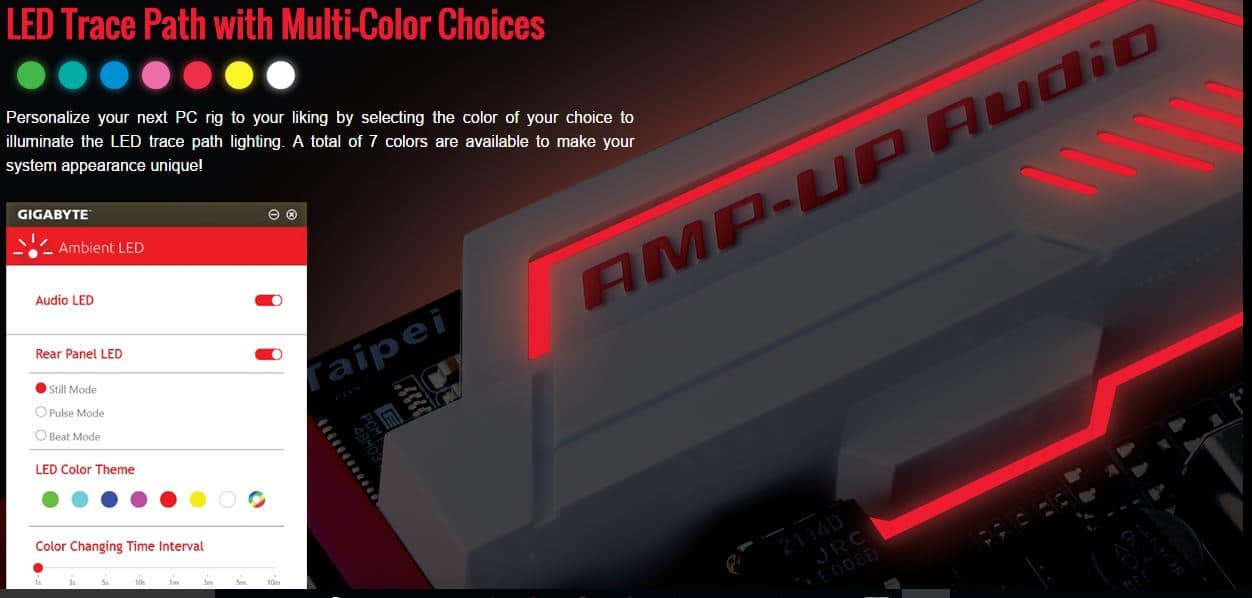
The Audio on the Gaming G1 has LED trace lighting with 7 different colors, it’s not RGB but with 7 color choices you get additional bling to draw attention to your Gaming shrine.

The Ambient lighting of the Audio trace path is a feature befitting a motherboard of this magnitude but they didn’t stop there.
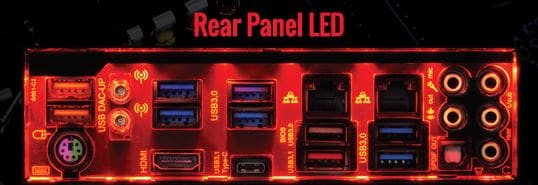
Gigabyte put LED lighting on the rear panel of the Gaming G1, 30 years later and someone was finally smart enough to light the I/O panel. Now how many times have you fumbled for a flashlight to find a needed port on the I/o Panel?
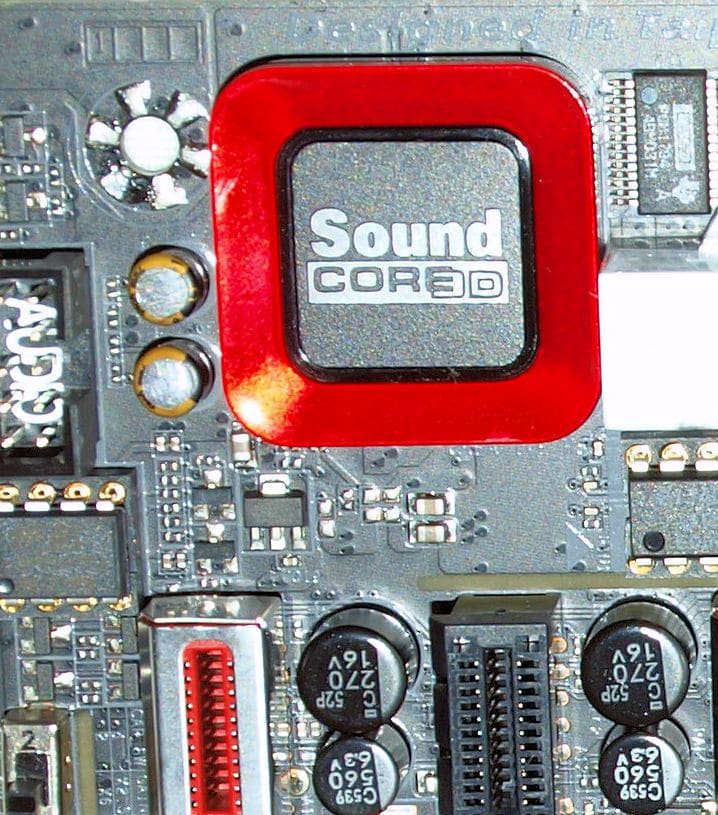
Just left of the LED audio panel you find the Sound Core 3D multi-processor sound chip which is a Quad core processor that takes the load of complex audio a gaming and processes it locally keeping the load off the rest of your system. To the left of the Sound Core 3D are a couple of the High End Nichicon Fine Gold Gigabyte uses in the audio system.
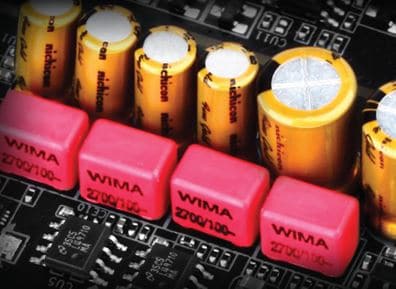
New to GIGABYTE and introduced on the 100 chipset the highly advanced Audio gets Fine Gold High End Nichicon capacitors and Hi-Fi grade WIMA FKP2 capacitors. You will be hard pressed to find better audio components inside high-end stereo equipment.
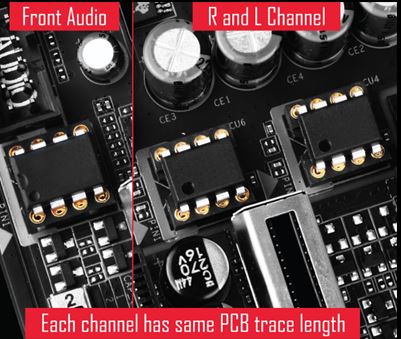
Now we don’t know anyone liable to upgrade on-board audio but GIGABYTE placed AMP-UP Audio Technology with Triple Upgradable OP-AMPs. Top top the upgradeibility of Gigabyte has included three Amps, one for the Right, Left and Front panel. We’ve been reviewing boards for years but this is a first for us, Hi-Fi quality audio on a computer motherboard. If you think about it you could not only game on this beast but use it as your audio system which really takes the bite out of the $500 price tag.

Pardon our enthusiasm for the audio system on the Gaming G1 and we’ll get back to the board layout itself, in front of the 24 pin color coded power connector you find two 4 pin PWN fan controllers, then the 24 pin power, the Dual BIOS switch then a couple of USB 2.0 headers.
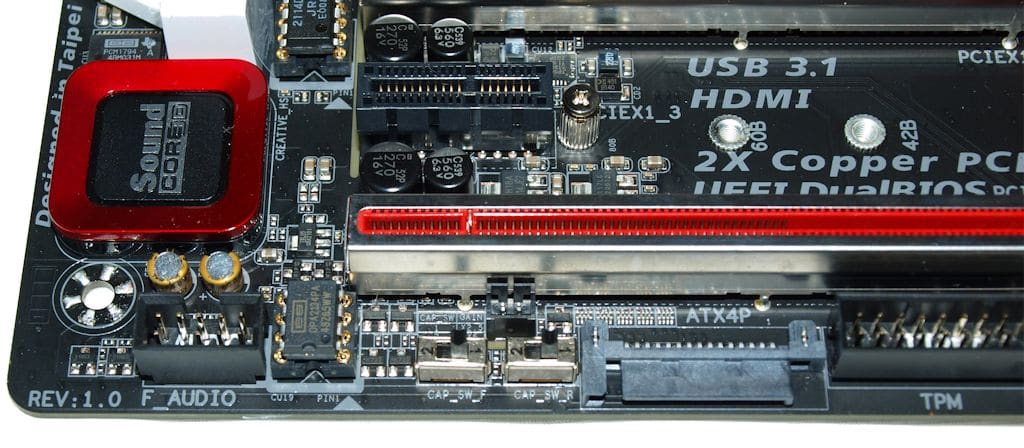
Moving left we find a TPM connector, Cap switch front and Rear and the front Audio Connector. The two switches located near a SATA power connector for more PCI-E power are used to change the gain from 6x to 2.5x. One switch is for the rear output and one for the front.
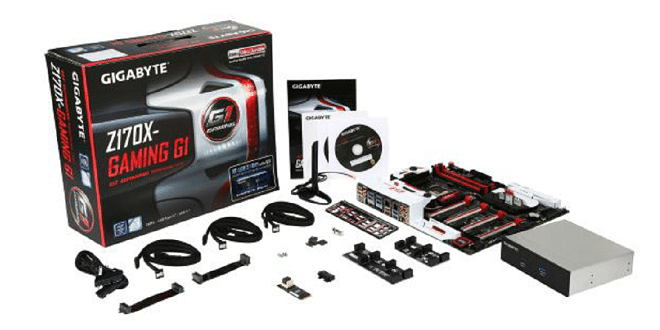
Lets get a look at the well stocked Bundle before moving on to the BIOS.
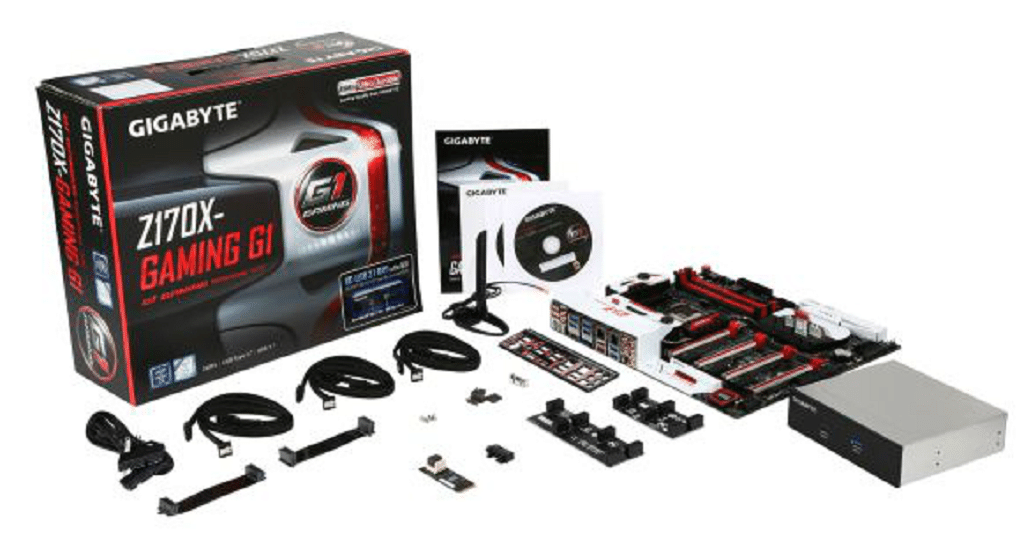
The Bundle Includes:
- 6x cloth braided SATA6Gb/s cables
- RGB LED IO shield
- 2-way SLI bridge
- 2-way CrossFireX bridge
- 3-way SLI bridge
- 4-way SLI bridge
- G-Connector
- MMCX antenna retention bracket
- Plugs for back panel IO ports
- USB 3.1 front panel bay
- SATA Express cable for the bay
- 2×2 MMCX antenna
- M.2 to U.2 add-in adapter
- Gaming G1 case badge
- Driver DVD
- Manuals
If GIGABYTE had thrown in a game download code we could go to our graves happy. You seldom see a bundle like this anymore, even on Flagship boards, and any more generosity would surely put us in our graves.