INTRODUCTION
Here at Bjorn3D, we have recently been taking a look at quite a few products from new brands, and next up in the line is Riotoro. Formed in 2014 and based out of California, Riotoro recently reached out to us with their CR480 PC case. The Riotoro CR480 case is a mid-tower design with budget builds in mind. And while budget parts usually come at the expense of something like quality or a full feature list, the Riotoro CR480 does quite well in providing a good base for a budget build. Riotoro sports a stylish bull for a logo, so let’s grab those horns and get to work!
FEATURES
Smart Cooling – Riotoro’s Direct Air Flow System is a standard cool-air intake, and warm-air exhaust design, which is a proven concept. With spots for up to five 120mm fans, there are quite a few options for users to customize their cooling needs.
Drive Options – Riotoro has chosen to include two 5.25″ drive bays at the top of the front panel, something we are seeing more and more companies move away from. In addition to these bays are support for up to two 2.5″ drives and three 3.5″ drives.
Aesthetics – A tinted window is found on the left side of the case, and is large enough to show off a build, but not so large that it highlights drive bays and cabling. A perforated front panel not only looks good, but provides a way for cool intake air. Red LED lighting is found below the Riotoro name at the bottom of the front panel, and adds a nice glow to the case.
SPECIFICATIONS
- Color: Black with red highlights
- Material: Steel body, plastic trim and window
- Dimensions: 464.82mm H x 209.80mm W x 447.04mm D
- Weight: 5.48kg
- Motherboard Support: ATX, Micro ATX, Mini ITX
- Max GPU Length: 320mm
- Max PSU Length: 280mm
- Cooling:
- Top: 2 x 120mm
- Front: 1 x 120mm (Included)
- Bottom: 1 x 120mm
- Rear: 1 x 120mm (Included)
- Drives:
- 2 x 5.25″
- 3 x 3.5″
- 2 x 2.5″
- I/O Panel:
- Power Switch
- 2 x USB 3.0
- HDD LED
- Headphone
- Microphone
- Reset Switch
CLOSER LOOK
EXTERIOR
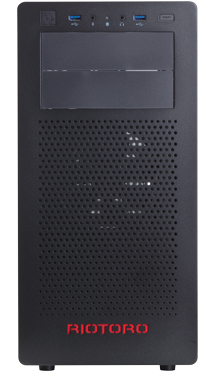
In today’s world of seemingly endless tempered glass side panels, the Riotoro CR480 brings a bit more standard look to the table. Available in a matte black finish with red highlights, the CR480 is a good mix of style and function, without overdoing any one aspect.
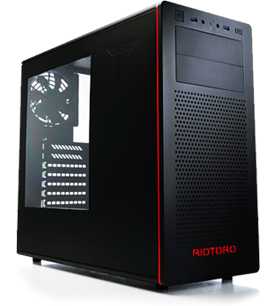
The left panel of the case sports an acrylic window that is sized just right to show off the motherboard, videocard, and all of the other standard gear that is typically showcased. The top right corner of the panel features a stamped “T”, which is kind of odd to us. We would have thought an “R” for Riotoro would make more sense here. A single thumb screw keeps the panel in place, although we would have liked to have seen two on each panel.The right panel is quite plain, aside from the “T” stamp in the top right of the panel. Again, a single thumb screw keeps the panel secured.

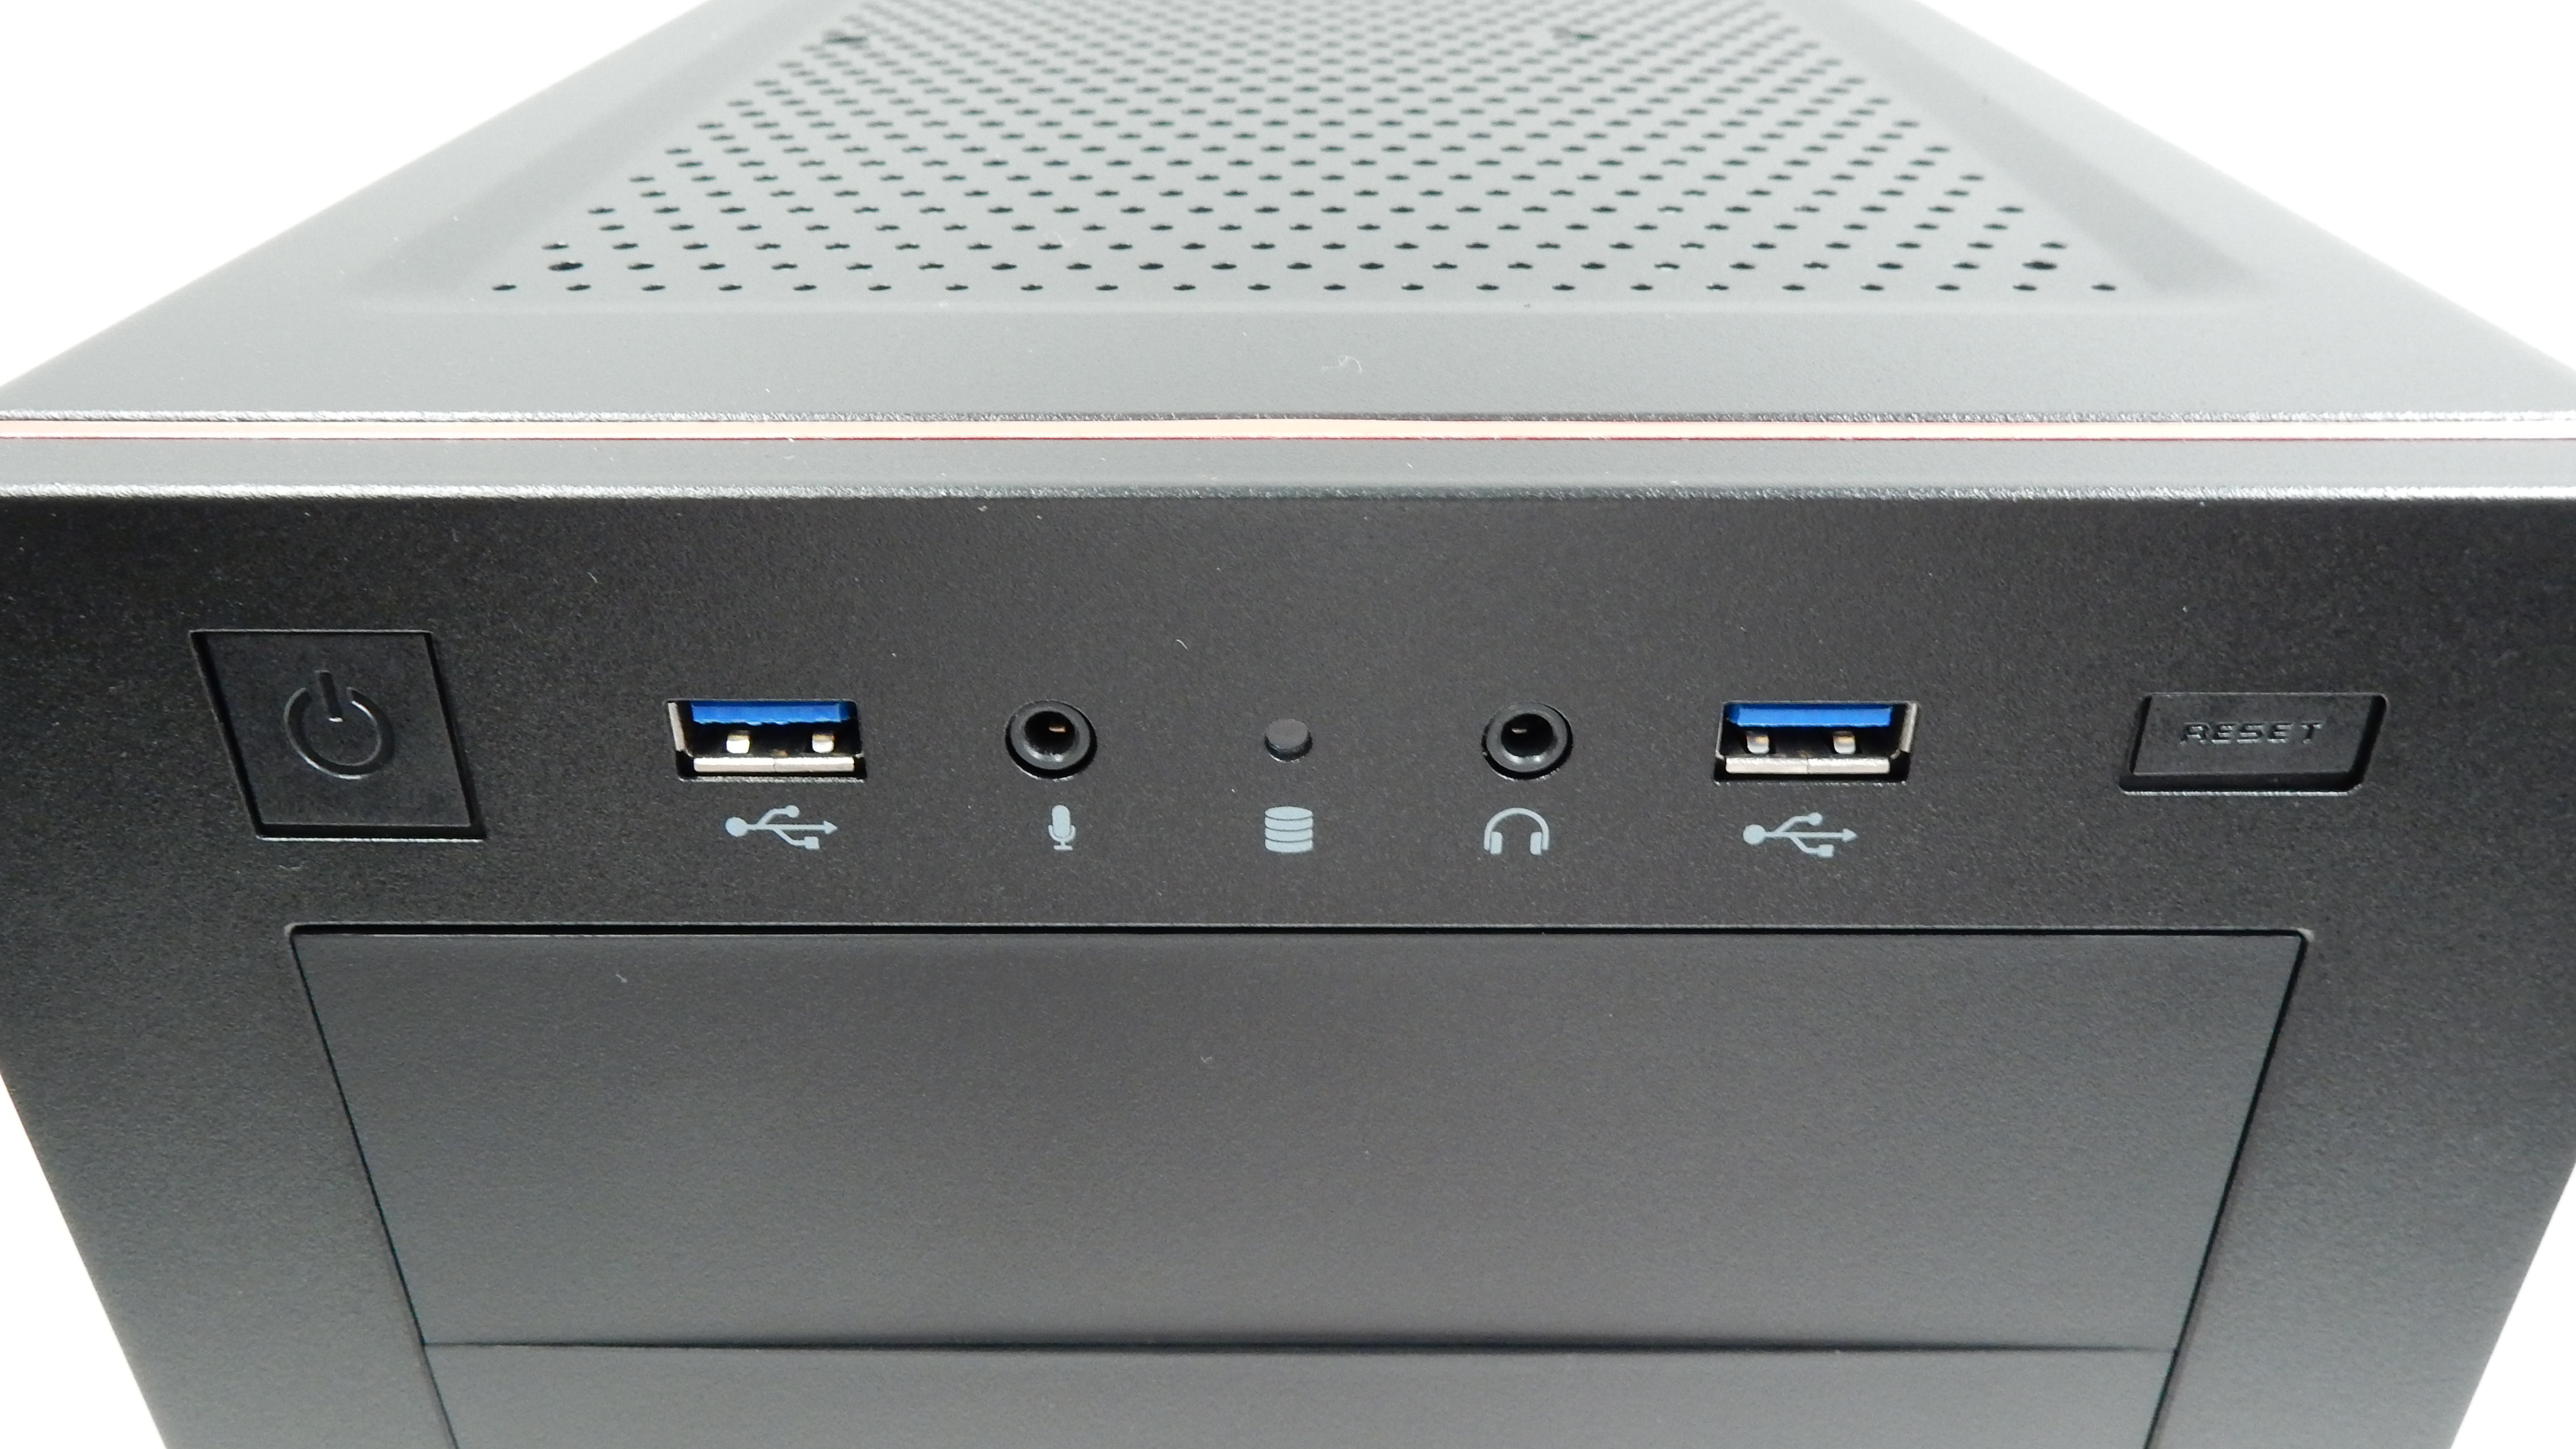
Up front the CR480 is home to quite a bit of action when compared to many of the blank front panels we often see. Starting at the top we have from left to right the Power button, a single USB 3.0 port, microphone jack, HDD LED indicator, headphone jack, another USB 3.0 port, and finally the reset button. No power LED is present, as that task is handled by the red LED lighting at the bottom of the front panel.
Moving down the front panel we are greeted with two removable 5.25″ drive bay panels, something we haven’t come into contact with in quite a while. We do expect to see cases from time to time that still feature at least one 5.25″ option, but they are becoming less and less common. Below the 5.25″ drive bays is a section of perforated grille work that allows the included 120mm fan behind to take in some fresh air.
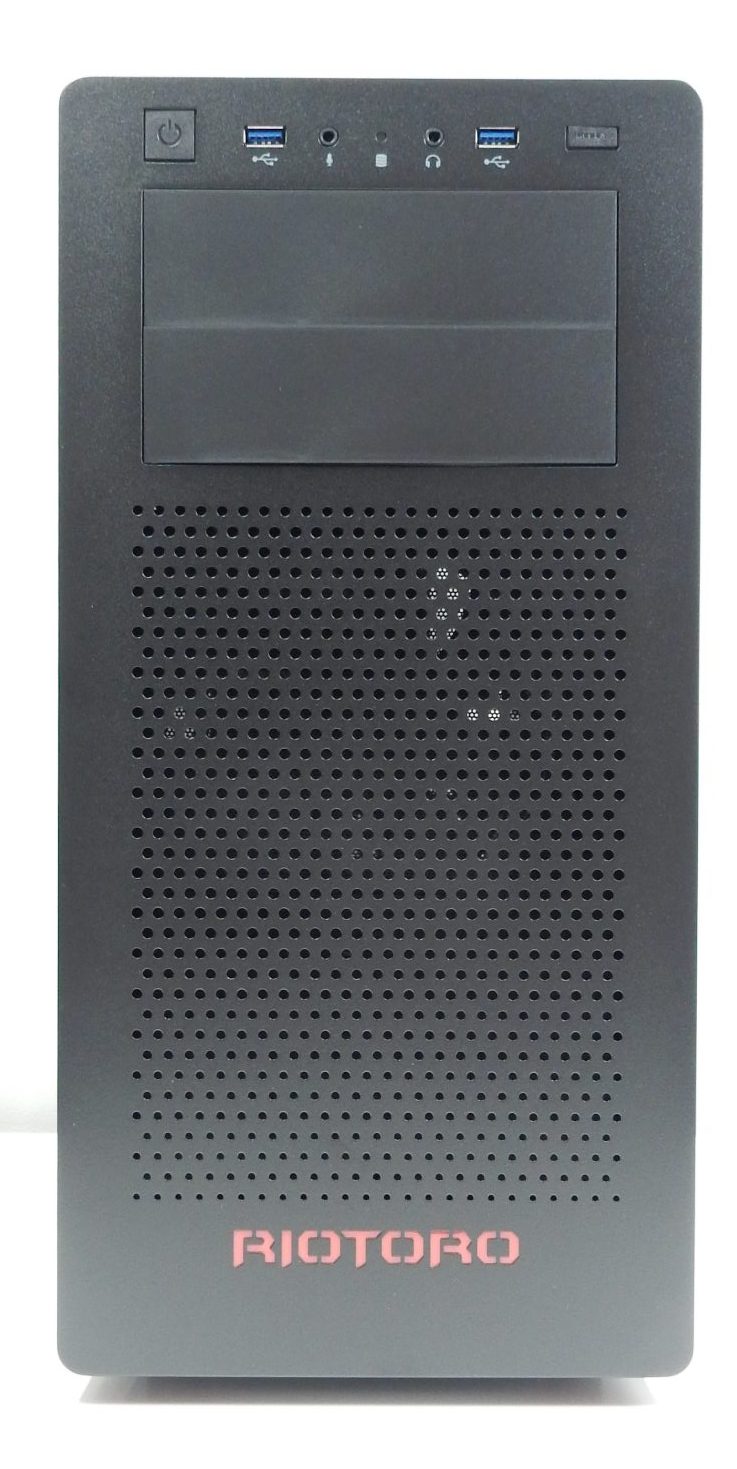
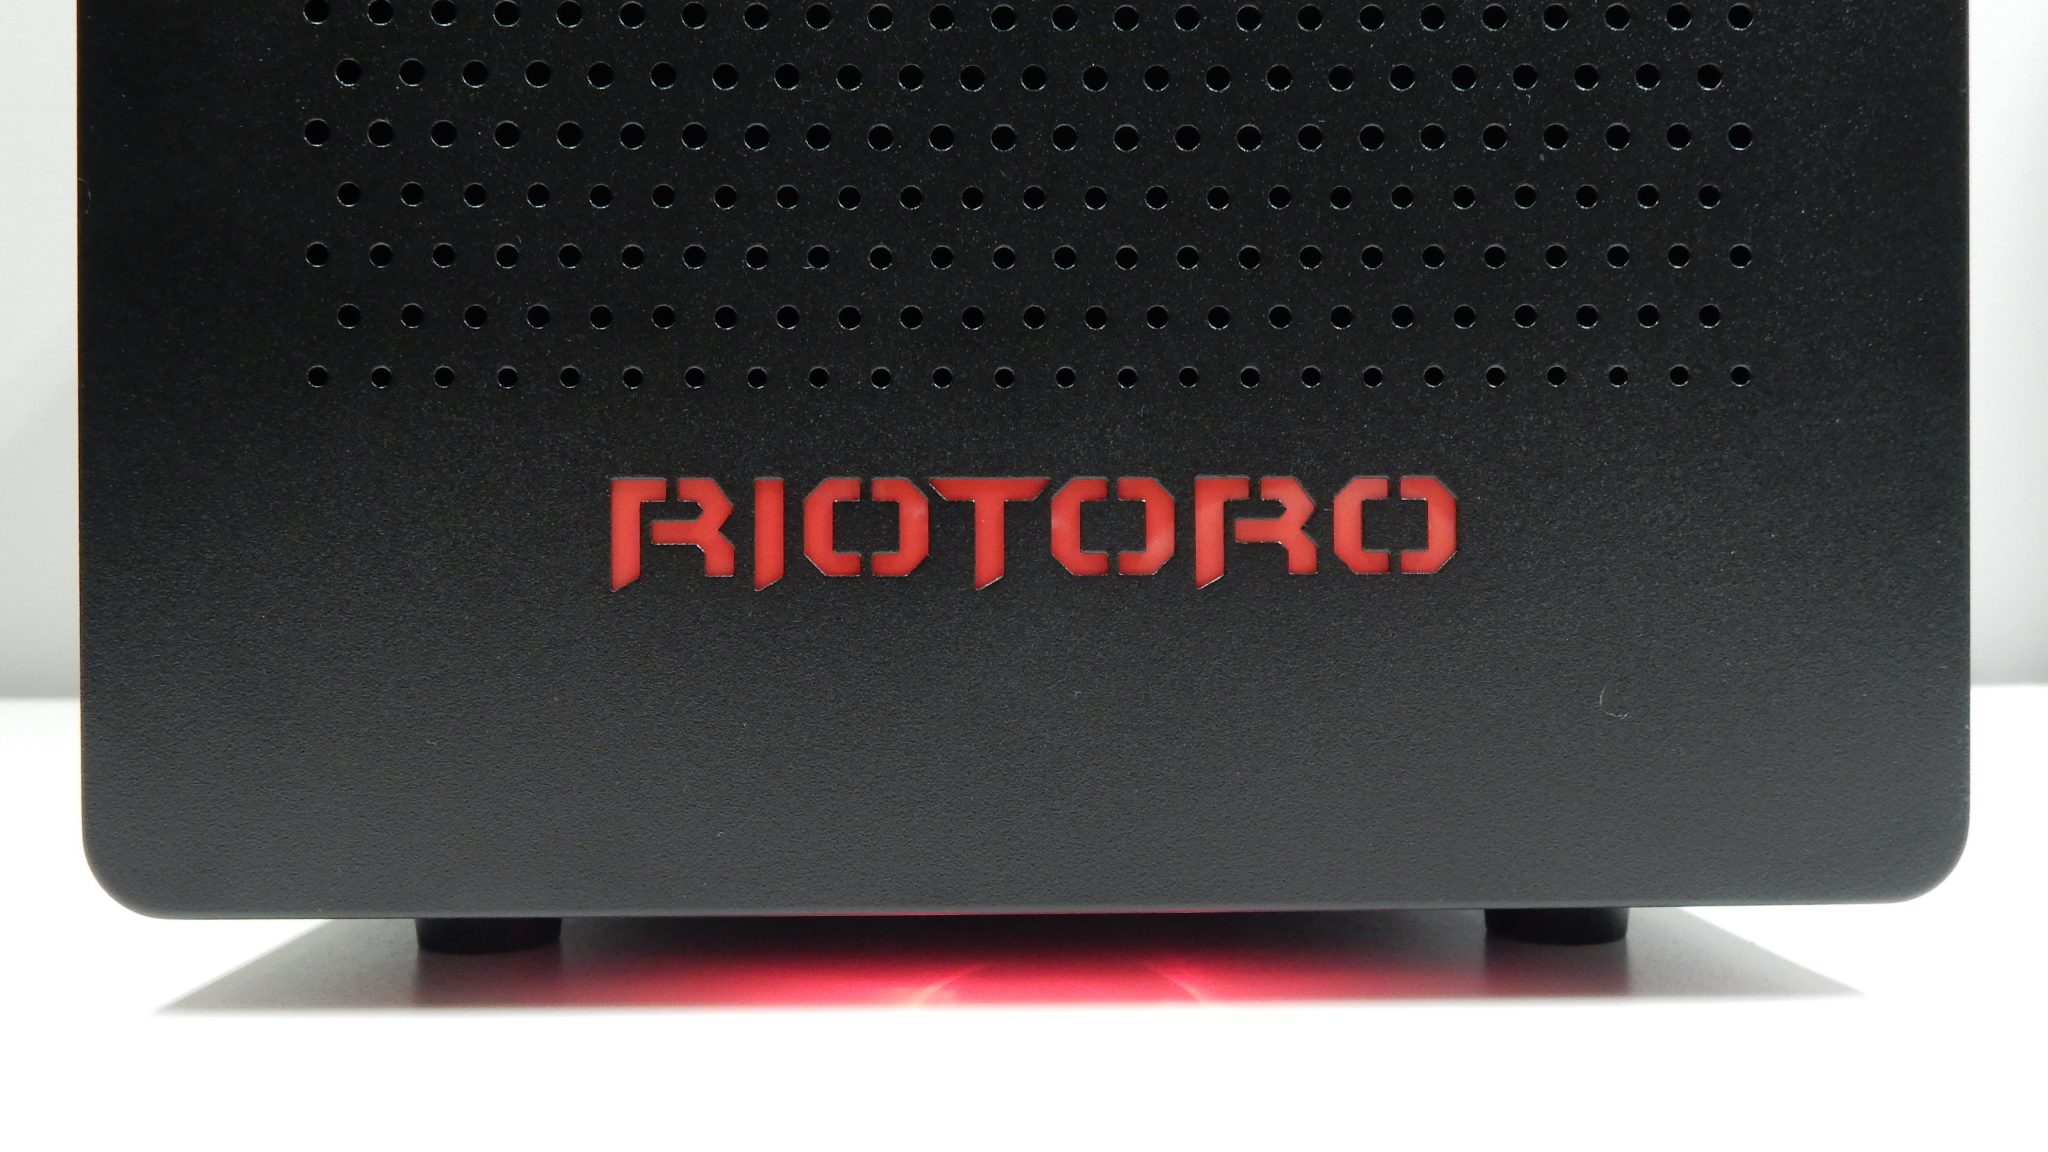
At the bottom of the front panel is a cutout Riotoro nameplate with a red plastic backing behind it. This is a really nice look that accents the front of the case. And speaking of accents, as we mentioned earlier, a red LED panel sits below the Riotoro nameplate and illuminates the surface underneath the front of the case when powered on.
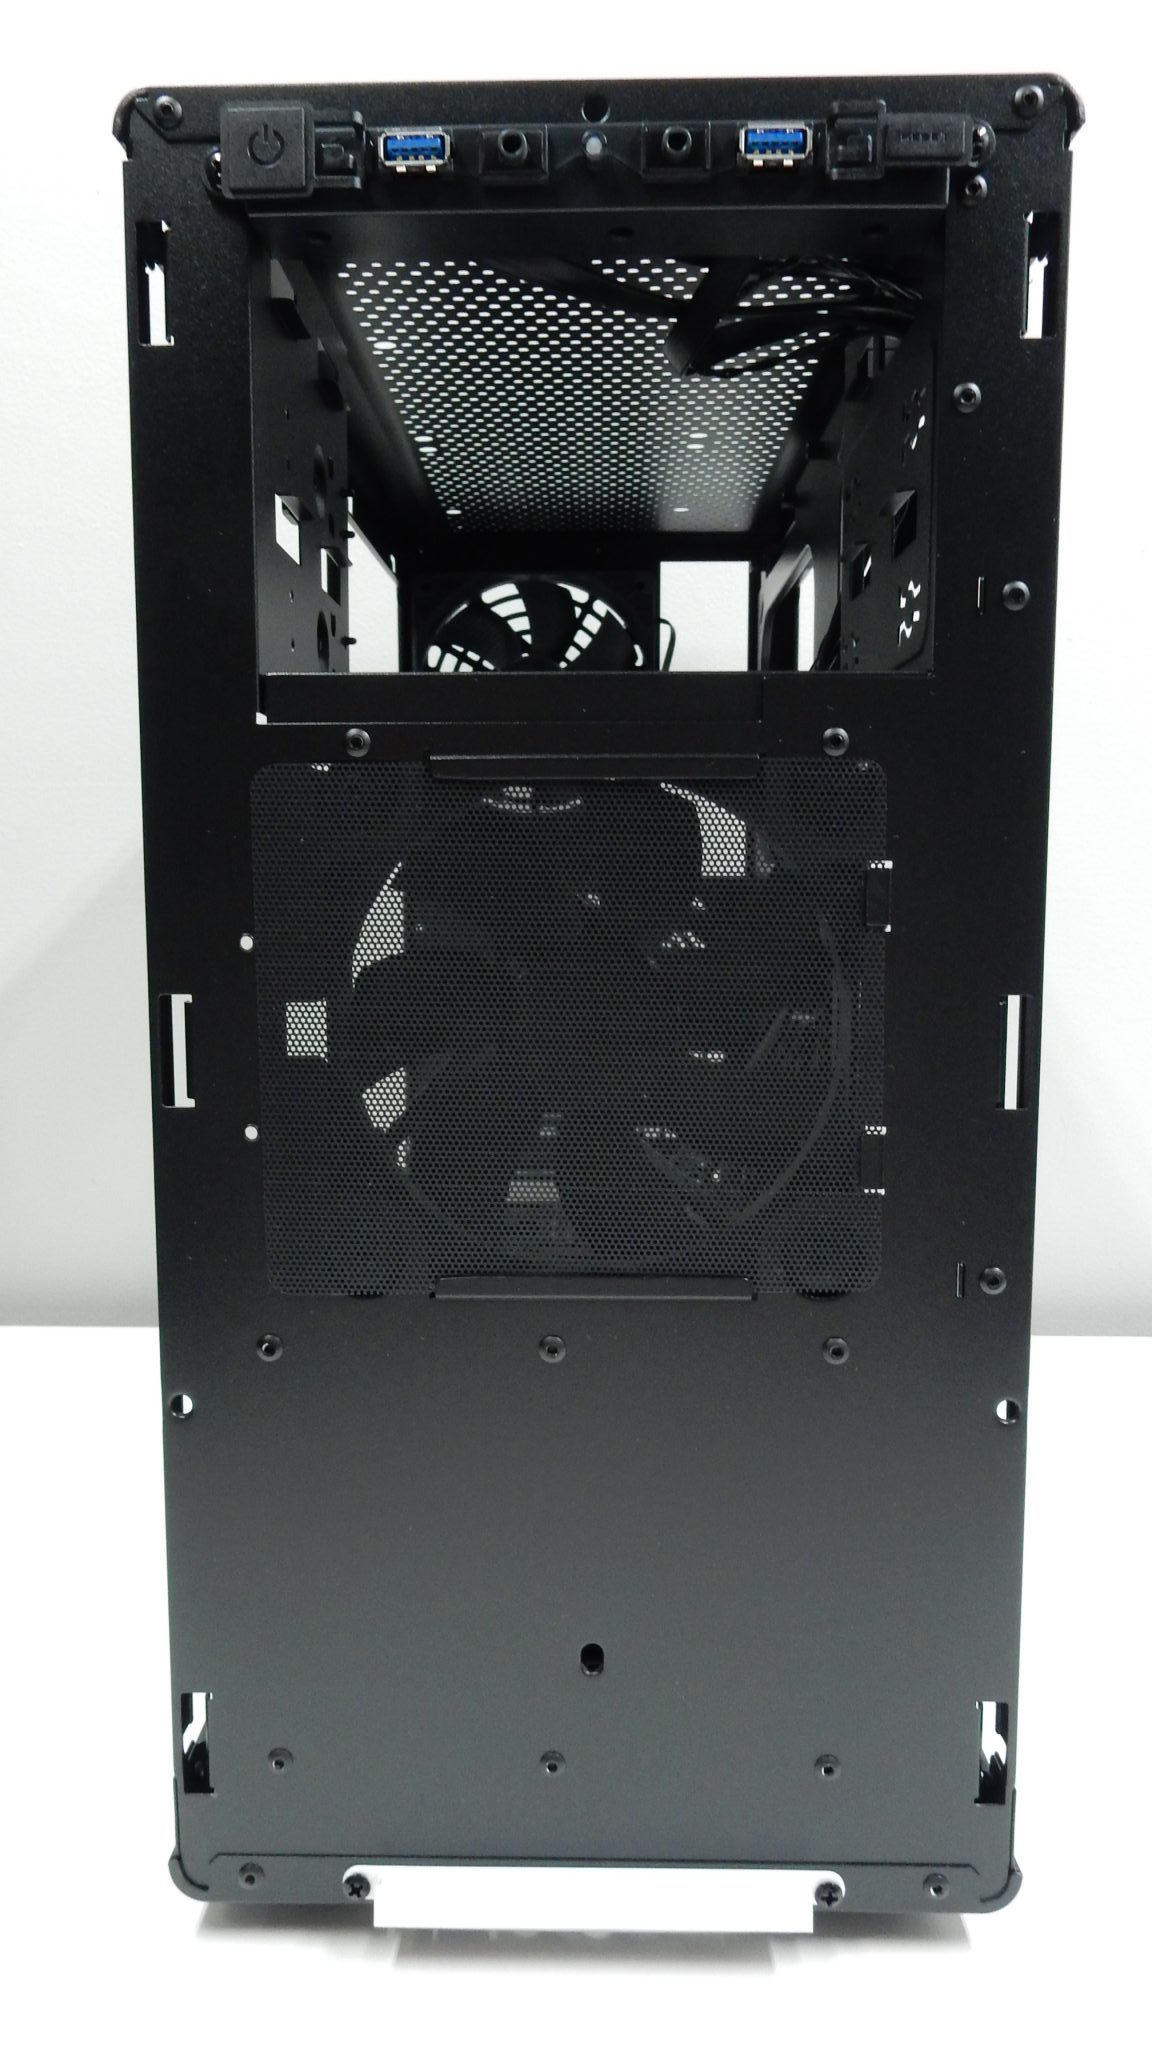
Removing the front panel is where we came across our first problem with the CR480. Riotoro chose to craft the front panel out of steel, like the rest of the case, and their mounting clips are quite hard to remove in order to gain access to the fan filter. We struggled quite a bit to get all of the clips to a state that would allow us to remove the front panel, and we had just as much trouble getting the panel back on.
With the front panel removed, we gain access to the empty 5.25″ drive bays, as well as the removable fan filter for the single 120mm front intake fan. While there looks to be enough room for a second fan, Riotoro opted to not provide that option. The red LED bar is attached to the case at the bottom via two screws.
Out back we have a very standard configuration of a single 120mm fan grille, a covered add-in card slot cover, and bottom-mounted PSU opening.
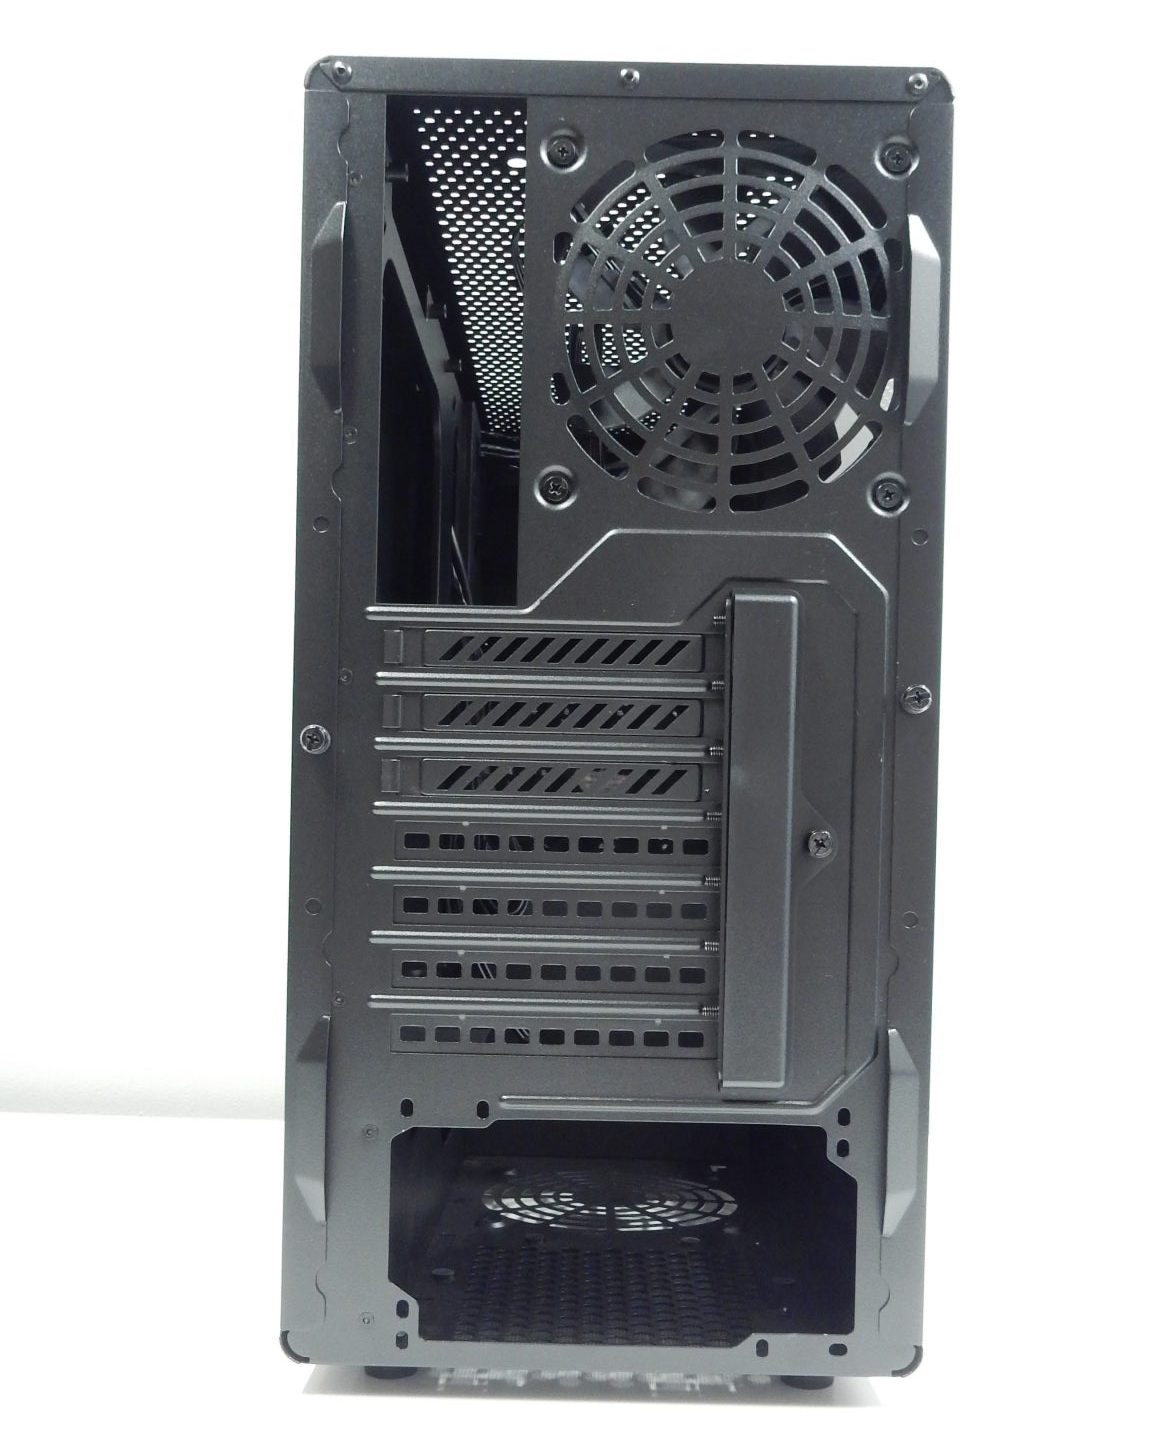
Up top we find a nearly full-length perforated panel with mounting holes for two 120mm fans.

Turning things upside down gives us a look at the removable mesh PSU filter, single 120mm fan mount, and ventilation holes for the 3.5″ drive bays up front. Four plastic feet prop the case up off the table surface.

INTERIOR
Getting into the Riotoro CR480 is quick and easy, thanks to a single thumb screw keeping each side panel in place.
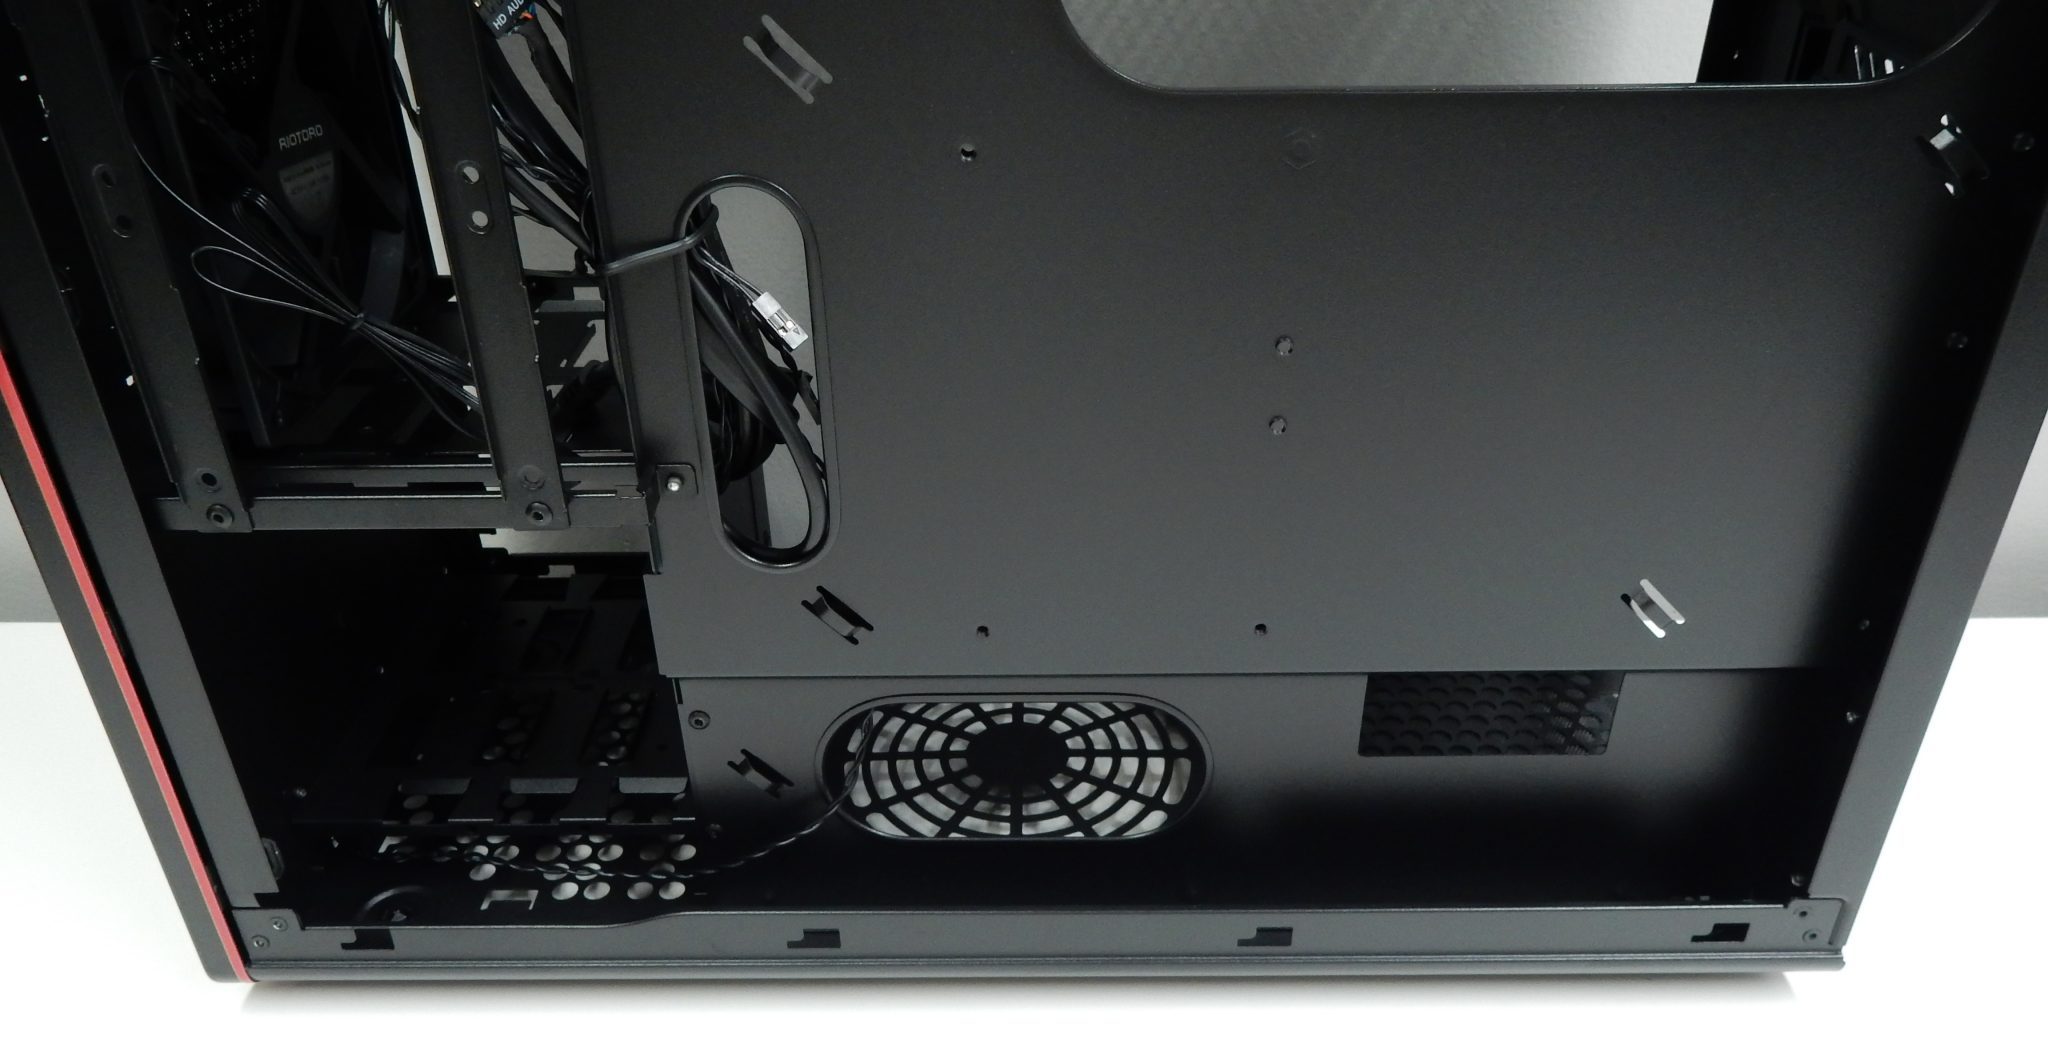
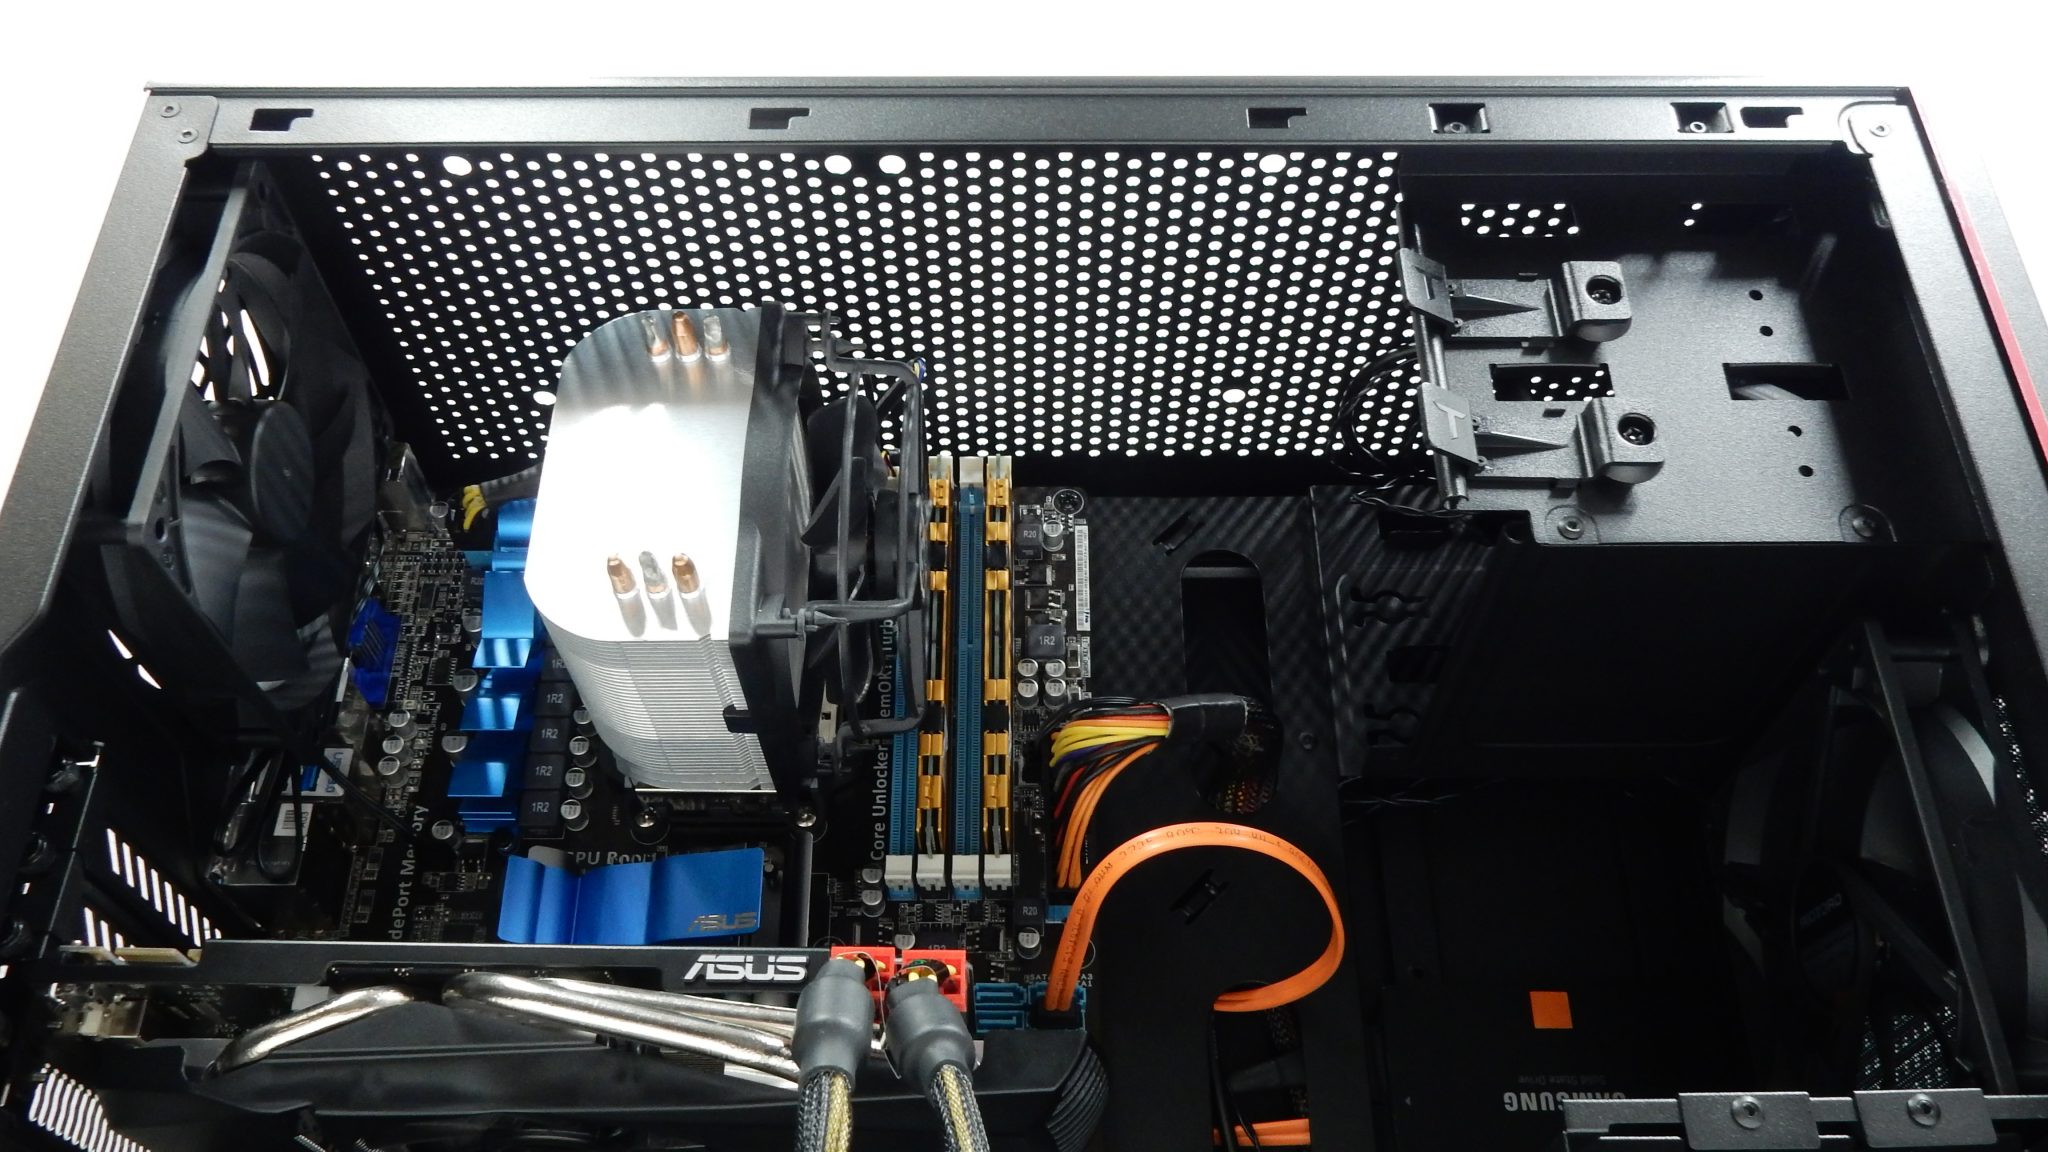
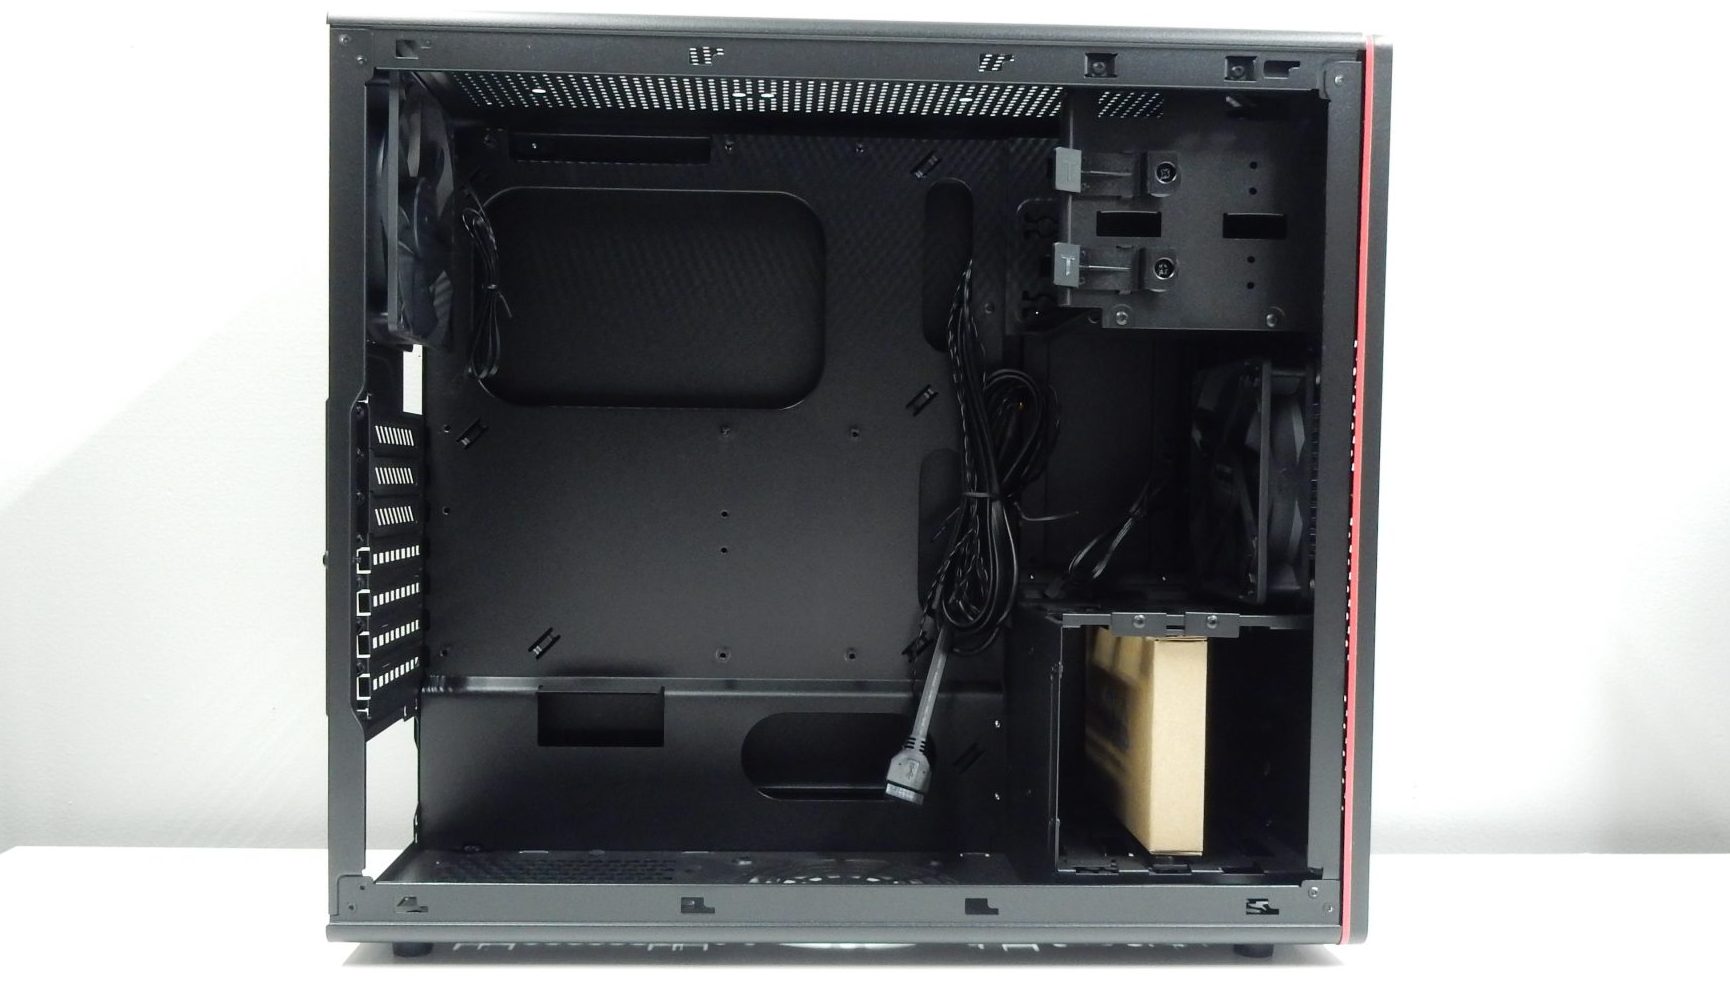 The first thing we noticed about the interior of the CR480 is the lack of a PSU shroud at the bottom of the case. We have really become accustomed to seeing these in most cases, but the lack of this feature is somewhat expected in the budget case category. Next to where the PSU sits is room for a single 120mm fan, as well as the 3.5″ drive cage with room for three drives.
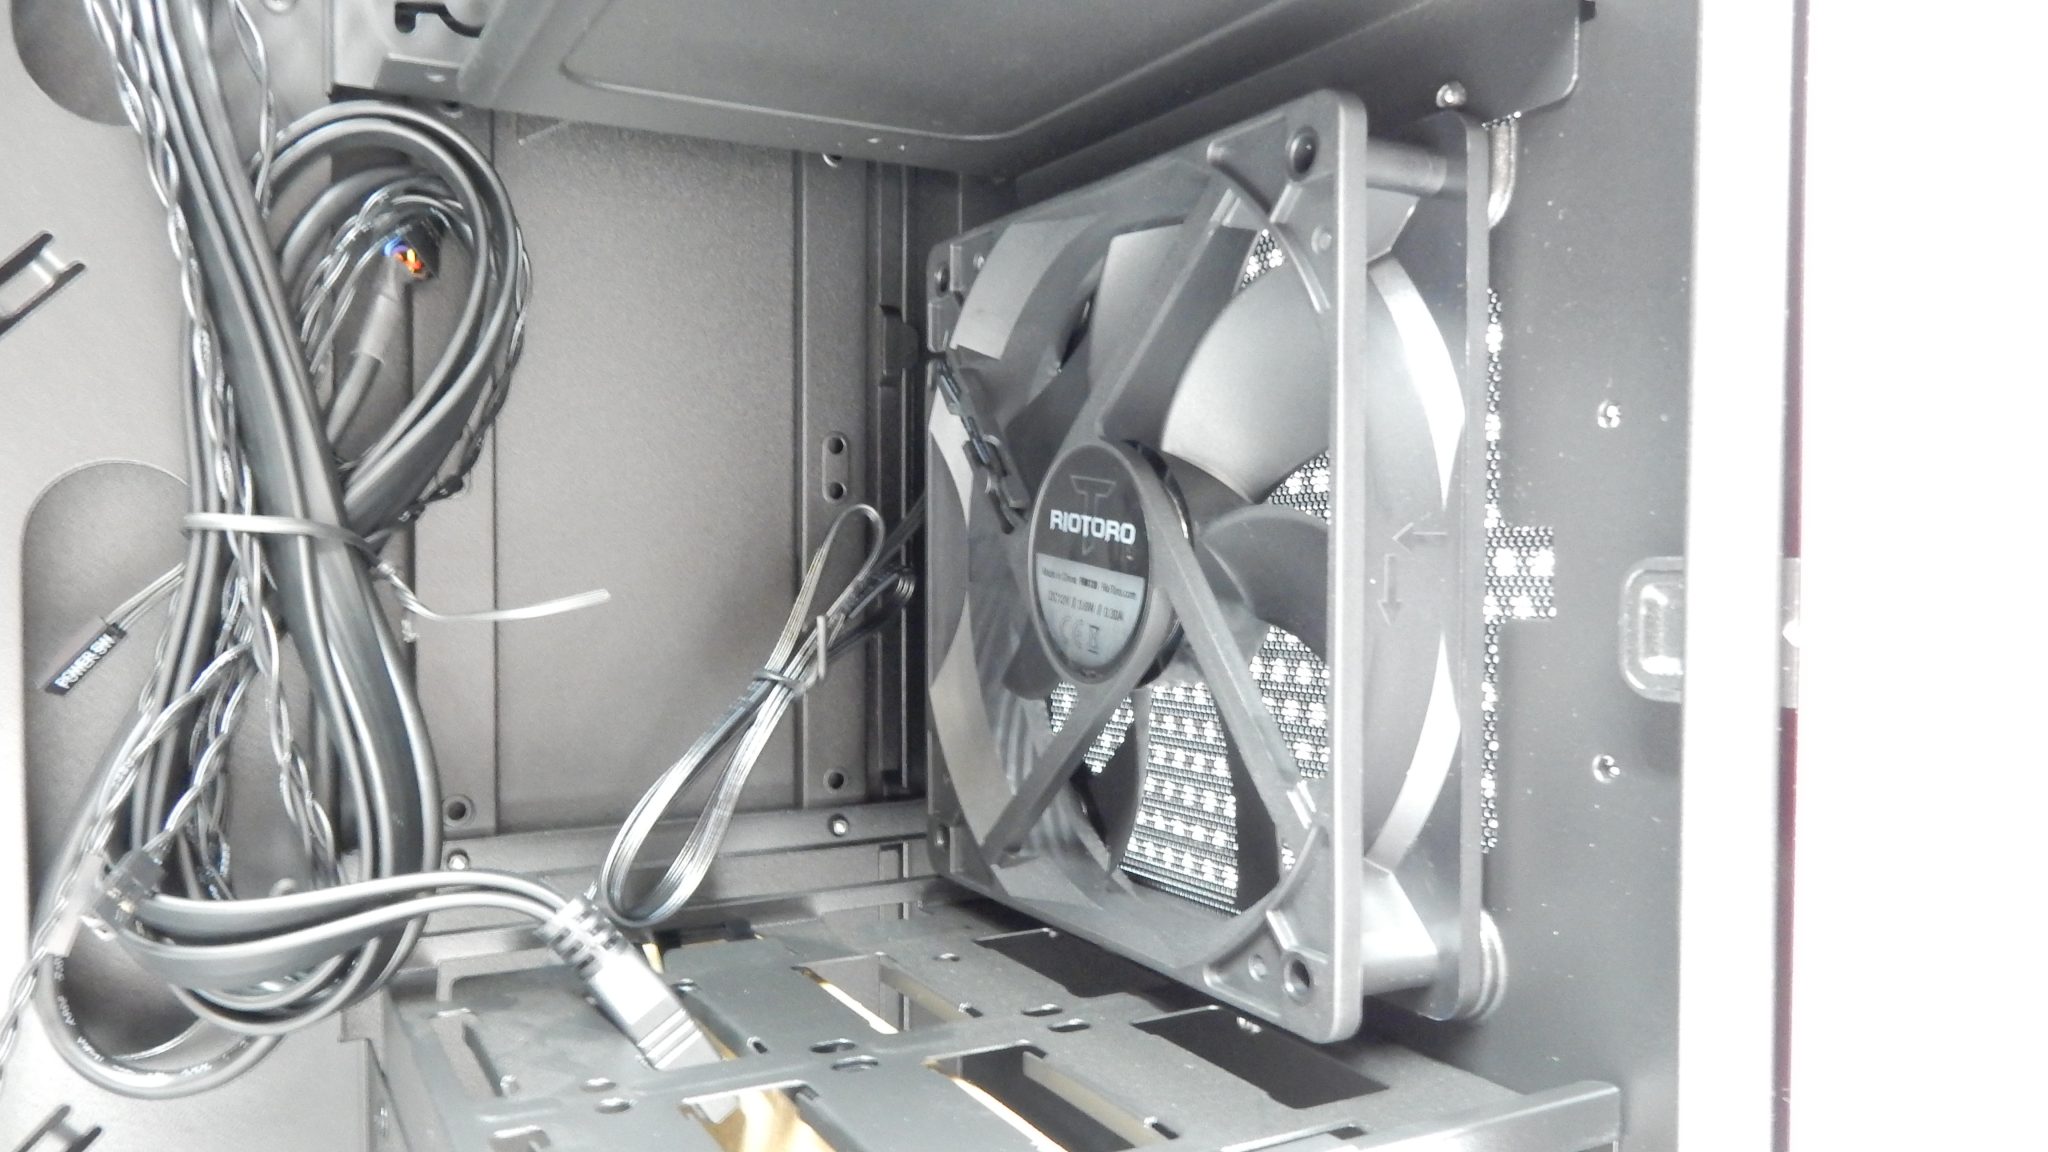
 A single 120mm fan is present at the rear of the case, as well as at the front, while room for two more 120mm fans is available at the top of the case.

Unfortunately, neither the 3.5″ and 5.25″ drive cages are easily removable, as they have been riveted to the frame of the case. We like the option of removing these often unused bays when available, but again, not all features will be present at this price point.
With the right side panel removed, we gain access to a few cable management options that are present on the Riotoro CR480. A standard motherboard backplate cutout is present, although a bit smaller than we have seen on some newer cases. Multiple cutouts are available along the side, top, and bottom of the motherboard area to allow for easy routing of I/O leads, as well as data and power cables. The mounting option for 2.5″ drives is a bit different than we are used to, but it gets the job done.

Overall, the cable management options are quite suitable for most builds, especially if a modular power supply is used. Multiple cable tie mounting points are available, and there is also a reasonable amount of room between the side panel and the motherboard tray to stuff extra cabling.

INSTALLATION AND USE
| Test Setup | |
| Case | Riotoro CR480 |
| CPU | AMD Phenom II X4 975 BE |
| Motherboard | ASUS M4A88TD-V EVO/USB3 |
| RAM | PNY DDR3 1600, 8GB |
| CPU Cooler | Arctic Cooling Freezer 7 Pro |
| Storage Drives | Samsung 840 Pro 120GB SSD |
| GPU | ASUS ENGTX460 Direct CU |
| PSU | Thermaltake Toughpower XT |
Installation of components within the Riotoro CR480 was pretty straightforward. Most components installed in a standard manner, and nothing special was encountered with our motherboard or graphics card. Being that this case features a bottom-mounted PSU, and does not feature any type of solution to hide the PSU cabling, things can be a bit messy at the bottom of the case, especially when using a non-modular power supply.

While our build did not utilize the two 120mm fan mounts at the top of the case, or the single 120mm mount at the bottom, there was plenty of room for these to be installed in the future.
When working with the CR480 we came across a few issues that might bother some users. The first is that the steel used throughout the case is very thin, which leads to it being quite flimsy. This is especially true for the top panel which has quite a bit of its body removed for ventilation. As we mentioned earlier, the front panel of the case is also very difficult to remove, and just as hard to get back into place. Granted, most users will never even remove the front panel, but with a removable filter available for cleaning, this may come into play for some users. The final nitpick we had with the CR480 was with how loose the 5.25″ drive bay covers were. These cover plates were quite loose, and did not look to be very secure. This is mostly an aesthetic issue, especially if you plan to populate the 5.25″ bays with drives or control panels.
CONCLUSION
The CR480 was designed with budget builds in mind, and we think that Riotoro has come up with a good case to offer to users looking to keeps costs down. With room for up to five 120mm fans, two of which are included, cooling options are quite plentiful. While Riotoro doesn’t mention any liquid cooling in their promotional materials, we think that some AIO kits might actually fit in this case.
The steel construction of the CR480, while a bit flimsy, has a nice finish to it, and is highlighted with a few red accents, including a nice “Riotoro” cutout. Adding a bit of extra flair to the case is the side panel window, as well as a red LED light bar at the bottom of the front panel, which illuminates when the PC is powered on.
Finding a case that still includes 5.25″ drive bays is becoming harder to do, so the inclusion of two 5.25″ drive bays is a selling point for users looking to utilize an optical drive, or control panel of some sort. In addition to the 5.25″ bays, the CR480 has mounting options for three 3.5″ drives and two 2.5″ drives.
The Riotoro CR480 was our first look at a Riotoro product, and with a going price of $50, we think it does quite well. Sure there are a few issues here and there, but for a first-time builder or someone wanting a budget case for a budget build, the Riotoro CR480 is worth considering.
| Riotoro CR480 Pros |
Riotoro CR480 Cons |
|
|